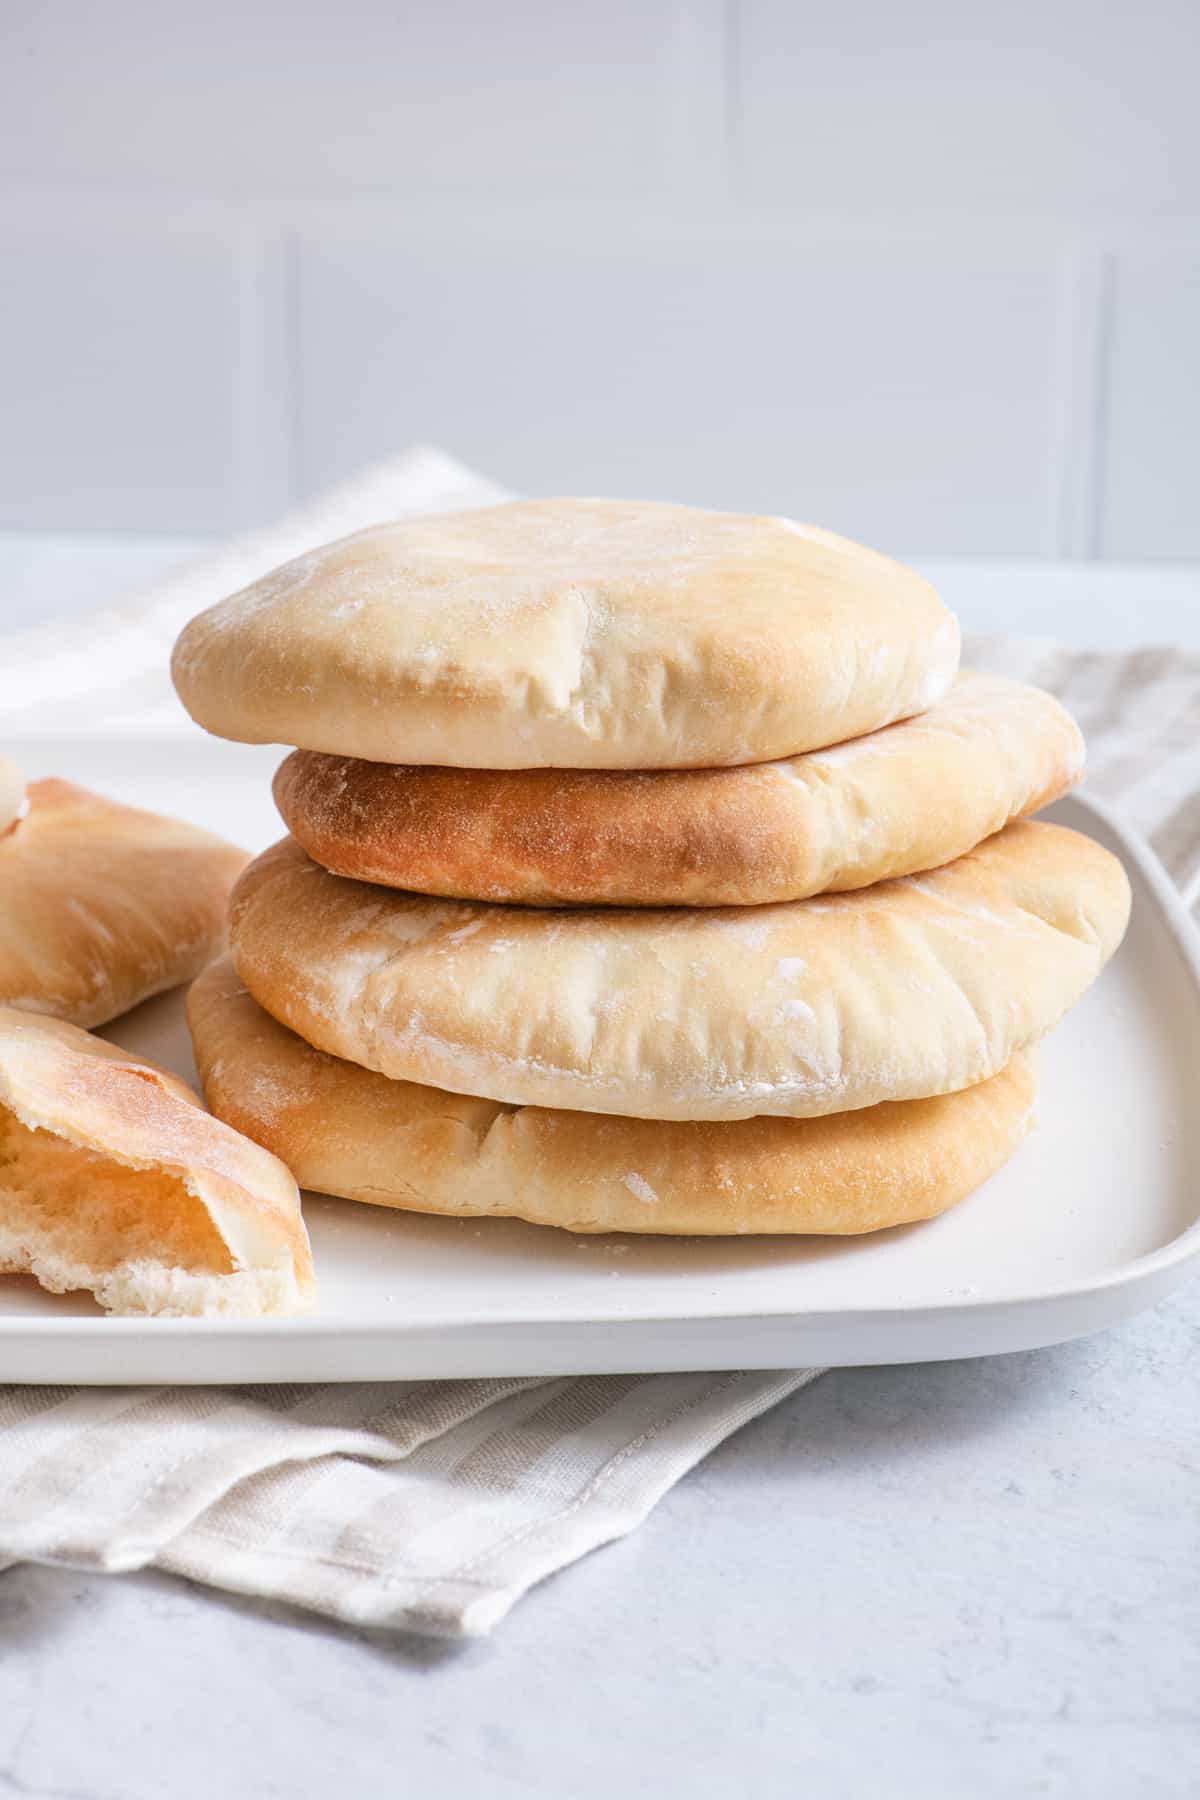
Homemade Pita Bread
Updated Apr 28, 2025
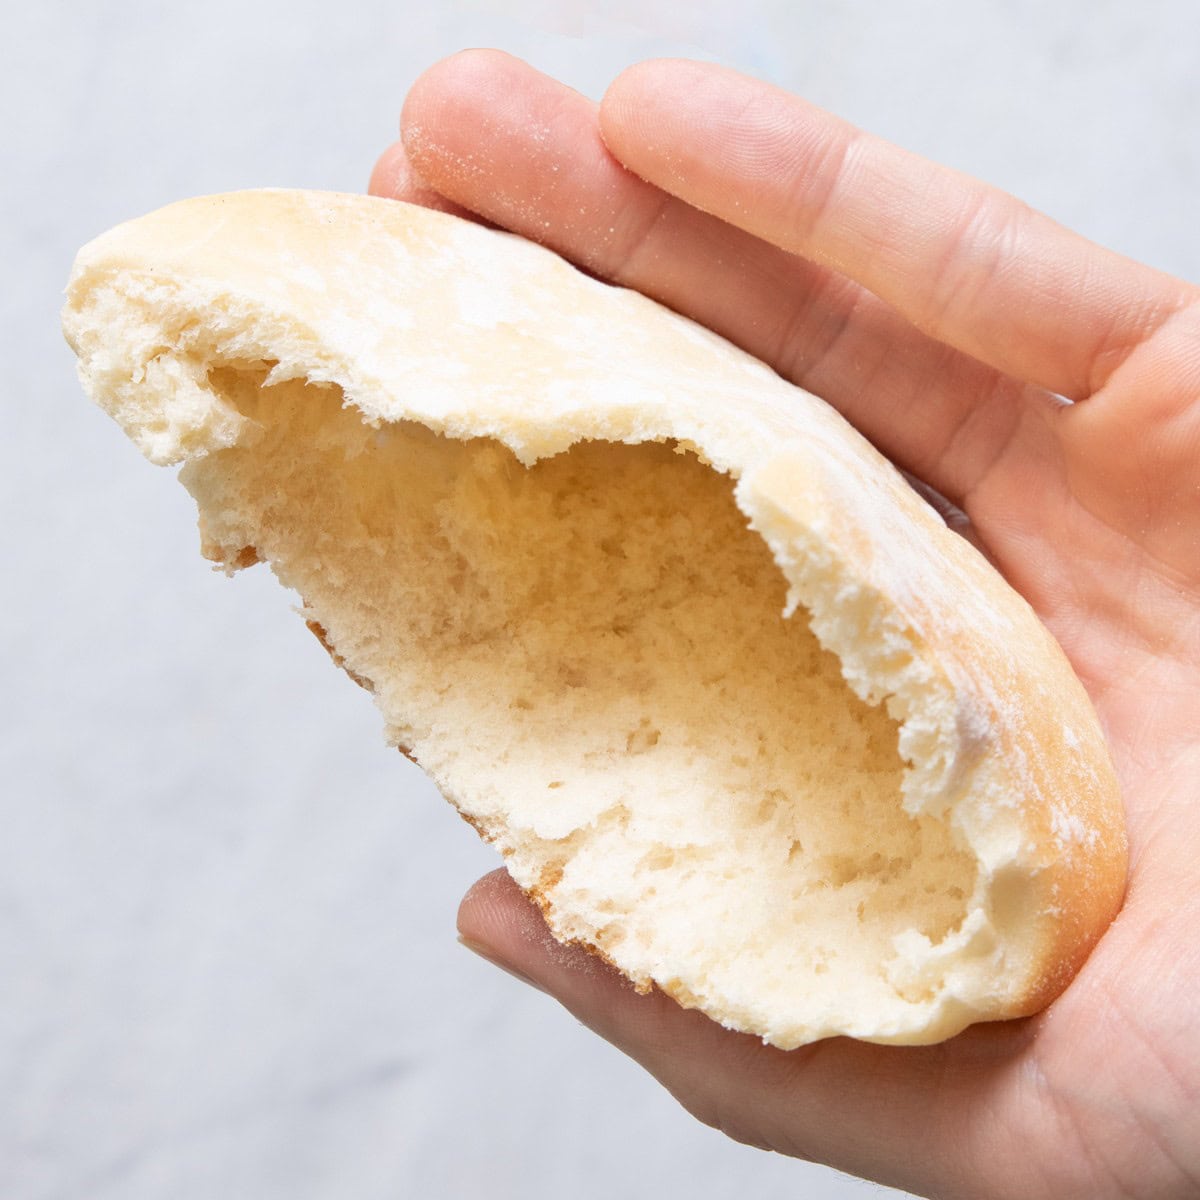
Learn how to make the best pita bread from scratch and enjoy homemade pita anytime you'd like! It's soft and only requires 6 ingredients!
This post may contain affiliate links. Please read our disclosure policy.
Jump to Section
Make My Homemade Pita Bread!

I grew up eating pita bread and it’s a must in any Middle Eastern home for scooping up hummus, making sandwiches with labneh and za’atar and toasting to make pita chips. I’ve even used pita bread as the base for making pita pizzas.
Growing up in Dearborn, Michigan, we had the luxury of enjoying the most delicious authentic pita bread sold in dozens of bakeries and grocery stores for $1 a bag. Now living away from Dearborn, I buy it in bulk and freeze it. But there’s nothing like fresh pita bread.
When I set out to research the recipe, I learned that the super-thin authentic Lebanese pita bread can only be made with special machinery. Homemade pita bread has a thicker consistency. I based my recipe on the pita from Amanda’s Plate and tweaked it to add olive oil and elaborate on the steps, so you get the perfect pita in your oven easily! If you’ve always wanted to make homemade pita bread, but were intimidated by the process, then this recipe is for you!
Happy Baking!
– Yumna
Homemade Pita Bread Ingredients
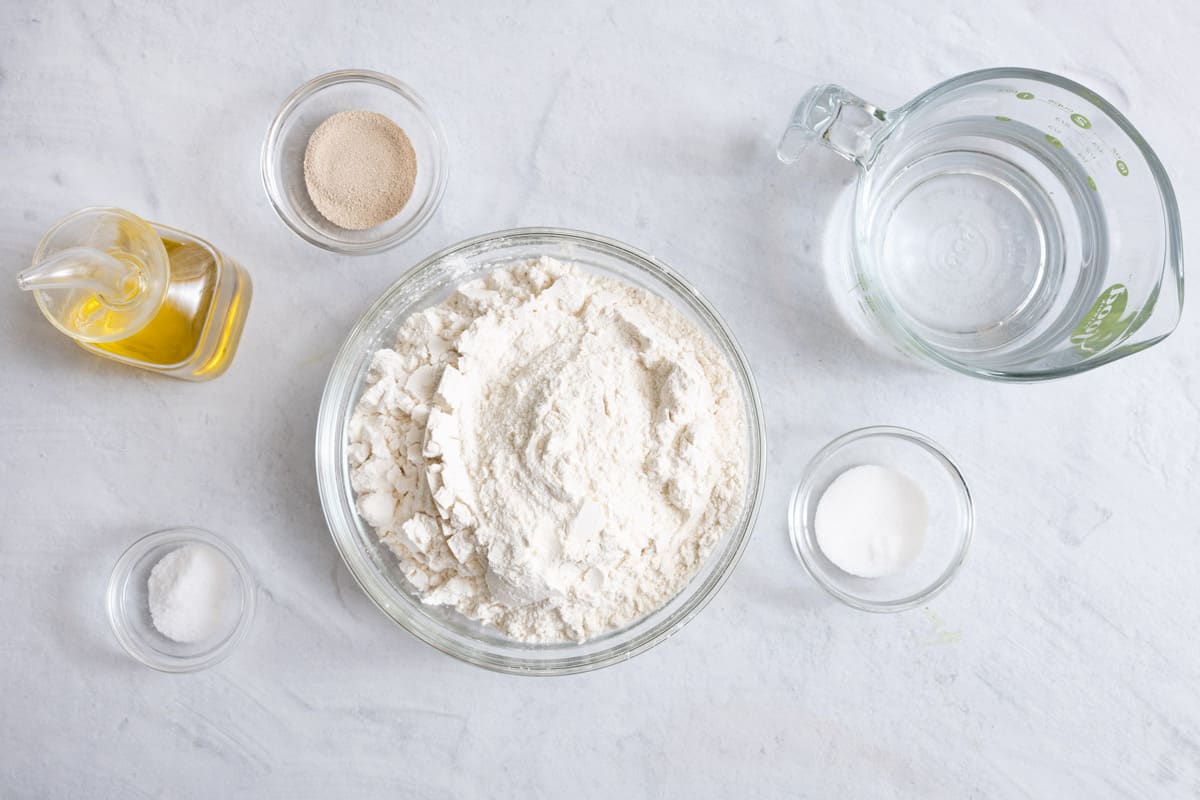
- Flour: Use all-purpose flour to keep things easy and accessible. You could also using bread flour or mix in some whole wheat flour.
- Yeast: Instant yeast works well. You need yeast for this recipe because it’s what creates the pocket in the pita.
- Sugar: Sugar helps to activate the yeast. Use granulated sugar or honey.
- Salt: Salt brings out the flavors of all the other ingredients. You can also add ½ teaspoon of dried herbs like rosemary, oregano or thyme when you add the salt.
- Olive oil: This adds flavor and helps keep the dough from drying out.
- Water: Make sure your water is not too hot or too cold. Instant yeast does need slightly warmer water (around 120°F to 130°F) to get started. If your water is too hot, it will kill the yeast, and colder water won’t activate it.
RECIPE VIDEO TUTORIAL
How to Make Homemade Pita Bread

Recipe Tips
- Knead the dough by hand. If you don’t have a stand mixer, you can use a flat wooden spoon to mix the ingredients. Then turn the dough onto a well-floured surface and knead until smooth. It will take about 10 minutes to do it by hand.
- Adjust the flour amount in the dough recipe based on humidity. It should feel slightly sticky but without sticking to your fingers.
- Roll out as evenly as possible. This is very important because it helps to disperse air bubbles and evens out the dough to make sure that the pita separates in the oven equally without one part being too thick or not separating.
- Pay attention to the seam when placing the dough in the oven. This is not necessary, but a helpful tip to result in the best looking homemade pita. Make sure the seam (or the part of the dough ball with the folds) is facing down, which will allow the top seamless part to rise perfectly.
- Keep the pita size small. It’s tempting to try to make larger pita bread, but without special pita machinery to press the dough perfectly flat, it can be hard to get the dough to separate and form pita pockets if you make them too large. Aim for 4-6 inches in width.
Serving Ideas
As a Lebanese foodie with pita bread being a staple in my fridge, my answer to this is EVERYTHING! But here are a few favorites that are definitely great with homemade pita bread.
- Labneh
- Shish Tawook
- Hummus
- Roasted Cauliflower Pitas
- Arayes (Meat Stuffed Pitas)
- Fattoush (With Fried Pita Chips)
- Chicken Fatteh
- 7 Layer Mediterranean Dip
Recipe Help & FAQs
If you have leftover pita bread, you can store it in a zip-top bag or an airtight container at room temperature for 2-3 days. You can also store it in the fridge to prolong its shelf life, up to 5 days.
To reheat, place the pita bread on a baking sheet and bake at 350°F for about 1 minute, or it’s faster to reheat in the microwave for 10 seconds.
Yes, you can freeze pita bread! Just make sure to wrap it tightly in plastic wrap or place it in a zip-top bag and freeze for up to 3 months. When you’re ready to eat it, just thaw out at room temperature or in the fridge.
Pita bread and naan are both leavened with yeast, but naan is traditionally made with yogurt and an egg. Making naan denser results in a thicker, chewier texture than pita. Pita and naan both are generally soft in texture, but pita will have a pocket in the center that naan will not. As far as flatbread goes it is the umbrella term for all bread that is, well, flat.
If your pita bread is dense, it might be because you didn’t roll the dough out thin enough. Make sure to roll it out as evenly as possible. If you’re having issues with it puffing up, your oven may not be hot enough. A good oven thermometer can help you troubleshoot this.
More Homemade Bread Recipes:
If you try this Homemade Pita Bread recipe or any other recipe on Feel Good Foodie, then don’t forget to rate the recipe and leave a comment below! It helps others who are thinking of making the recipe. I would love to hear about your experience making it. And if you snapped some shots, share it on Instagram so we can repost on Stories!

Homemade Pita Bread
Ingredients
- 1¼ cup warm water
- 2 teaspoons granulated sugar
- 2 ¼ teaspoons instant yeast 1 packet
- 3 cups all purpose flour plus more for dusting
- 1 tablespoon olive oil
- 1 teaspoon salt
Instructions
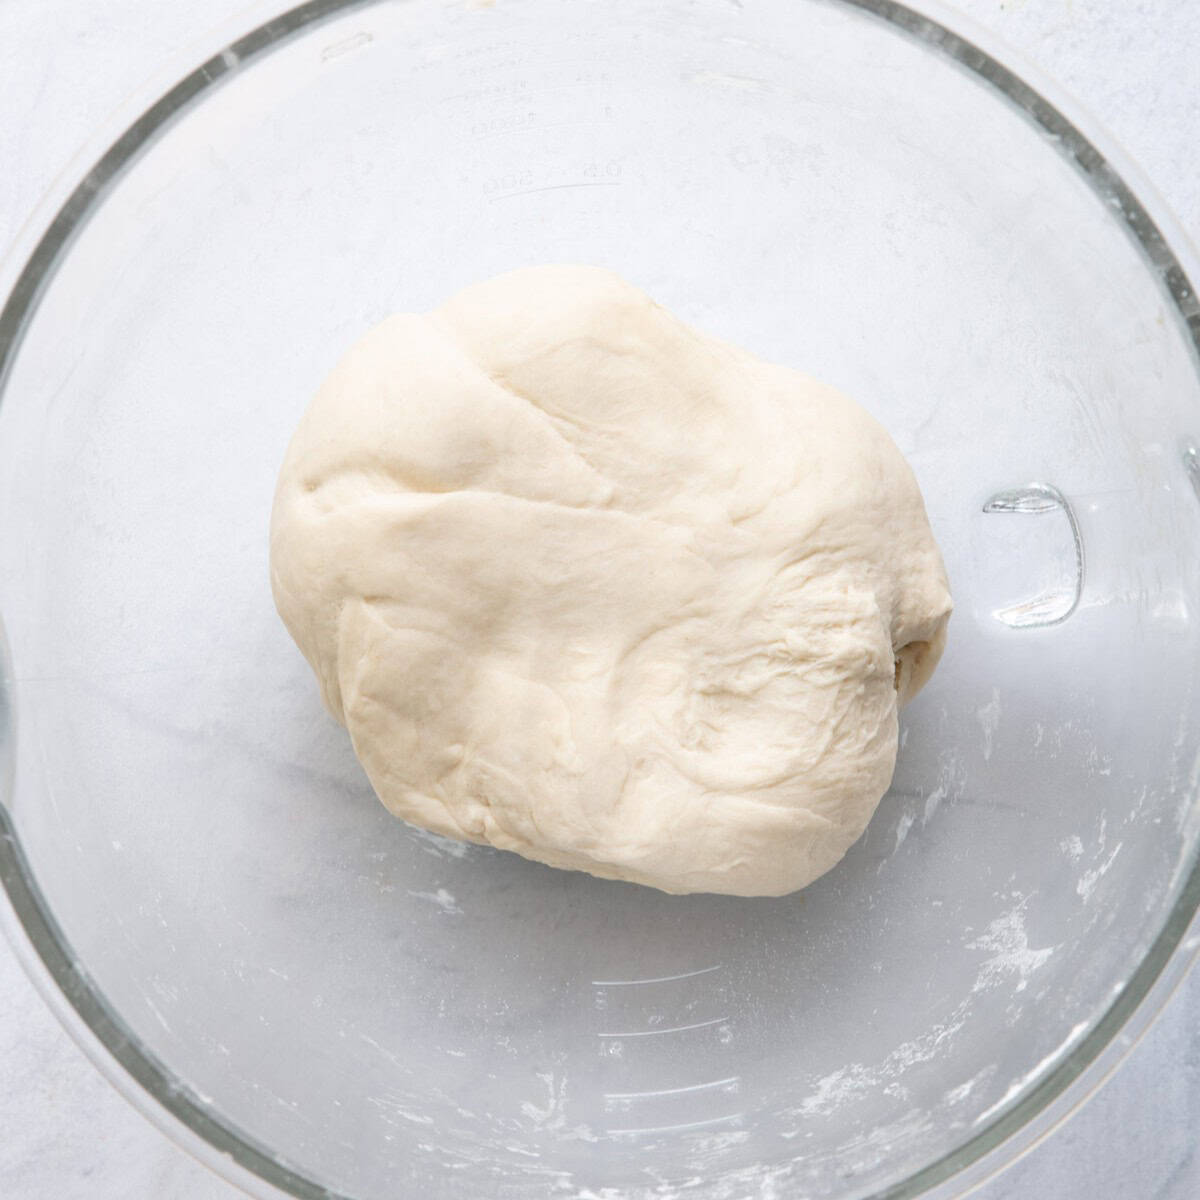
- In a large bowl or stand mixer fitted with hook attachment, dissolve sugar in the warm water. Sprinkle in yeast and let stand until mixture is foamy, about 5 minutes.
- Add 1 cup flour, olive oil and salt and stir with a wooden spoon. Slowly add remaining flour until a shaggy dough is formed. Knead for 10 minutes in the stand mixer until the dough comes together and is smooth.
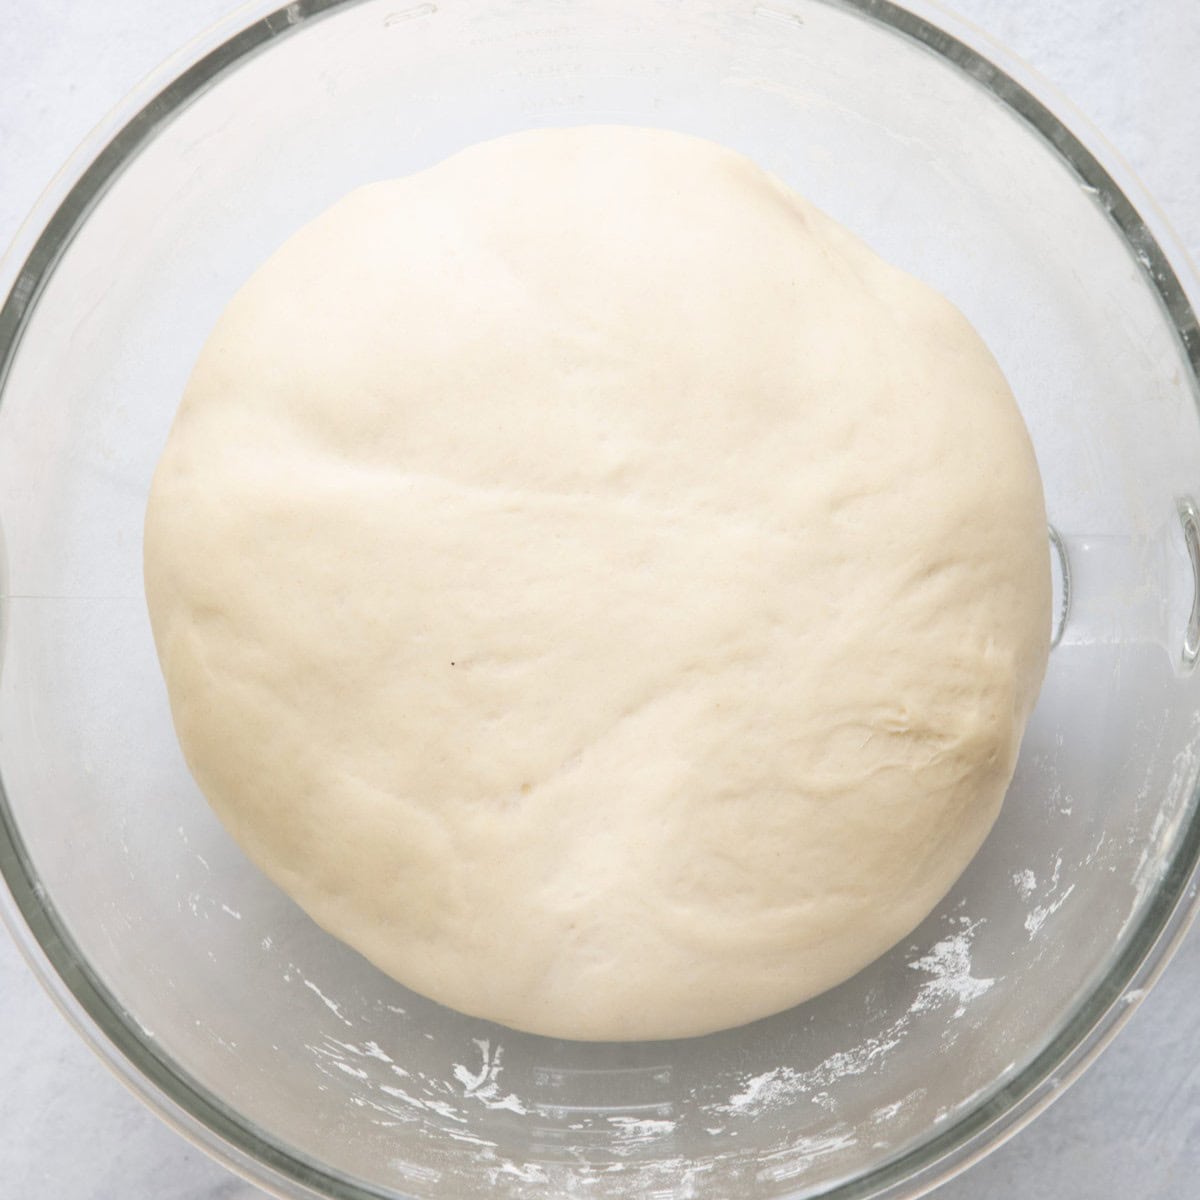
- Cover dough with a moist kitchen towel. Allow dough to rise in a warm, dark place, until the dough has doubled in size, about 1 hour.
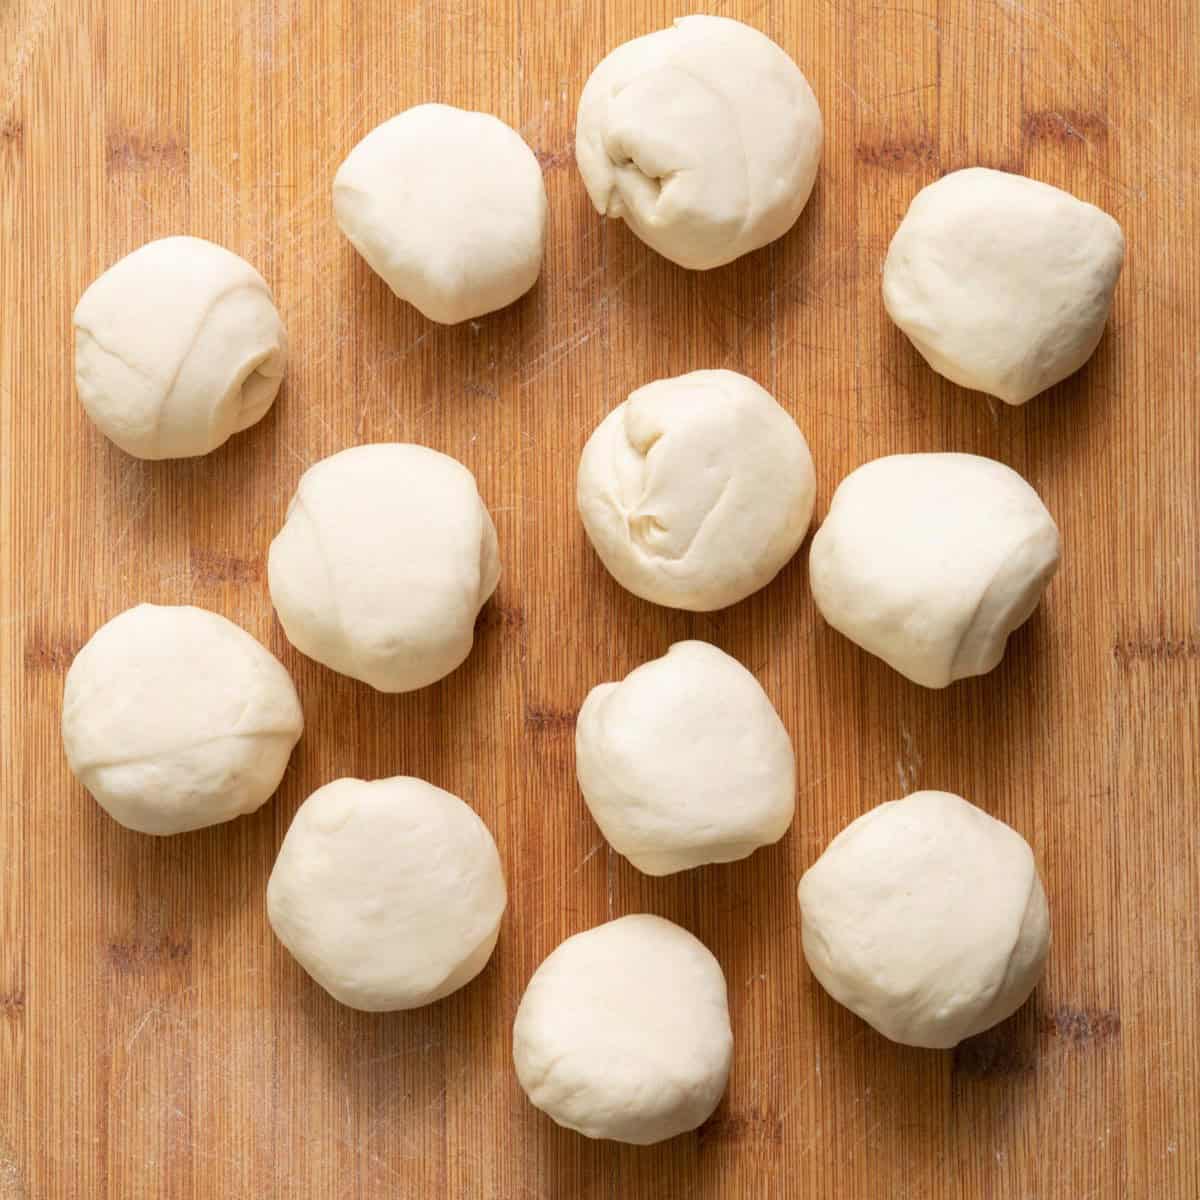
- Punch dough down and separate dough into 12 round pieces by pinching off some of the dough. Use your hands to tuck the sides and roll into an even ball, covering the pieces with a moist kitchen towel as you work. Allow to rest for 10 minutes.
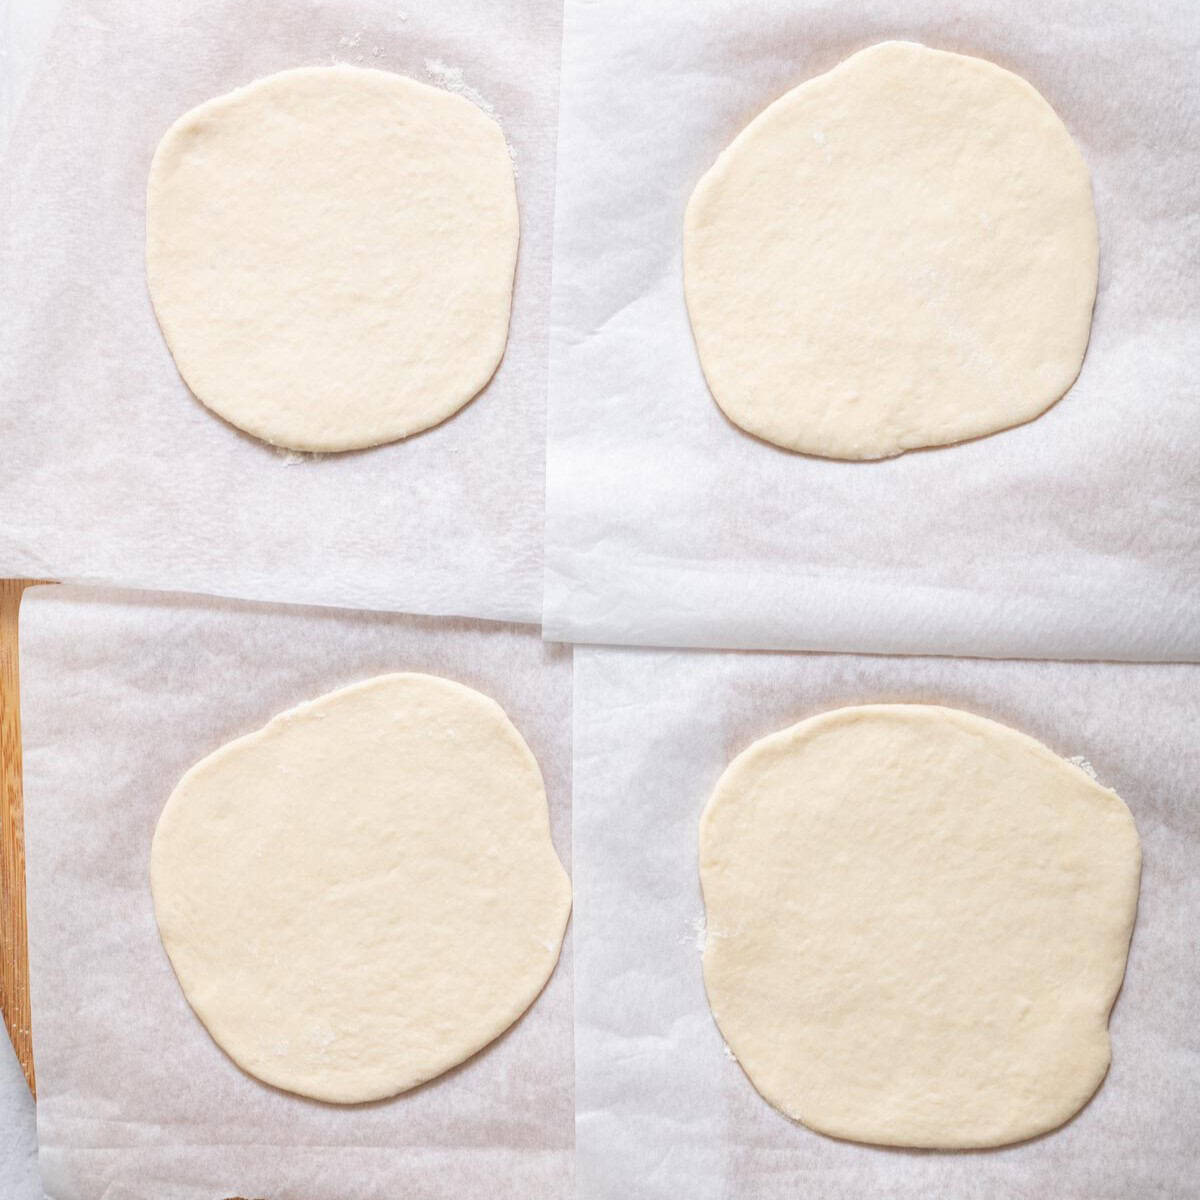
- Use a rolling pin to roll out the dough as evenly as possible. This is important to ensure that the pita puffs up. Transfer the rolled out pita onto small squares of parchment paper floured lightly.
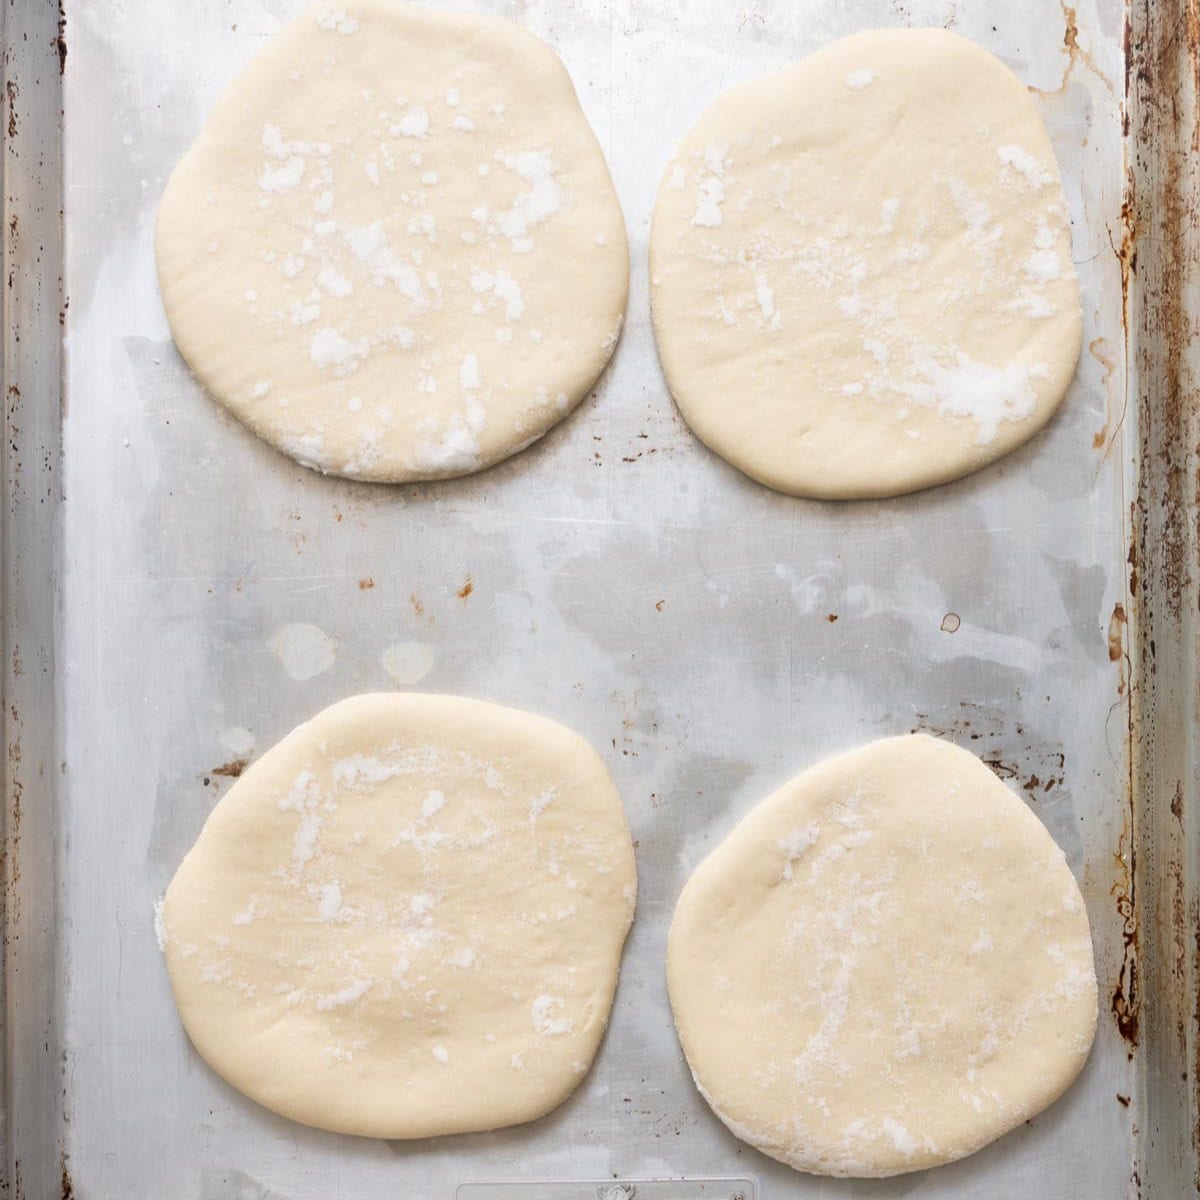
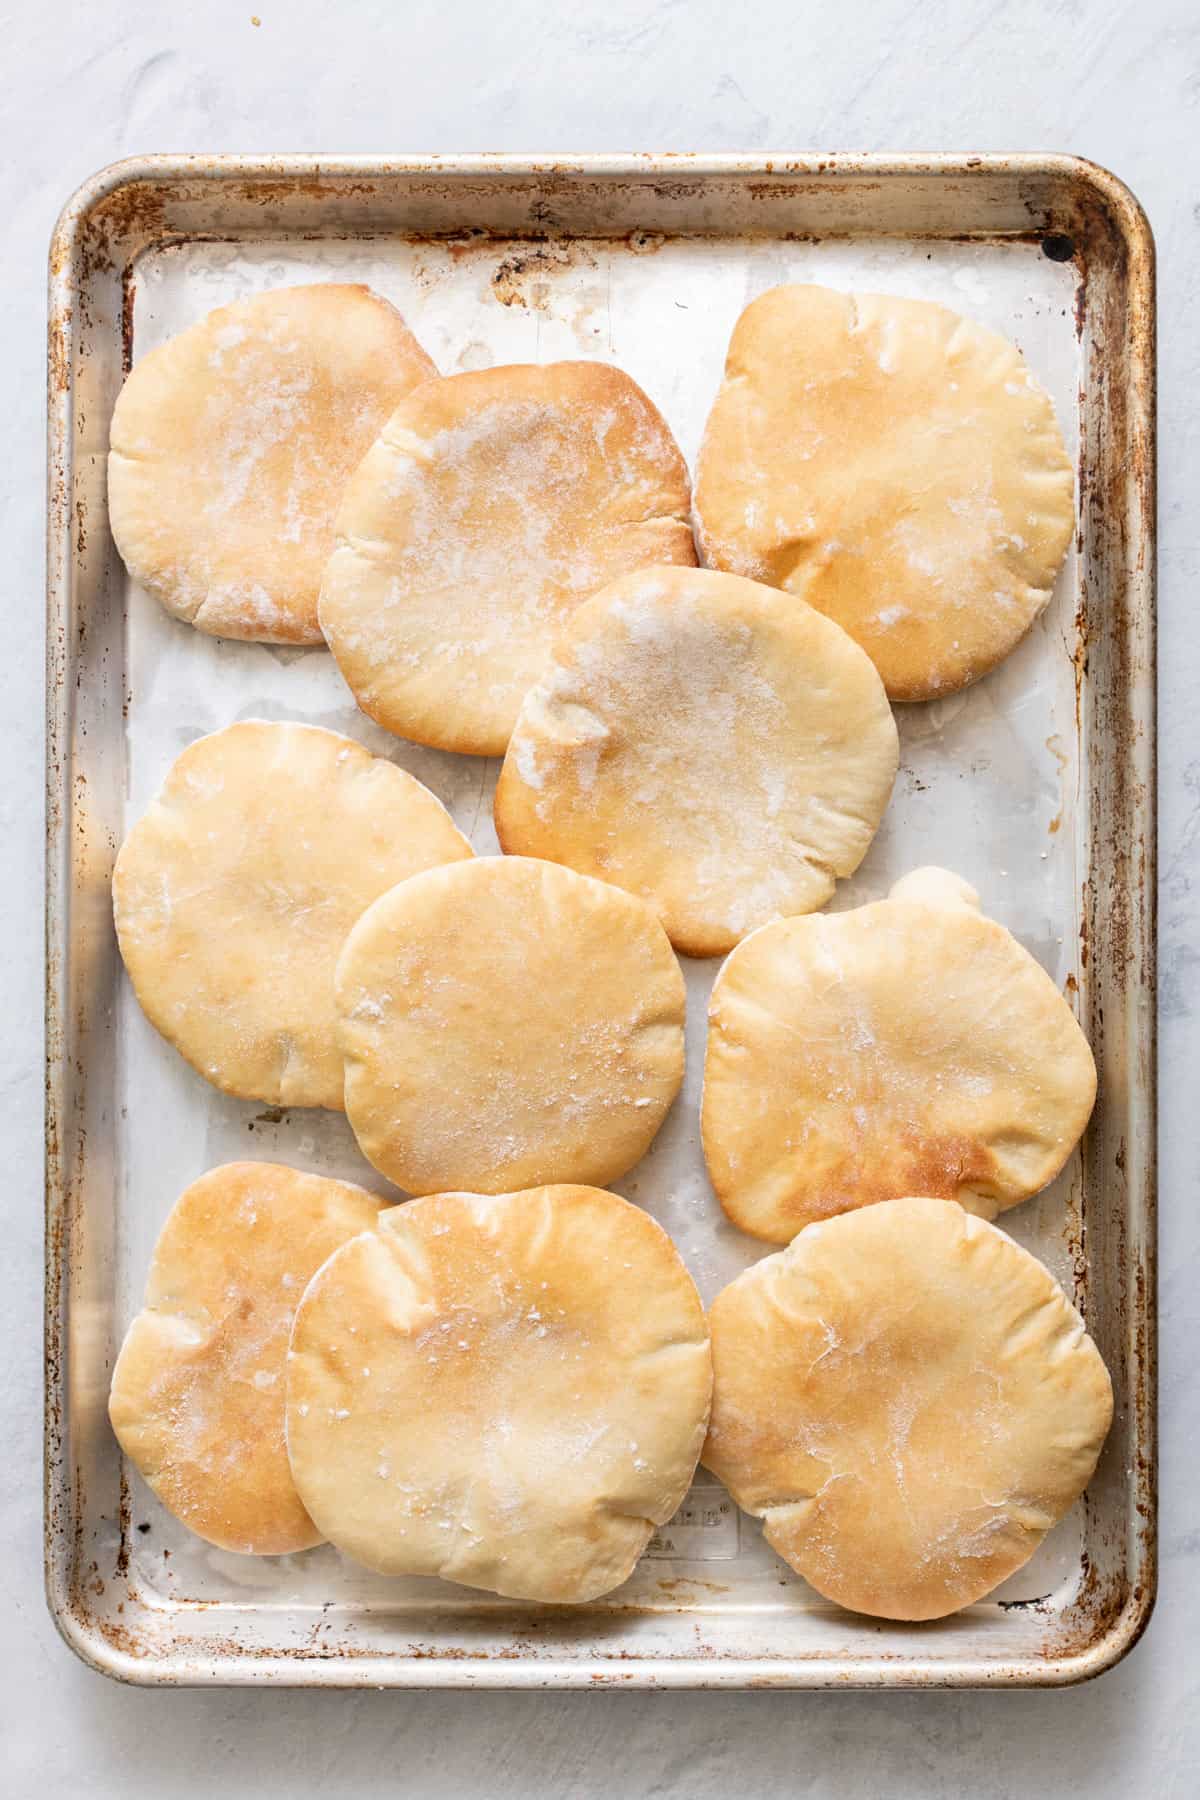
- Preheat oven 550°F (or to the highest temperature it will go) with the baking sheet inside the oven. While the oven is heating, allow the pita rounds to rest for about 30 minutes.
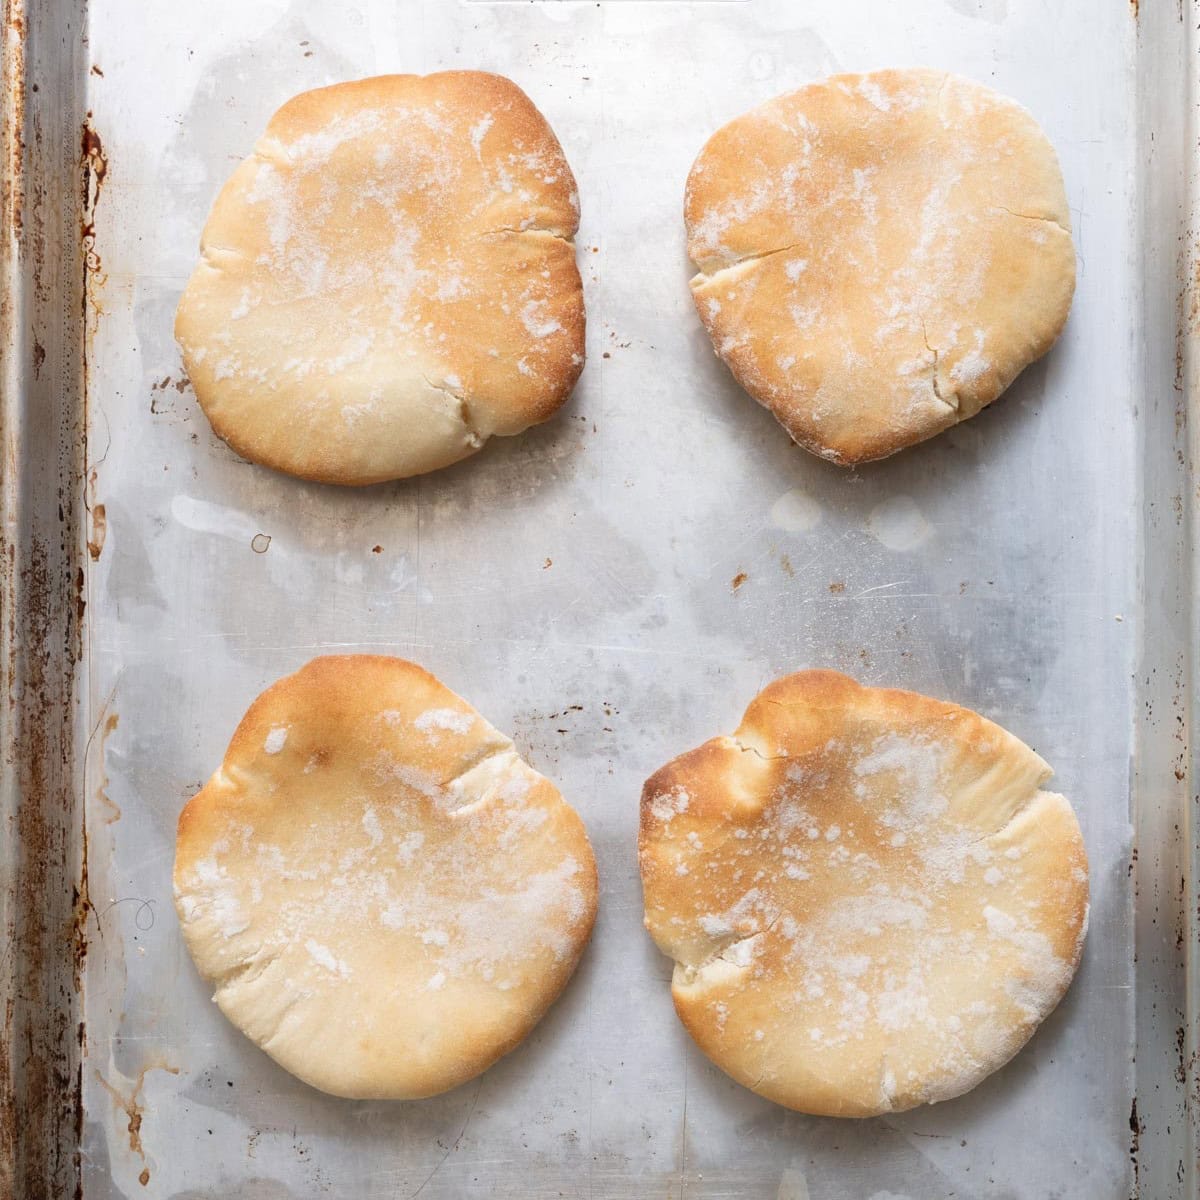
- Flip the rolled out pita onto the heated baking sheet. Bake on the bottom rack of your oven until lightly golden brown and puffed, about 3-5 minutes. Wrap them in a clean kitchen towel as soon as they come out of the oven.
Equipment
Notes
Nutrition
Nutrition information provided is an estimate. It will vary based on cooking method and specific ingredients used.


Comments
Can you freeze these pitta bread? thanks!
Hi Maria, yes, you can freeze pita bread! Just make sure to wrap it tightly in plastic wrap or place it in a zip-top bag and freeze for up to 3 months. When you’re ready to eat it, just thaw out at room temperature or in the fridge.
Made these this morning in a fan oven and they tasted really good! I’m more used to the thinner Lebanese bread where I live but this is a refreshing change.
Yay! So glad you liked them, Abeer!! Thanks!
I made them and it was perfect until I cooked it. What temperature do we cook it? The highest temp of 500F? The recipe never had a different temp to cook it at. I then cooked it at 500 for 5 min and it puffed up nicely but when I took it out, it stayed puffed up and it was hard and never deflated. What did I do wrong? It’s like pita chips now, very crunchy.
The temperature is 550°F (or to the highest temperature it will go) and it’s in the recipe card. You can use the “Jump to Recipe” button to find the recipe card. The instructions also say to bake on the bottom rack of your oven until lightly golden brown and puffed, about 3-5 minutes. So it’s possible the position of the pita affected them but I think the dough seems like it was too dry if it became crunchy. Did you substitute any ingredients in the dough?
I don’t have a stand mixer. Can I hand knead the dough?
Yes, you can! You can use a flat wooden spoon to mix the ingredients, then turn the dough onto a well-floured surface and knead until smooth. It should take you about 10 minutes to do it by hand. Hope that helps!!
Thanks!
Amazing, light and with a delicious pocket.
Yay! Thank you so much!! So happy you like it!
Thank you. I can’t believe how good these turned out. All your recipes are easy to follow and amazing (smala). ♥️
Yay!! You’re welcome! So glad you liked them!!
The dough was so easy to make and came out perfect, followed your recipe exactly. Can you make the pitas on a dry flat pan, on the stove top, like naan? Or stick to the oven?
Thanks, Nisha!! You can, but they puff up much better when baked in the oven. If you do end up trying the stovetop method, I recommend using a cast iron skillet on medium-high heat. Depending on the state of your skillet, you may need to add just a little bit of oil to the pan before you start, too (but be sure to wipe off the excess). Hope that helps!
Thank you so much; it was perfection as is so maybe will just stick to the oven method 🙂
So I was looking for something similar to my grandmother’s recipe because I can’t find the card I got like 20 years ago. We spent a whole day in the kitchen when she taught me how. Your recipe is the most similar I can find. So thank you very much for having posted. She’s been gone for 14 years now and my aunt and uncles made a request. So again thank you very much!
Aww, I am so happy it reminds you of your grandmother’s recipe!! You’re so welcome, Natajia!
Just made this but subbed a few ingredients to make it clean and wow!!! Came out so so so good! For every cup of AP flour I did 113g whole wheat bread flour and swapped Monk Fruit in place of the sugar. Did everything else the same and it turned out fabulous! So happy to now have a go to pita recipe!!
Love the tweaks you made!! So glad you liked the recipe, Amanda. Thank you!!
Just requested your pita recipe, can’t wait to try it—thank you! Noticed that the amount of yeast packets is incorrect for double and triple batches- it says 6.75ts of yeast is one packet…just for your editing purposes.
I hope you enjoy the recipe, Jay! Thanks so much for pointing this out. Unfortunately, this is a flaw in the recipe card coding—when you tap on the ‘2X’ and ‘3X’ buttons it adjusts the measurement but not the note (in this case, ‘1 packet’).
The dough was absolutely disastrous. So wet! But I needed the pita for dinner so I added tons of flour. So hard to handle the dough, make the balls and roll out. Not pleasant! The pita were still not golden after 5 minutes but I didn’t want them to hard. So shocked that all actually puffed and were able to be stuffed! But not a recipe I will make again.
Oh no, I’m sorry to hear that. Is it humid where you live? Humidity can affect how wet your dough is. Adding more flour was the right call!
This is actually a foolproof recipe, don’t be intimidated when it’s messy at the start. The dough is wet and shaggy at the beginning and you might be tempted to keep adding flour but that’s what made your dough hard at the end. When you first start kneading the wet dough, dust your hands with flour, but don’t be tempted to add too much. After a few minutes of kneading you’ll notice the dough getting smoother and more together when the gluten starts developing. It is definitely easier and less messy to do it with a stand mixer with the dough attachment. But it is also possible to do it by hand, which is what I do. By the end of kneading it for the full 10 minutes (it is a workout but it adds love and is relaxing) it should be perfectly smooth and ready to rest and rise. This gluten development stage of kneading is crucial in making sure the end product is soft and easy to handle.
Your recipes are so amazing! First time making pita and they are perfect!
Aww, thank you! I’m so happy your pita turned out great, Clara!!
Came out perfect!! Didn’t have instant yeast so used regular active dry yeast this is my first time making this or anything like it. Got oven to 550 made them in the oven in sets of 3 just to see. First set I let sit for 5 mins came out to firm. Then did 3 mins and it was perfect!
Amazing! I’m so happy you liked it, Monique!
Is it possible to make the dough and freeze it, and then pull them out and bake off just a few at a time? Or would you just recommend freezing the freshly cooked pita?
I would recommend freezing the cooked pita, that’s what works best for me. I don’t see why you couldn’t freeze the dough and bake just a few at a time though, just make sure to wrap your balls of dough really well.
Wow! I was worried that being at a high altitude would affect the recipe and the rising of the pita, although they came out wonderfully puffy! Huge pocket in the middle too! I am so glad I found YOUR recipe while in the grocery store as I was looking at prepackaged pitas (with ingredients I didn’t want to ingest!) THANK YOU! If I could post a photo I would love you show everyone how great they came out the first time!
Yay!! I’m so happy to hear they turned out great even at a high altitude! Thanks so much, Jacqueline!!
I’m bummed because though your recipe was straightforward and real easy to follow, my pitas did not puff up at all! I happen to be Lebanese and was hoping I’ll get better results. I did follow your instructions to the T- yeast was new and did foam up! I don’t get it! 🤦🏻♀️
hi there, so sorry to hear! What size were the pita in diameter? Without special pita machinery to press the dough perfectly flat, it can be hard to get the dough to separate and form pita pockets if you make them too large. Aim for 4-6 inches in width.
After three failed attempts at chef John’s pita recipe, I tried your recipe tonight and am soooooo pleased with how the turned out….pita, not tortillas. Thank you Sooo much for saving my hope in humanity.
So happy they worked out well for you!
Can you use a different flour? Something a little healthier than AP which has basically been stripped of all its nutrients. Thank you!😘
HI I am confused if you use instant yeast or active dry yeast here, instant does not need to be activated and foam but you give instructions for active dry yeast. The text says instant dry yeast. Can you please clarify which one is it?
Instant yeast does not have to be activated, but I find it speeds up the process of rising. You could use active dry yeast, but the rising time would probably take twice as long.
I just made these and wow, they are (in your words) SO good! I made them a little bigger to make six instead of twelve. They puffed up perfectly and are pillowy soft. My husband who is Armenian/Lebanese and is used to eating pita was very impressed! Saving the recipe 🙂
Yay, so happy you like this recipe!
I just Finished making this and it’s soooo perfect. I live In high altitude denver and it worked. My mom lives in Mn and thinks 5 minutes is not enough for high altitude but I enjoyed. I did Leave in a few for 6 minutes to see if it makes a difference. Also I just Used the same oven rack and the same parchment paper vs cutting into squares cause I didn’t have time. This is the first recipe I made By you. Thank you Yumna. Can’t wait to make the one with stuffed dates- peanuts, and chocolate that tastes like snickers.
Thank you so much, Mia! Those snicker dates are so good and it’s so hard to eat just one! Looking forward to seeing what you think!
Hi,
I was so excited to make this recipe and I’m sure it will be fine but your recipe unless tapping on the link didn’t say extra version olive oil and said just olive oil. Can you update? Currently making this and excited for the results. I’m Arab so I should’ve known better.
You can use regular olive oil, it won’t hurt anything. I hope they turned out well for you!
I love the recipe I can use for my falafal sandwiches thank you so much.
You’re so welcome!
This recipe was easy to follow and they tasted great! I did have an issue with some not puffing up. Do you know why this happened? I want to make these again but I want to know why some didn’t puff, I instead got flatbread – which was just as good. I had them with your chicken kabobs, grilled veggies. Added roasted garlic, feta and fresh cucumber slices. Yummy!!!
Is it possible your yeast did not activate completely or that it wasn’t evenly distributed in the dough? The yeast is what creates the pocket.
Mine came out perfect. Thank you for the recipe.
So happy to hear that, you’re so welcome!
I also grew up eating pita bread in our house. It was easy to find Middle Eastern bakeries in Brooklyn back then in the 1970’s-80’s. Fresh out of the oven, so good. Now I can’t find any bakeries that still bake pita bread. Everything is factory made and the pita bread doesn’t open-up without falling apart. I was afraid to try your recipe never baked any kind of bread before. Now I know why bakeries start baking at 300am. .Your recipe was easy to follow. I have to take lessons on how to roll out in a circle the bread. It was fluffy and easy to open up. The taste is good for a first timer. Wow! I am so grateful to you for making the recipe so easy to follow. Definitely will make again. Thank You
You’re so welcome, Daisy! So happy to hear that it turned out well for you!
This is my go to pita recipe and I always use it with your chicken shwarma. Delicious. One thing I do is just use a full sheet of parchment paper and place the sheet pan right onto my baking steel. No need to move it or put it onto individual sheets of parchment. The pitas puff up and bake wonderfully. Thanks for the delicious recipes.
You’re so welcome!
Hello! It is years since I have made pita pockets! Following your recipe, I do not see how thin the rolled out pockets should be. 1/2” or 1/4”? Mine are puffing up, but the inside is a bit of a pocket surrounded by thick airy sides as well. Not quite the neat thin walls I was hoping for. Any suggestions? I also eased my pitas all together onto the hot oven sheet on a large parchment paper. Paper scorched but pitas popped! Some burned on the bottom. With a convection oven can I lower the temperature? They bake VERY fast – oh my!
They should be around 1/4″ thick. I have not made this in a convection oven. You can try lowering the temperature and see if that works better. It may take some trial runs to get them cooked properly. I hope that helps!
This recipe yielded my most successful pitas yet– perfect little dough balloons inflating in the heat! and it was the easiest to follow. My baking steel in the oven helped too.
So glad your pita bread turned out well!
I follow too on Instagram and LOVE so many of your recipes. I just made mujadara! It was perfect. I have never made pita m, and I am wondering if I can use a tortilla press after rolling out the dough. I prefer pita that is thin-er…not fluffy (doughy). I buy them at a middle eastern market and they are perfect. I want to learn to make them. Thoughts?
Aww thank you!! I’ve never tried that but I think it’s worth trying! Let me know how it turns out if you try it!
The tortilla press made the pitas perfect. I made half with a rolling pin and the other half with the press, just in case. Both puffed the same and had the same thin/fluffy balance. So delish!
Thanks for the update and trying it out! Such a useful tip!
Great recipe. I’ve made it several times. I add extra flour, usually when rolling out the dough and it turns out great. My question is, after rolling out the dough, if I stack the pita on a plate separated by parchment paper and store in the refrigerator to bake the next day, do you think they’ll turn out?
Yes, thats totally fine to do that. I recommend leaving them out at room temperature covered with a damp kitchen towel or plastic wrap so they come to room temperature and soften before baking.
Pita came out as hard as rocks after 3 minutes of cooking at 550. I used Kitchenaid with kneading hook for 2 minutes. Have no idea what happened
Oh no! I am sorry to hear that, Sue. I do recommend kneading for 10 minutes in the stand mixer. Did you let it rest and proof after kneading?
This recipe is perfect!! I made this 2 separate times and each time the pitas cams out perfect and with a complete pocket. I knead the dough by hand for eight minutes and I also ended up adding 3 1/2 cups of flour both of the times I made this recipe, plus additional flour for rolling out the dough. My oven only went up to 500°, however I baked the pita bread on the bottom rack for 7 min, then I moved it to the center rack and baked it for 2 min, which resulted in a perfectly golden brown color on top but still soft fresh out of the oven texture overall. It’s so fun to watch the pitas puff up in the oven. Going to try to make pita chips out of this at some point. My mom is from Egypt and she raved about these pitas! Thanks for sharing your recipe!!
Thank you so much, Ashley, for sharing your tips! I totally agree. It’s so exciting watching the pitas rise and knowing you made it!
I moved away from Dearborn a few years ago and have been looking to create dishes that remind me of home. Your recipes have consistently allowed me to recreate that feeling in my new home and I’m so grateful. I also didn’t realize you were from Dearborn until I read this recipe which makes making your recipes hit even closer to home. Wishing you all the best and thank you so much for sharing.
Awww, that really makes me feel so happy to hear that my recipes have helped you recreate such fond memories. I felt the same way when I started making my mom’s recipes for my kids. It brings me so much joy! Sahtain, as we say in Dearborn 🙂
The pita was delicous. However, I did not anticipate the flour required, so the dough did not stick to the parchment paper. I had to re-roll and flour several dough balls because they stuck to the parchment.
Thank you! It’s definitely important in this recipe to adjust the flour amount in the dough recipe based on humidity.
So good! Just like my Sitoo made me.
Aww, I love that! Thank you so much!
Thanks for the recipe
You’re welcome!
This pita recipe was way easier than I thought it would be! They were delicious and puffed up nicely. Thank you Yumna for always providing easy and tasty recipes!
That’s perfect! I’m so glad to hear it. You’re so welcome!
Hello, can I use 100% whole wheat flour?
You can substitute up to half the amount of flour for whole wheat flour, which actually has a better taste because it’s more nutty. If you do use whole wheat flour, make sure to add more water until the dough feels smooth.
Wow, these pitta breads are absolutely divine. Very easy to make. I made with half wholemeal flour. Went down very well with all the family, very tasty. Thank you
Thank you so much! I’m glad you all enjoyed!
This recipe is so easy and the results are amazing! My kids enjoyed watching through the oven door as the pitas rise. We served it with Greek chicken one night and beef and broccoli stir fry another night. Thank you!
Thank you so much! That is so fun. What a great meal!
Made this recipe for Shabbat dinner and it was a hit! Can’t wait to make it again!
I love that! Yay!!
Made the pita bread and loved it! Very easy recipe
That makes me so happy to hear! Yay!
These were incredible! Super easy to make and absolutely delicious! Never purchasing pita from the store again. Thank you, Yumna!
Thank you so much! I love that!
Thank you love it. EXCELLENT JOB
I appreciate it! Thank you so much!
Loved the recipe!! One question, my pitas puffed but lop sided!! Why?? They were rolled out evenly and I did preheat oven and pan.
Thanks!!!
Thank you! That shouldn’t have been the case if you rolled it out as evenly as possible. Did you make sure the seam (or the part of the dough ball with the folds) is facing down? This will allow the top seamless part to rise perfectly.
These are so good! Way tastier than store bought! We used whole wheat flour and they were amazing!!
Thank you so much! That’s perfect!
Hi, these tasted great but they did not puff up. I am assuming I did something wrong with making them into balls and then the rolling out part. The directions on the seam facing up did not make sense to me. I will make these again but wondering if you could provide some clarity on the seam and what that means in this context.
Glad to hear you enjoyed the taste! Sorry for any confusion here. The seam is basically the part of the dough ball that is not smooth. This helps the pita puff nicely in the oven, but it’s not necessary if you have a smooth dough ball.