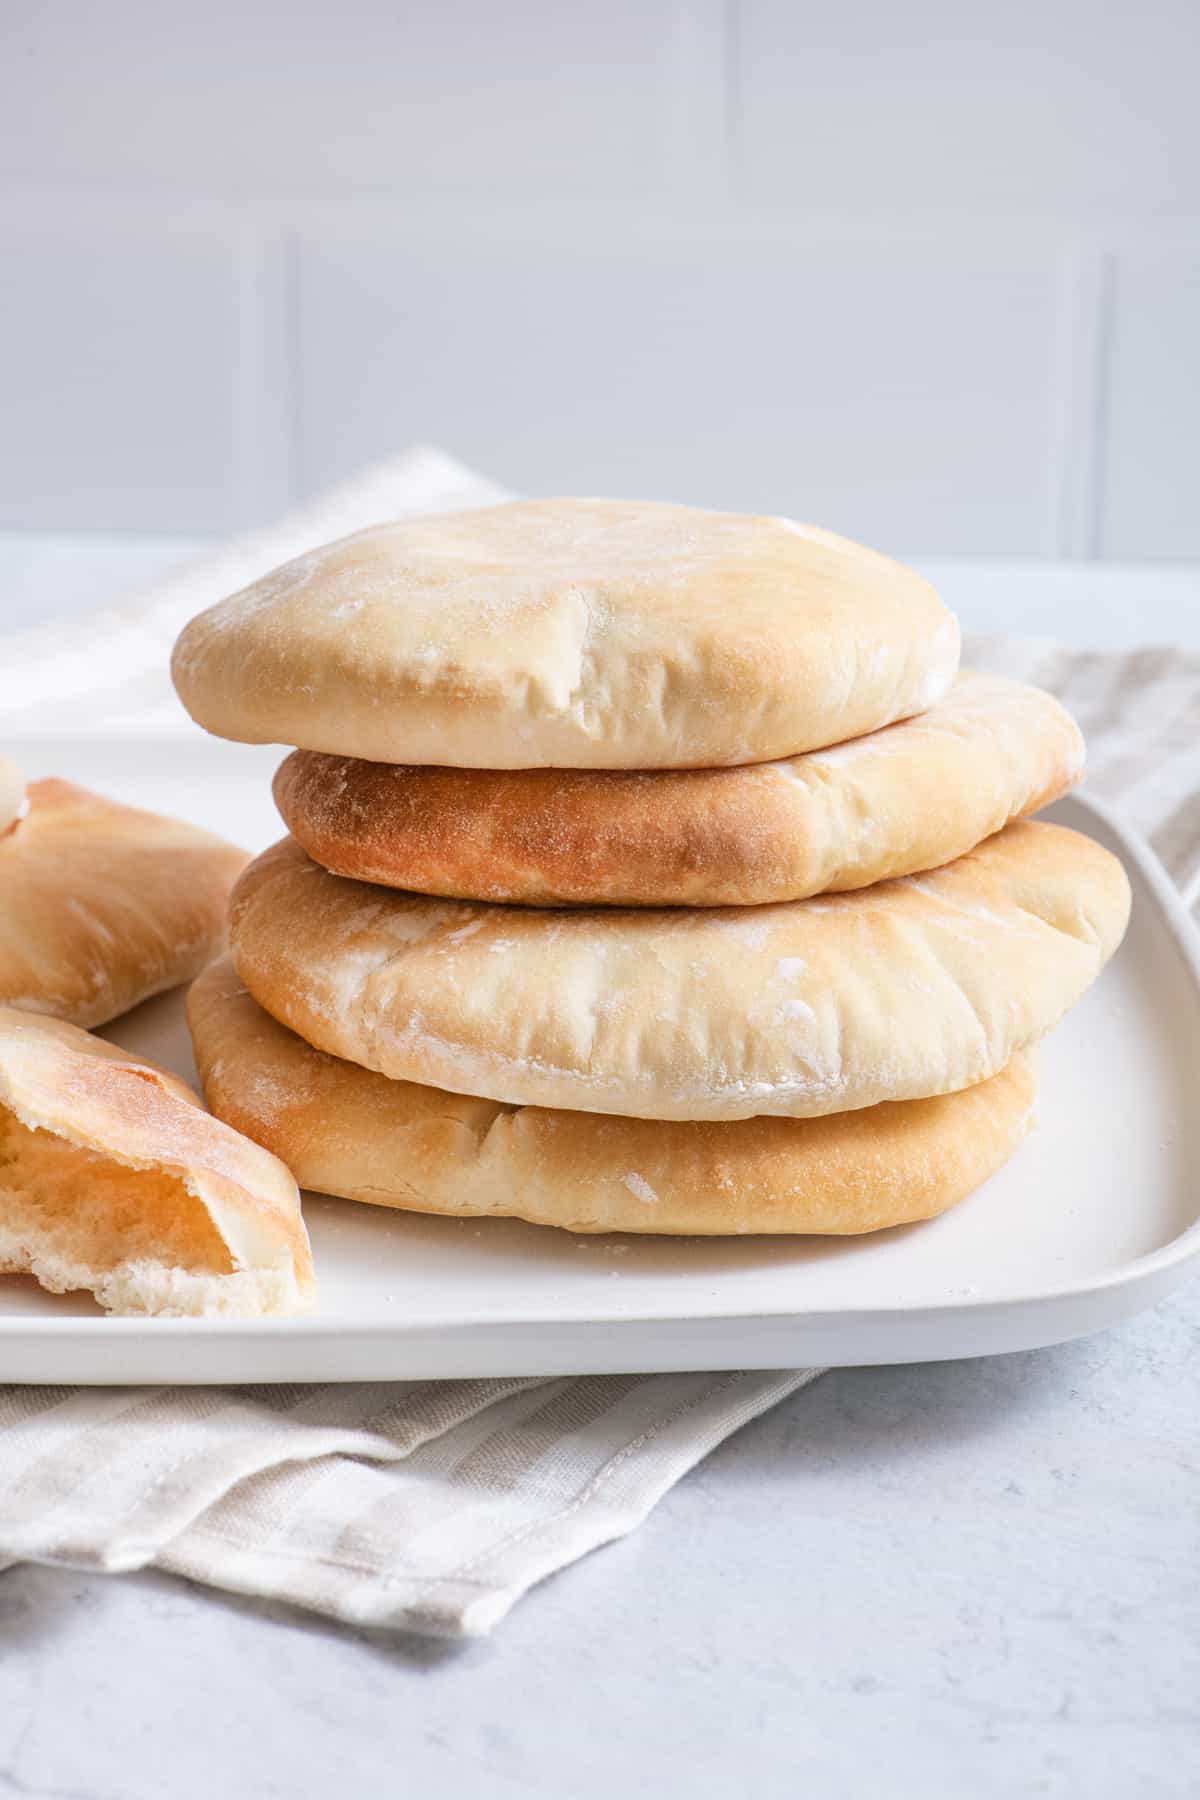
Homemade Pita Bread
Updated Apr 28, 2025
Learn how to make the best pita bread from scratch and enjoy homemade pita anytime you'd like! It's soft and only requires 6 ingredients!
This post may contain affiliate links. Please read our disclosure policy.
Jump to Section
Make My Homemade Pita Bread!

I grew up eating pita bread and it’s a must in any Middle Eastern home for scooping up hummus, making sandwiches with labneh and za’atar and toasting to make pita chips. I’ve even used pita bread as the base for making pita pizzas.
Growing up in Dearborn, Michigan, we had the luxury of enjoying the most delicious authentic pita bread sold in dozens of bakeries and grocery stores for $1 a bag. Now living away from Dearborn, I buy it in bulk and freeze it. But there’s nothing like fresh pita bread.
When I set out to research the recipe, I learned that the super-thin authentic Lebanese pita bread can only be made with special machinery. Homemade pita bread has a thicker consistency. I based my recipe on the pita from Amanda’s Plate and tweaked it to add olive oil and elaborate on the steps, so you get the perfect pita in your oven easily! If you’ve always wanted to make homemade pita bread, but were intimidated by the process, then this recipe is for you!
Happy Baking!
– Yumna
Homemade Pita Bread Ingredients
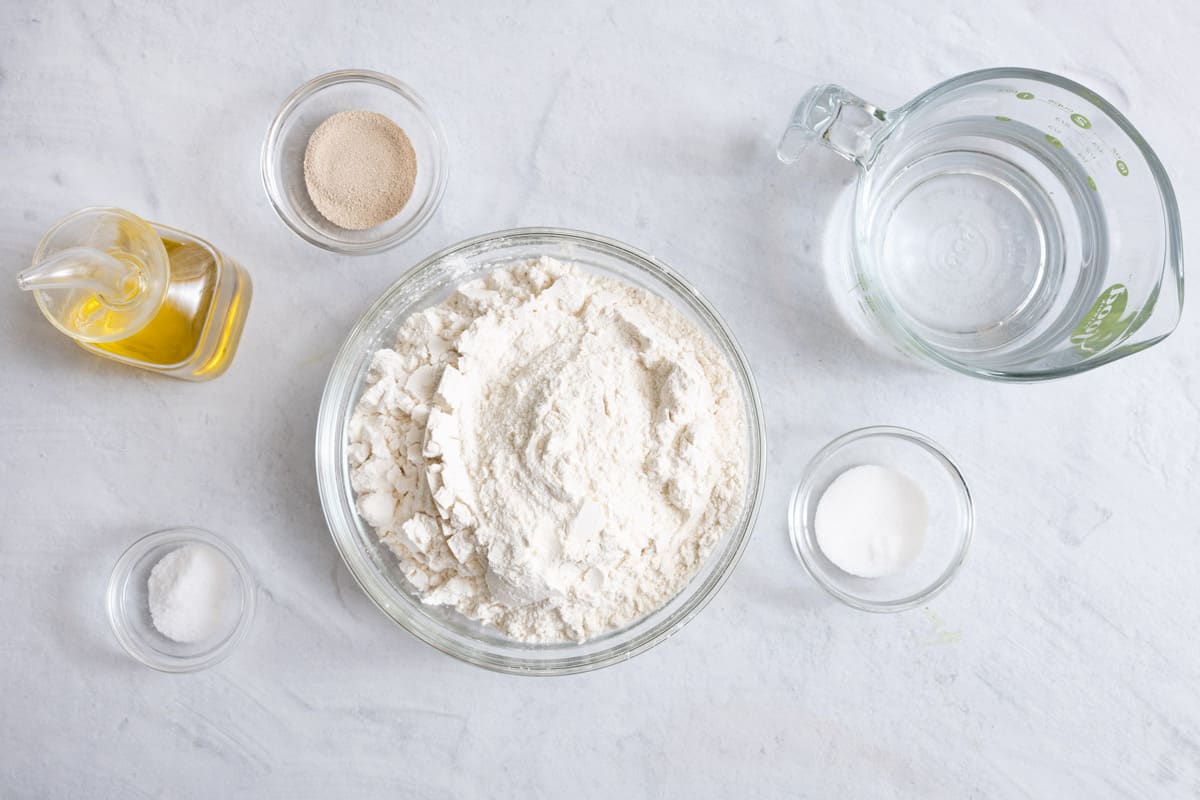
- Flour: Use all-purpose flour to keep things easy and accessible. You could also using bread flour or mix in some whole wheat flour.
- Yeast: Instant yeast works well. You need yeast for this recipe because it’s what creates the pocket in the pita.
- Sugar: Sugar helps to activate the yeast. Use granulated sugar or honey.
- Salt: Salt brings out the flavors of all the other ingredients. You can also add ½ teaspoon of dried herbs like rosemary, oregano or thyme when you add the salt.
- Olive oil: This adds flavor and helps keep the dough from drying out.
- Water: Make sure your water is not too hot or too cold. Instant yeast does need slightly warmer water (around 120°F to 130°F) to get started. If your water is too hot, it will kill the yeast, and colder water won’t activate it.
RECIPE VIDEO TUTORIAL
How to Make Homemade Pita Bread

Recipe Tips
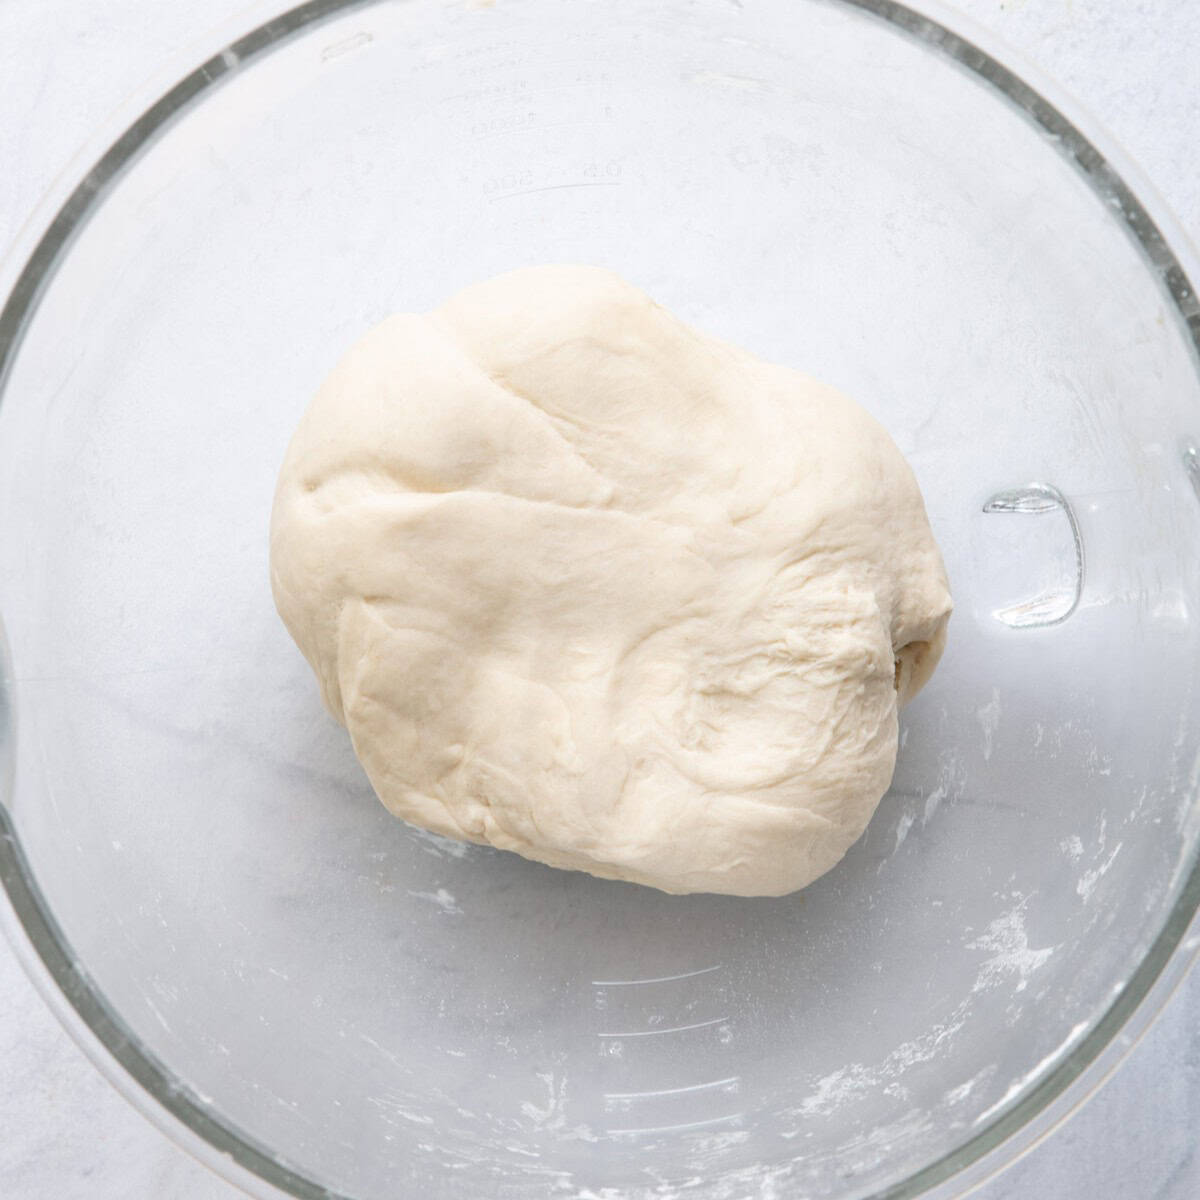
- Knead the dough by hand. If you don’t have a stand mixer, you can use a flat wooden spoon to mix the ingredients. Then turn the dough onto a well-floured surface and knead until smooth. It will take about 10 minutes to do it by hand.
- Adjust the flour amount in the dough recipe based on humidity. It should feel slightly sticky but without sticking to your fingers.
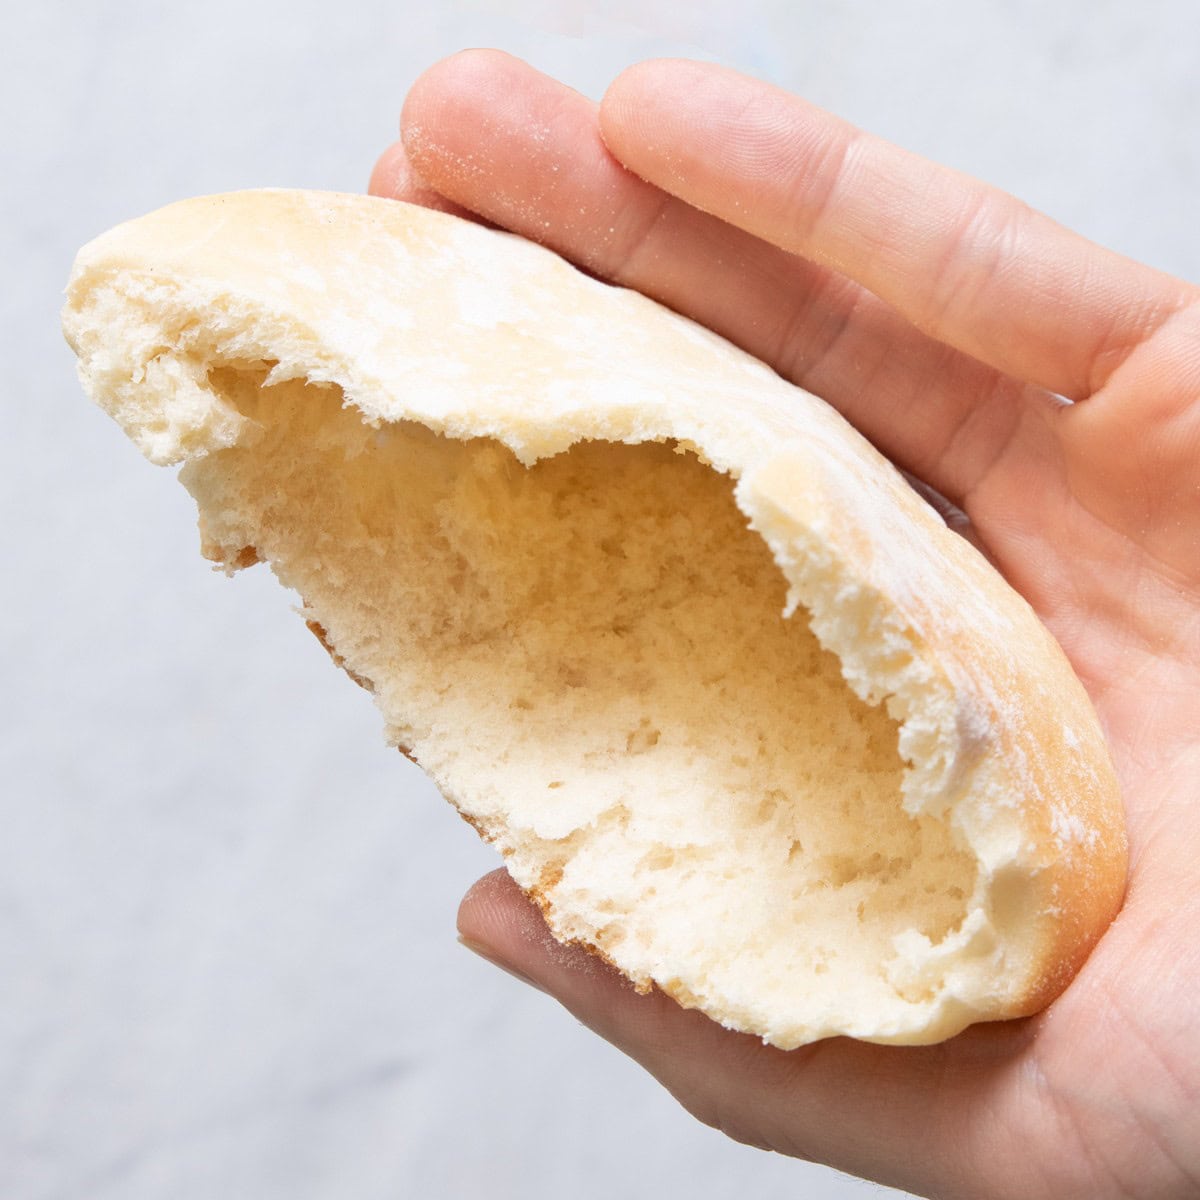
- Roll out as evenly as possible. This is very important because it helps to disperse air bubbles and evens out the dough to make sure that the pita separates in the oven equally without one part being too thick or not separating.
- Pay attention to the seam when placing the dough in the oven. This is not necessary, but a helpful tip to result in the best looking homemade pita. Make sure the seam (or the part of the dough ball with the folds) is facing down, which will allow the top seamless part to rise perfectly.
- Keep the pita size small. It’s tempting to try to make larger pita bread, but without special pita machinery to press the dough perfectly flat, it can be hard to get the dough to separate and form pita pockets if you make them too large. Aim for 4-6 inches in width.
Serving Ideas
As a Lebanese foodie with pita bread being a staple in my fridge, my answer to this is EVERYTHING! But here are a few favorites that are definitely great with homemade pita bread.
- Labneh
- Shish Tawook
- Hummus
- Roasted Cauliflower Pitas
- Arayes (Meat Stuffed Pitas)
- Fattoush (With Fried Pita Chips)
- Chicken Fatteh
- 7 Layer Mediterranean Dip
Recipe Help & FAQs
If you have leftover pita bread, you can store it in a zip-top bag or an airtight container at room temperature for 2-3 days. You can also store it in the fridge to prolong its shelf life, up to 5 days.
To reheat, place the pita bread on a baking sheet and bake at 350°F for about 1 minute, or it’s faster to reheat in the microwave for 10 seconds.
Yes, you can freeze pita bread! Just make sure to wrap it tightly in plastic wrap or place it in a zip-top bag and freeze for up to 3 months. When you’re ready to eat it, just thaw out at room temperature or in the fridge.
Pita bread and naan are both leavened with yeast, but naan is traditionally made with yogurt and an egg. Making naan denser results in a thicker, chewier texture than pita. Pita and naan both are generally soft in texture, but pita will have a pocket in the center that naan will not. As far as flatbread goes it is the umbrella term for all bread that is, well, flat.
If your pita bread is dense, it might be because you didn’t roll the dough out thin enough. Make sure to roll it out as evenly as possible. If you’re having issues with it puffing up, your oven may not be hot enough. A good oven thermometer can help you troubleshoot this.
More Homemade Bread Recipes:
If you try this Homemade Pita Bread recipe or any other recipe on Feel Good Foodie, then don’t forget to rate the recipe and leave a comment below! It helps others who are thinking of making the recipe. I would love to hear about your experience making it. And if you snapped some shots, share it on Instagram so we can repost on Stories!

Homemade Pita Bread
Ingredients
- 1¼ cup warm water
- 2 teaspoons granulated sugar
- 2 ¼ teaspoons instant yeast 1 packet
- 3 cups all purpose flour plus more for dusting
- 1 tablespoon olive oil
- 1 teaspoon salt
Instructions
- In a large bowl or stand mixer fitted with hook attachment, dissolve sugar in the warm water. Sprinkle in yeast and let stand until mixture is foamy, about 5 minutes.
- Add 1 cup flour, olive oil and salt and stir with a wooden spoon. Slowly add remaining flour until a shaggy dough is formed. Knead for 10 minutes in the stand mixer until the dough comes together and is smooth.
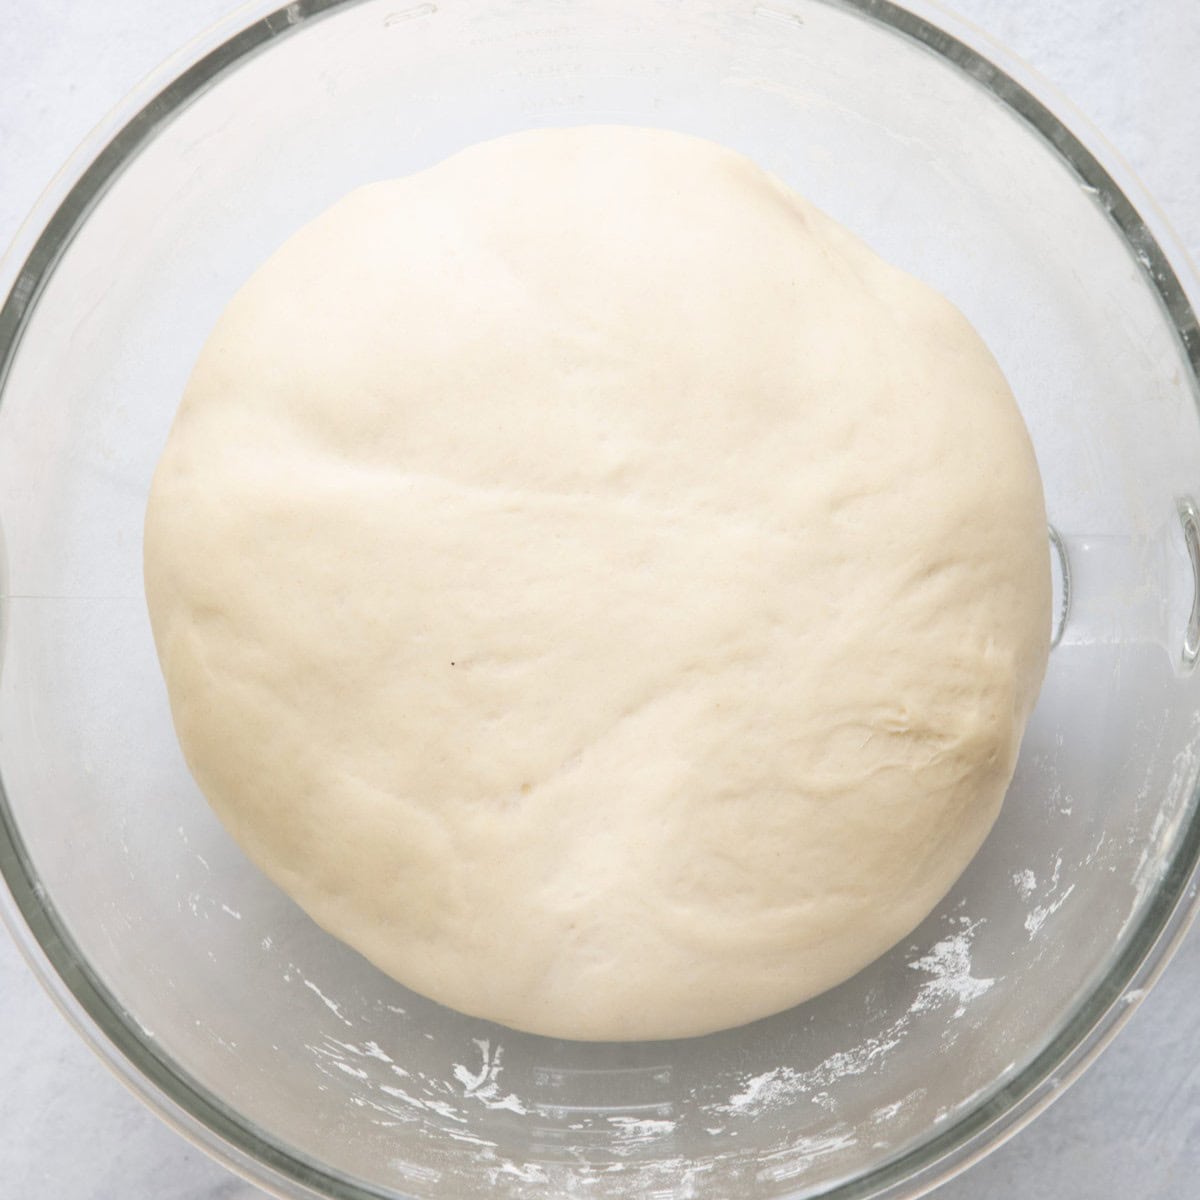
- Cover dough with a moist kitchen towel. Allow dough to rise in a warm, dark place, until the dough has doubled in size, about 1 hour.
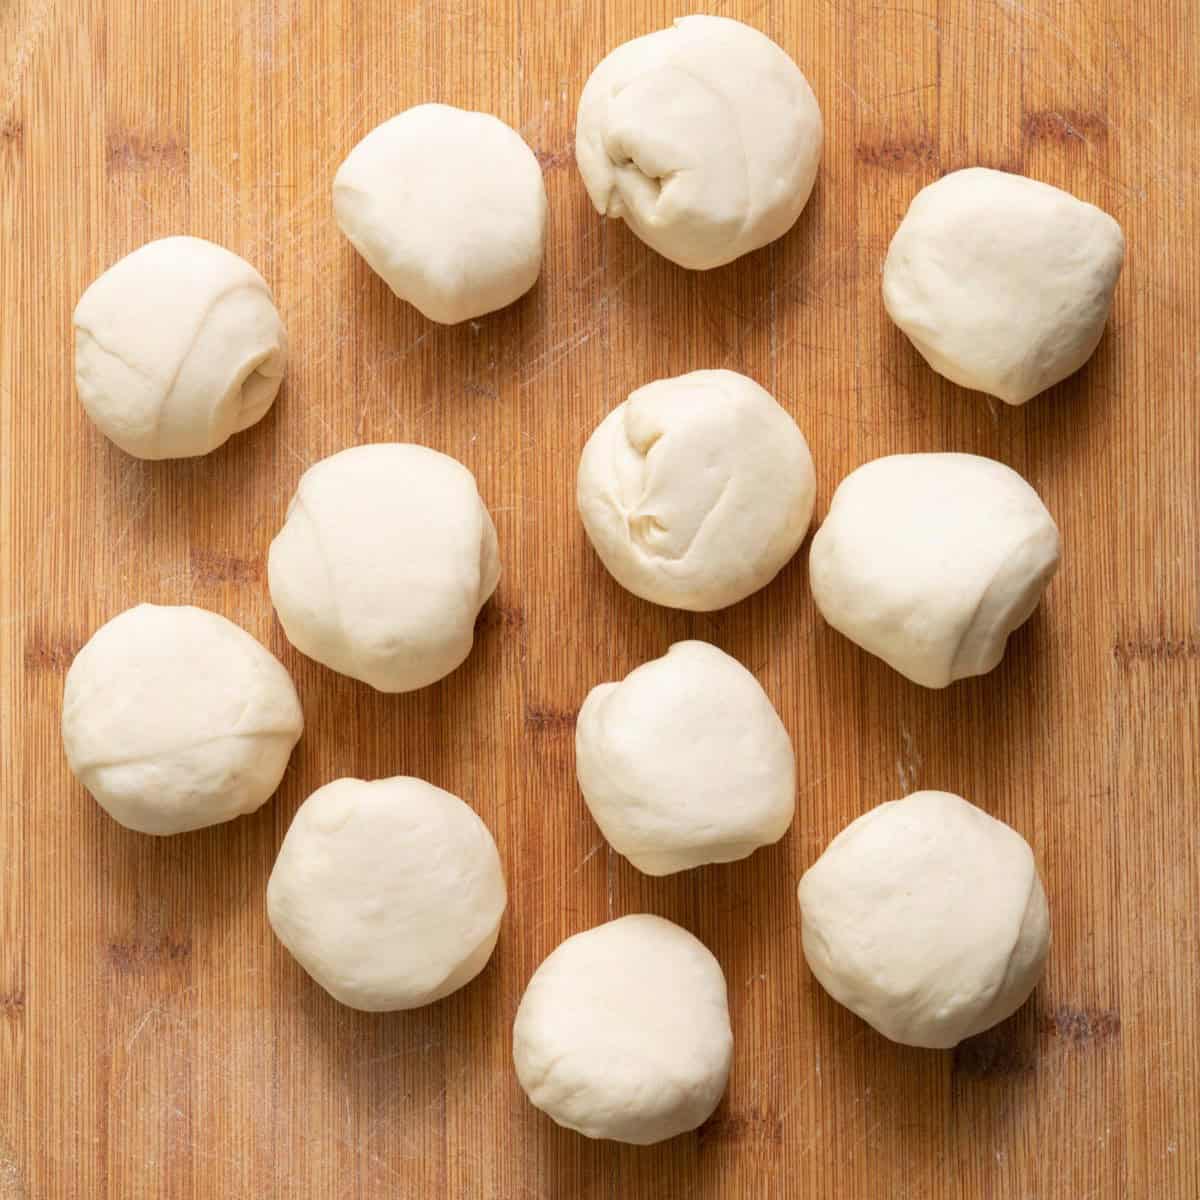
- Punch dough down and separate dough into 12 round pieces by pinching off some of the dough. Use your hands to tuck the sides and roll into an even ball, covering the pieces with a moist kitchen towel as you work. Allow to rest for 10 minutes.
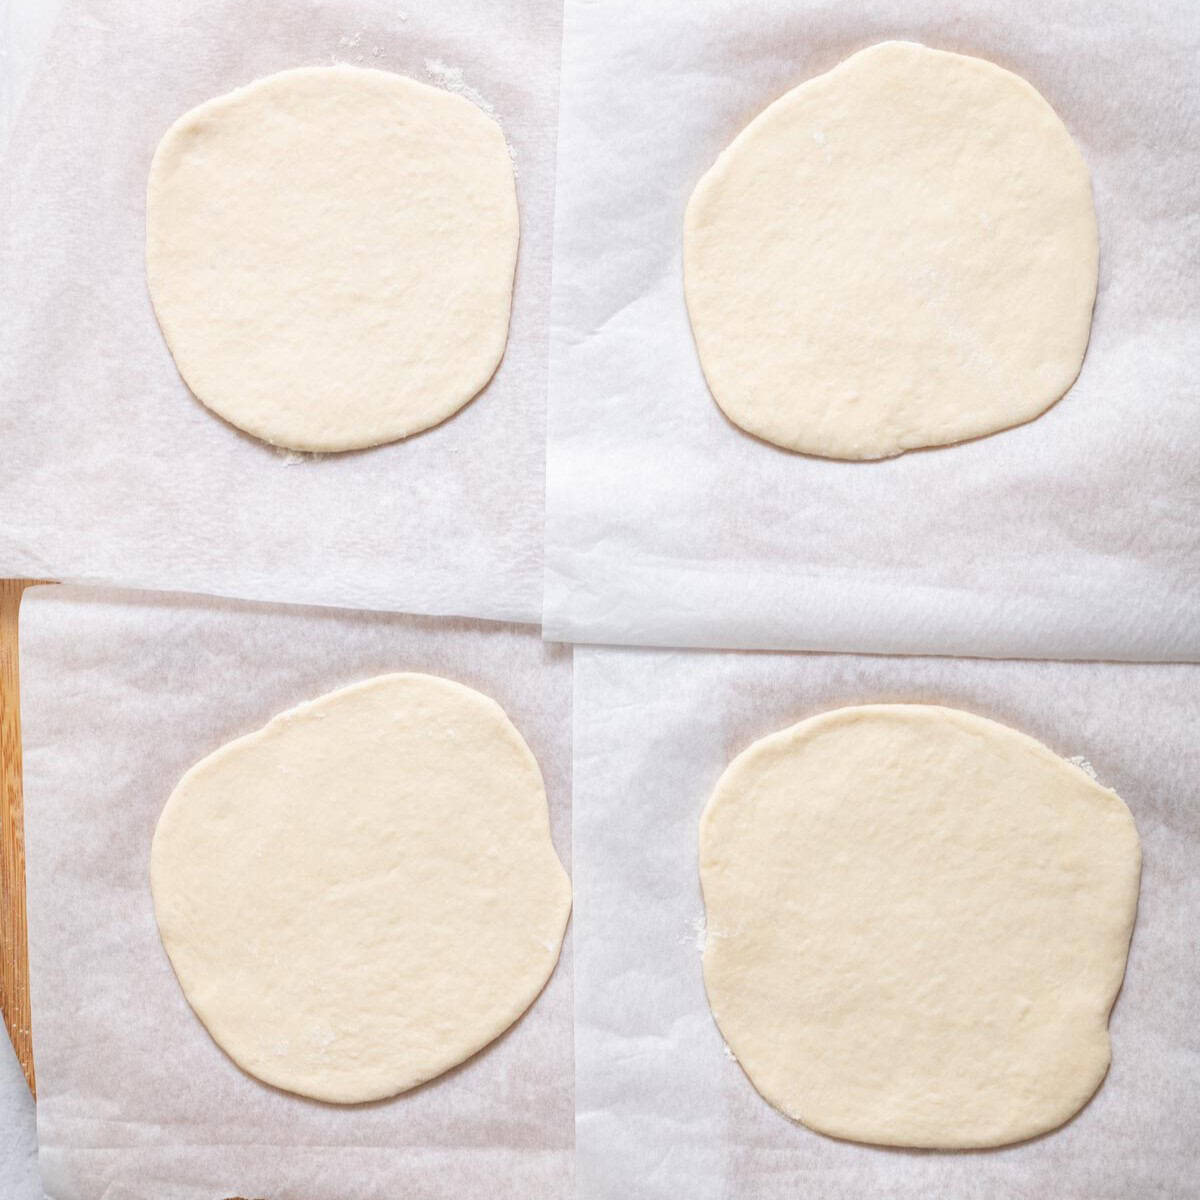
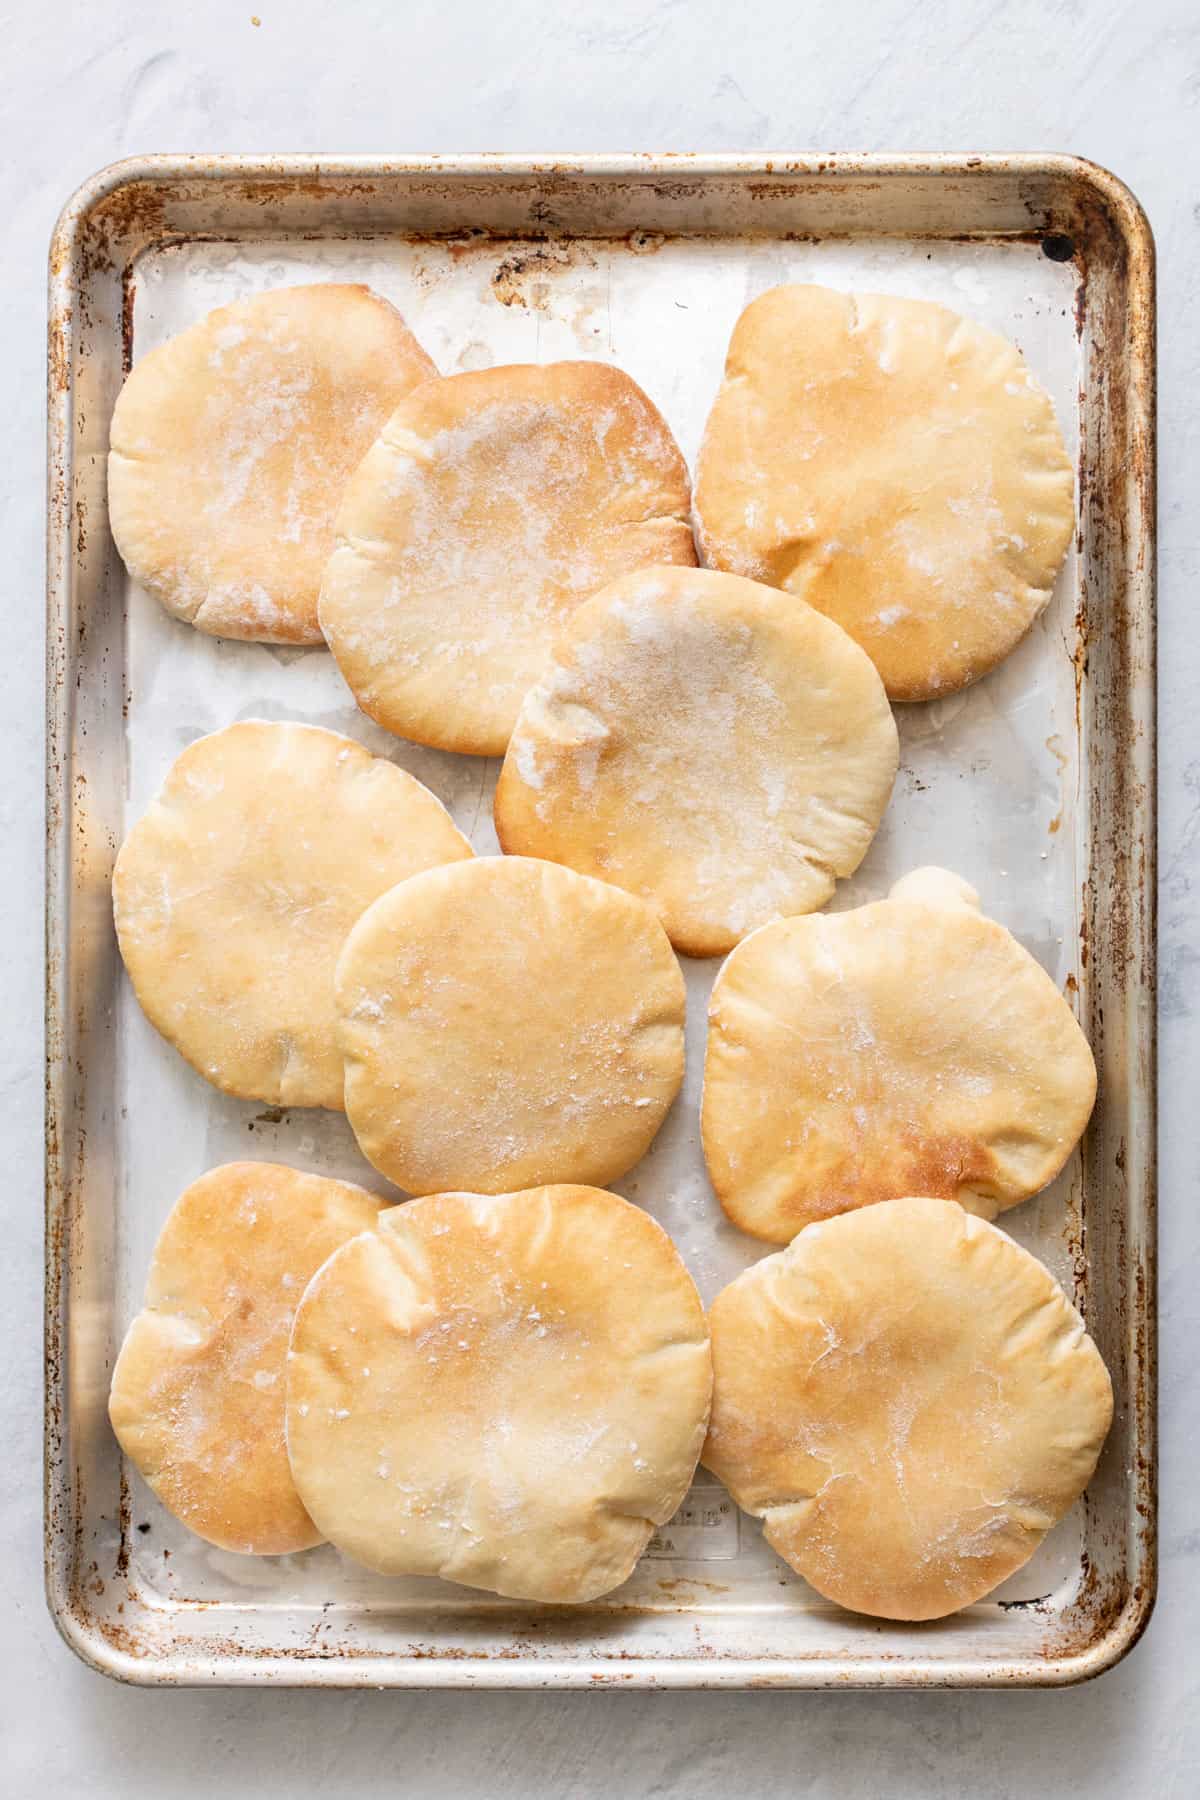
- Use a rolling pin to roll out the dough as evenly as possible. This is important to ensure that the pita puffs up. Transfer the rolled out pita onto small squares of parchment paper floured lightly.
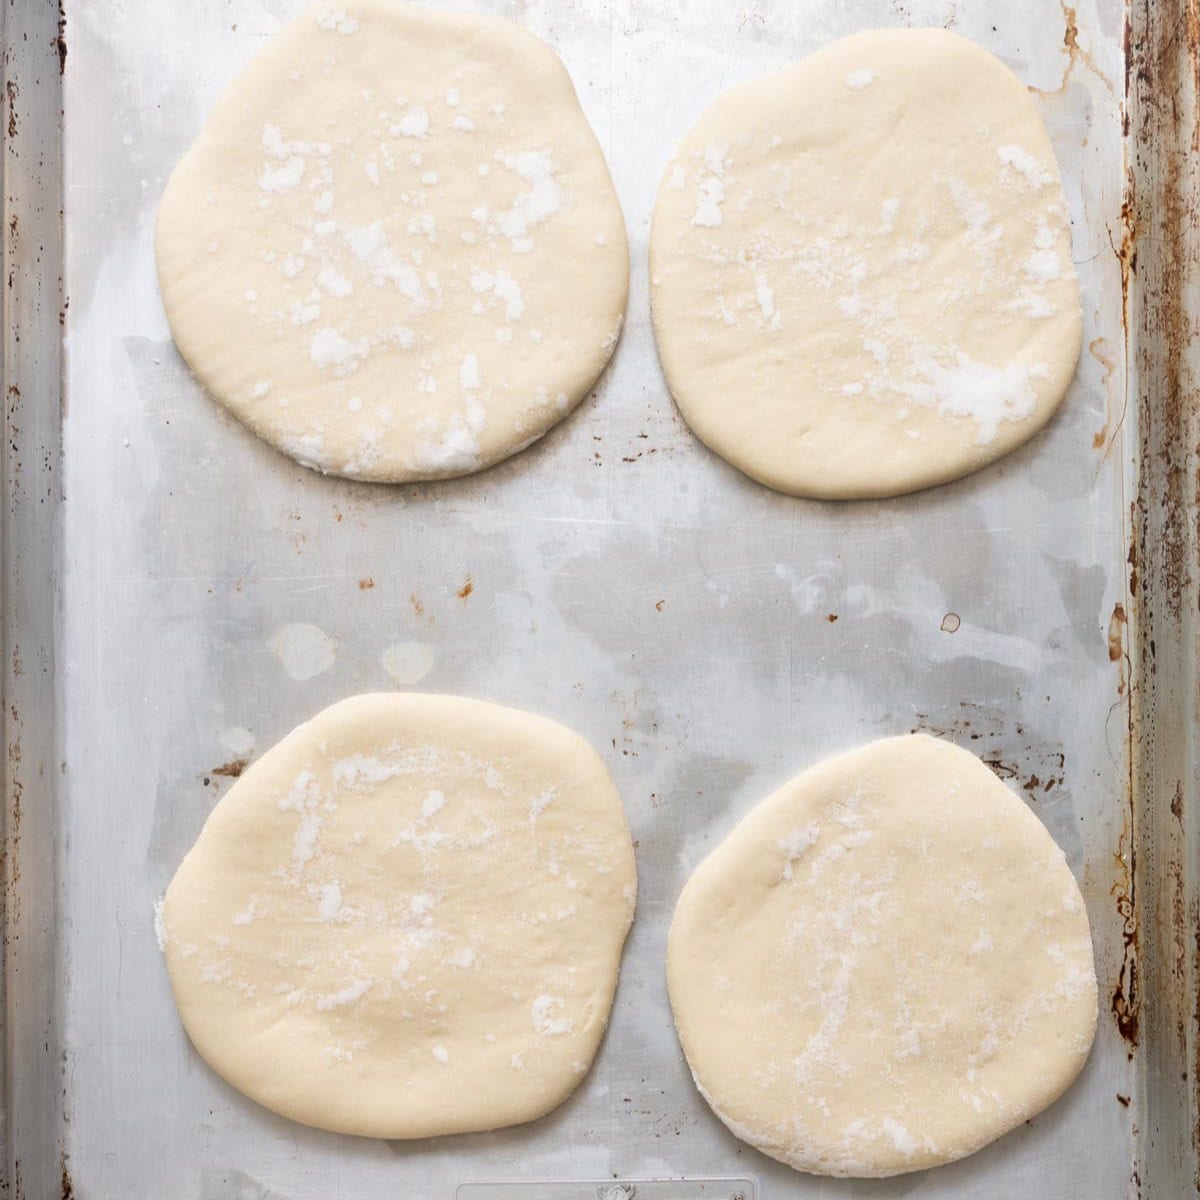
- Preheat oven 550°F (or to the highest temperature it will go) with the baking sheet inside the oven. While the oven is heating, allow the pita rounds to rest for about 30 minutes.
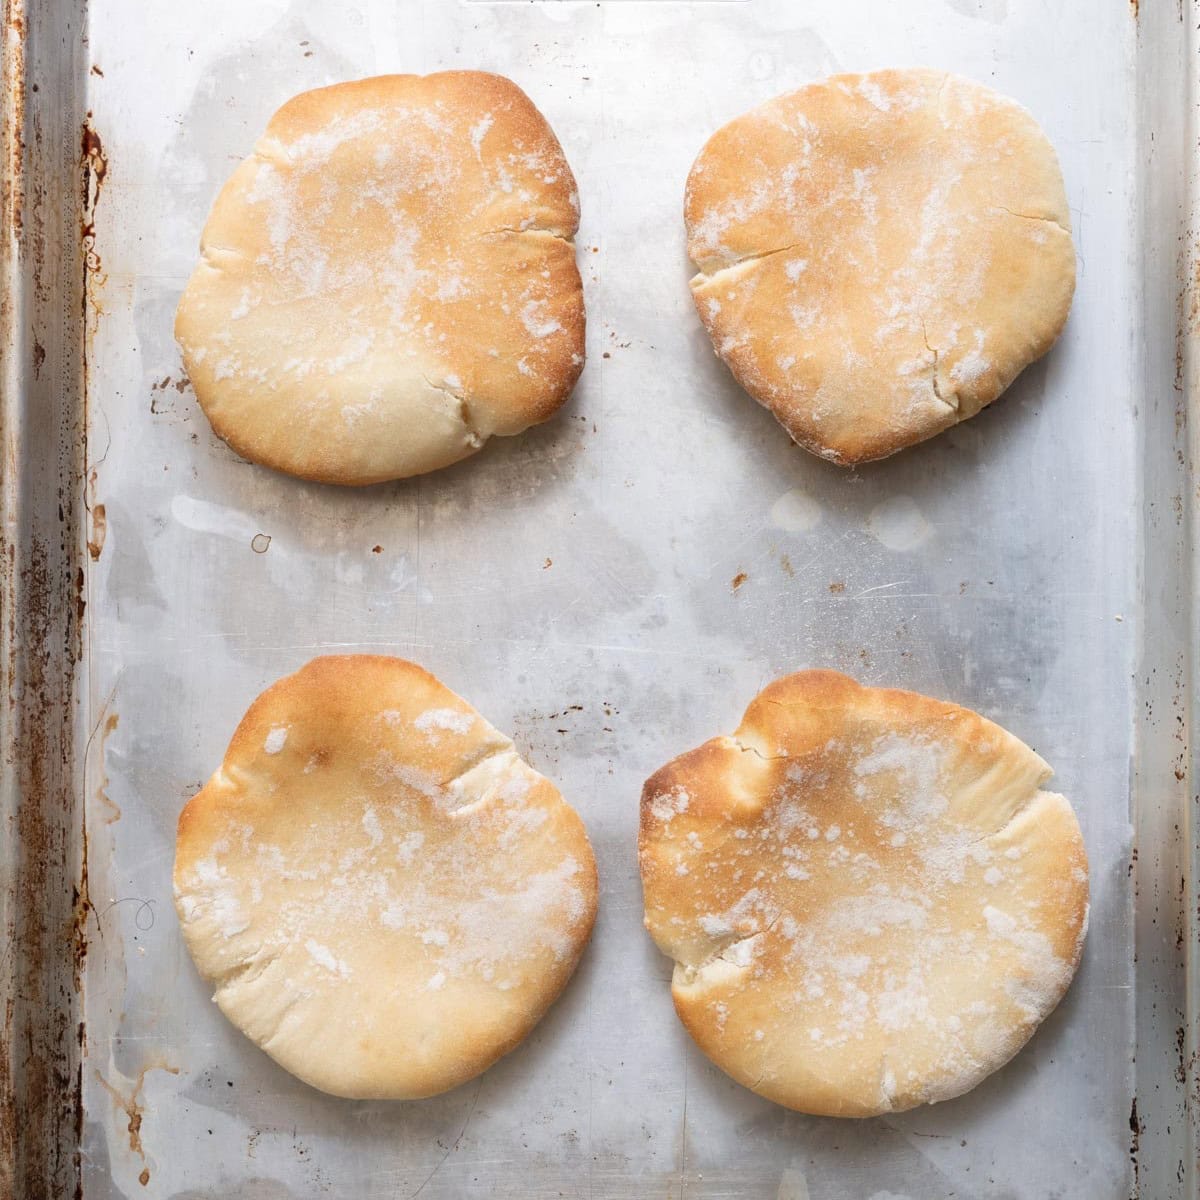
- Flip the rolled out pita onto the heated baking sheet. Bake on the bottom rack of your oven until lightly golden brown and puffed, about 3-5 minutes. Wrap them in a clean kitchen towel as soon as they come out of the oven.
Equipment
Notes
Nutrition
Nutrition information provided is an estimate. It will vary based on cooking method and specific ingredients used.


Comments
Can you freeze these pitta bread? thanks!
Hi Maria, yes, you can freeze pita bread! Just make sure to wrap it tightly in plastic wrap or place it in a zip-top bag and freeze for up to 3 months. When you’re ready to eat it, just thaw out at room temperature or in the fridge.
Made these this morning in a fan oven and they tasted really good! I’m more used to the thinner Lebanese bread where I live but this is a refreshing change.
Yay! So glad you liked them, Abeer!! Thanks!
I made them and it was perfect until I cooked it. What temperature do we cook it? The highest temp of 500F? The recipe never had a different temp to cook it at. I then cooked it at 500 for 5 min and it puffed up nicely but when I took it out, it stayed puffed up and it was hard and never deflated. What did I do wrong? It’s like pita chips now, very crunchy.
The temperature is 550°F (or to the highest temperature it will go) and it’s in the recipe card. You can use the “Jump to Recipe” button to find the recipe card. The instructions also say to bake on the bottom rack of your oven until lightly golden brown and puffed, about 3-5 minutes. So it’s possible the position of the pita affected them but I think the dough seems like it was too dry if it became crunchy. Did you substitute any ingredients in the dough?
I don’t have a stand mixer. Can I hand knead the dough?
Yes, you can! You can use a flat wooden spoon to mix the ingredients, then turn the dough onto a well-floured surface and knead until smooth. It should take you about 10 minutes to do it by hand. Hope that helps!!
Thanks!
Amazing, light and with a delicious pocket.
Yay! Thank you so much!! So happy you like it!
See All Comments