Olive Bread
Updated Mar 14, 2025
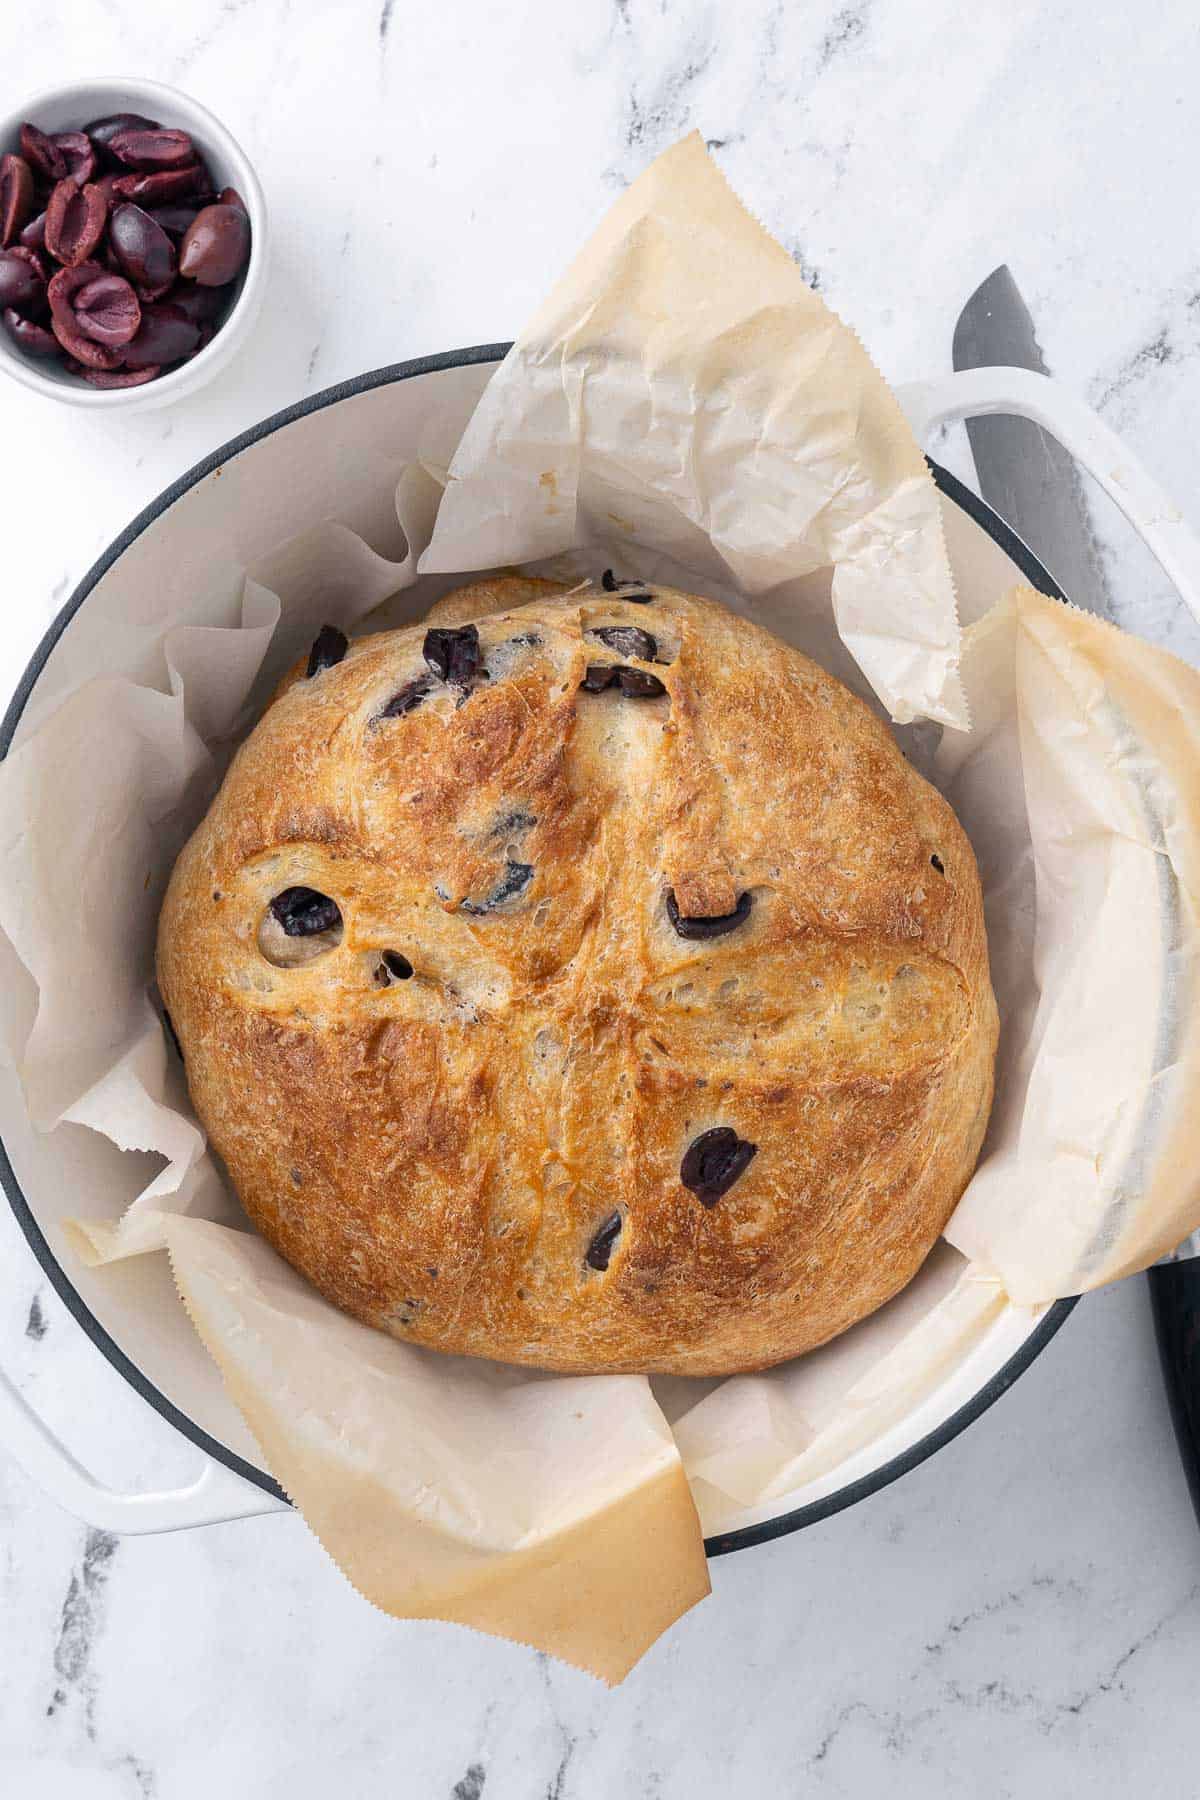
This rustic Mediterranean bread recipe uses kalamata olives and a touch of honey to make an easy, delicious, and beautiful loaf.
This post may contain affiliate links. Please read our disclosure policy.
Kneading dough might just be one of my favorite kitchen therapies, and when it’s olive bread on the menu, the anticipation of that first slice keeps me coming back to this recipe. It’s a simple blend of flour, yeast, water, and olive oil, sweetened just a tad with honey. But the real focus of this olive bread has got to be the kalamata olives! They add a salty, tangy, and briny flavor to the breed, and it is so good!!
Jump to Section
There’s something about the process of making this olive bread that feels almost meditative. You start with basic ingredients, each one humble on its own, but together, they’re about to become something special. The olives, with their bold flavor, are the secret to turning a simple loaf into something different. Every time I fold those kalamata olives into the dough, it’s like I’m weaving a bit of Mediterranean sunshine right into the bread.
Recipe At a Glance
Cuisine Inspiration: Mediterranean
Primary Cooking Method: Oven
Dietary Info: Vegetarian, Dairy Free
Key Flavor: Salty and tangy from kalamata olives
Skill Level: Intermediate
Ingredients to Make Olive Bread
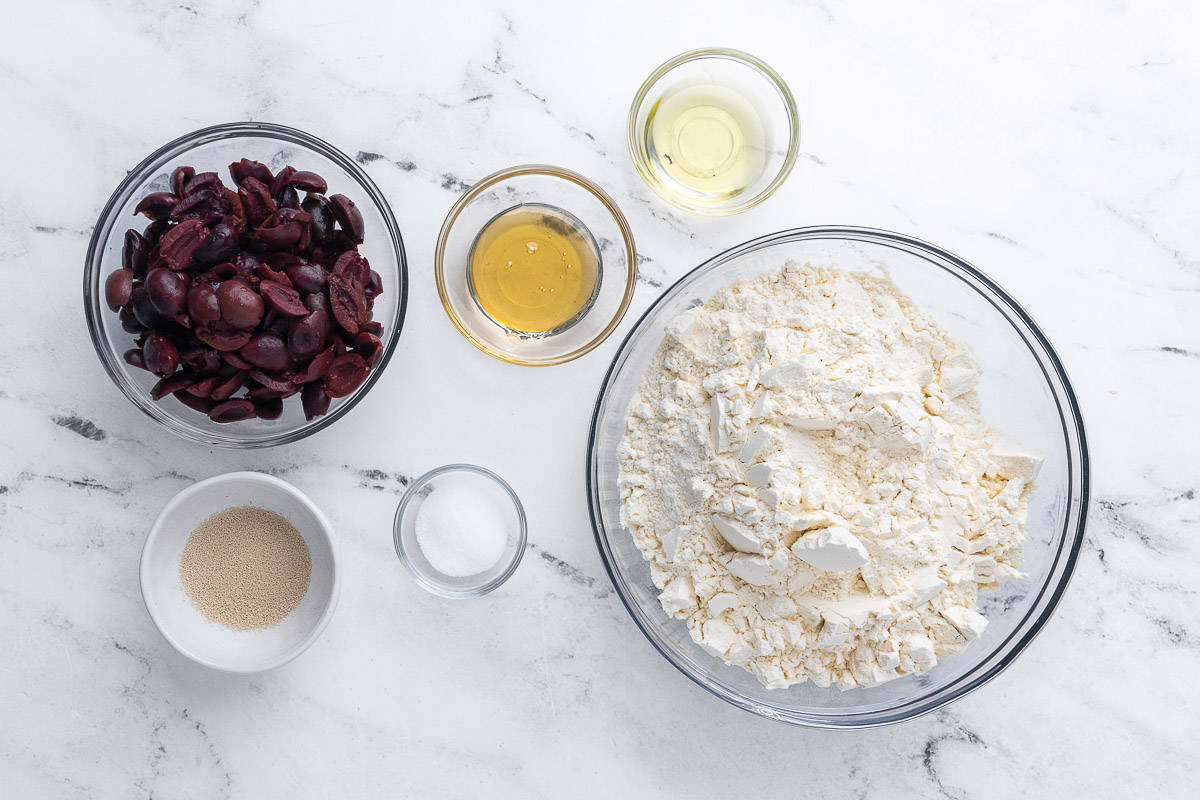
- Bread Flour: The foundation of the bread, providing structure and chew. Bread flour makes for a lighter overall finish than AP.
- Instant Dry Yeast: The leavening agent that helps our bread rise and develop flavor.
- Salt: Enhances the overall flavor of the bread and controls yeast activity.
- Warm Water (110°F): Activates the yeast and hydrates the flour.
- Olive Oil: Adds moisture and a subtle flavor, keeping the crumb tender.
- Honey: A touch of sweetness to balance the saltiness of the olives.
- Kalamata Olives: The key ingredient! Opt for pitted kalamata olives to make your life easier.
- Optional for Serving: Extra olive oil for drizzling and a sprinkle of sea salt for finishing.
Popular Substitutions & Additions
- Yeast options: No instant dry yeast? Active dry yeast can be used instead; just remember to proof it first.
- Olive oil swap: For a different twist, try using infused olive oils, like garlic or rosemary, to add an extra layer of flavor to your bread.
- Sweetener substitute: If honey isn’t your thing or you’re vegan, agave syrup or maple syrup are great alternatives that still provide that slight sweetness.
- Switch out the olives: Don’t limit yourself to kalamata olives! Feel free to mix in green olives, black olives, or a combination thereof for a more complex flavor profile.
- Add-Ins: For an additional flavor boost, consider incorporating sun-dried tomatoes, roasted garlic, or fresh herbs like rosemary or thyme into the dough.
- Seeds for Texture: Sprinkle the top of your dough with sesame or poppy seeds before baking for a crunch and visual appeal.
How to Make Olive Bread
Bread always seems to intimidate people when it comes to the idea of making it from scratch. It’s actually super easy and a great way to get a fresh baked loaf on the table the same day you make it. This olive bread is a simple way to add a little something special to any meal.
Make the Dough
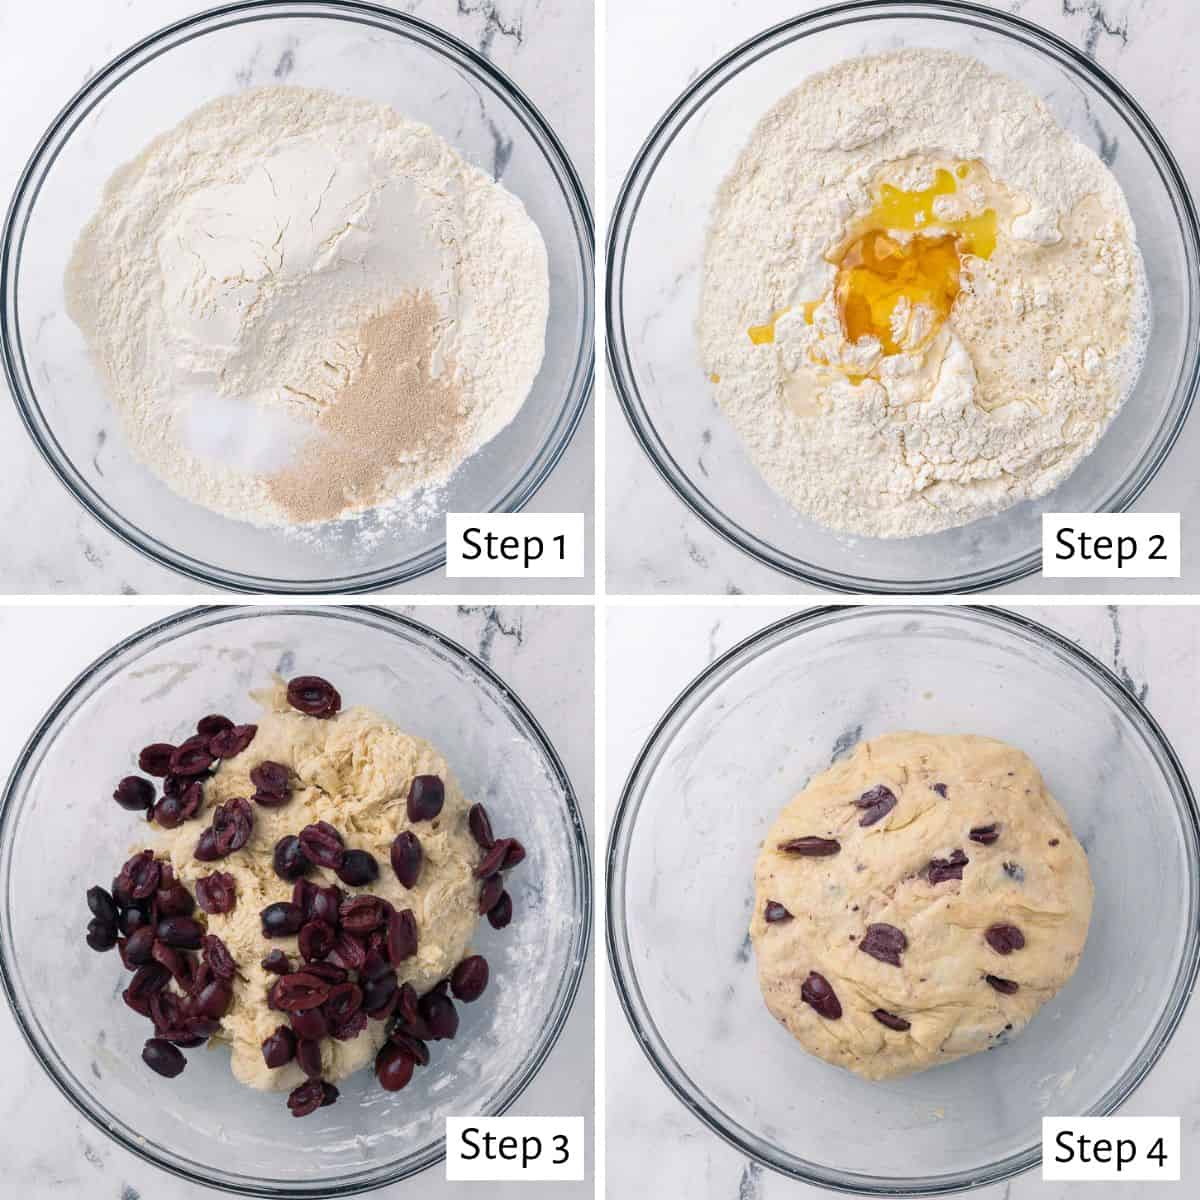
- In a large bowl, combine bread flour, yeast, salt.
- Add the warm water, olive oil, and honey.
- Use a rubber spatula or wooden spoon to combine until a slightly shaggy, sticky dough forms. Sprinkle in the chopped olives.
- Fold the dough together until the olives are incorporated throughout.
Allow the Dough to Rise
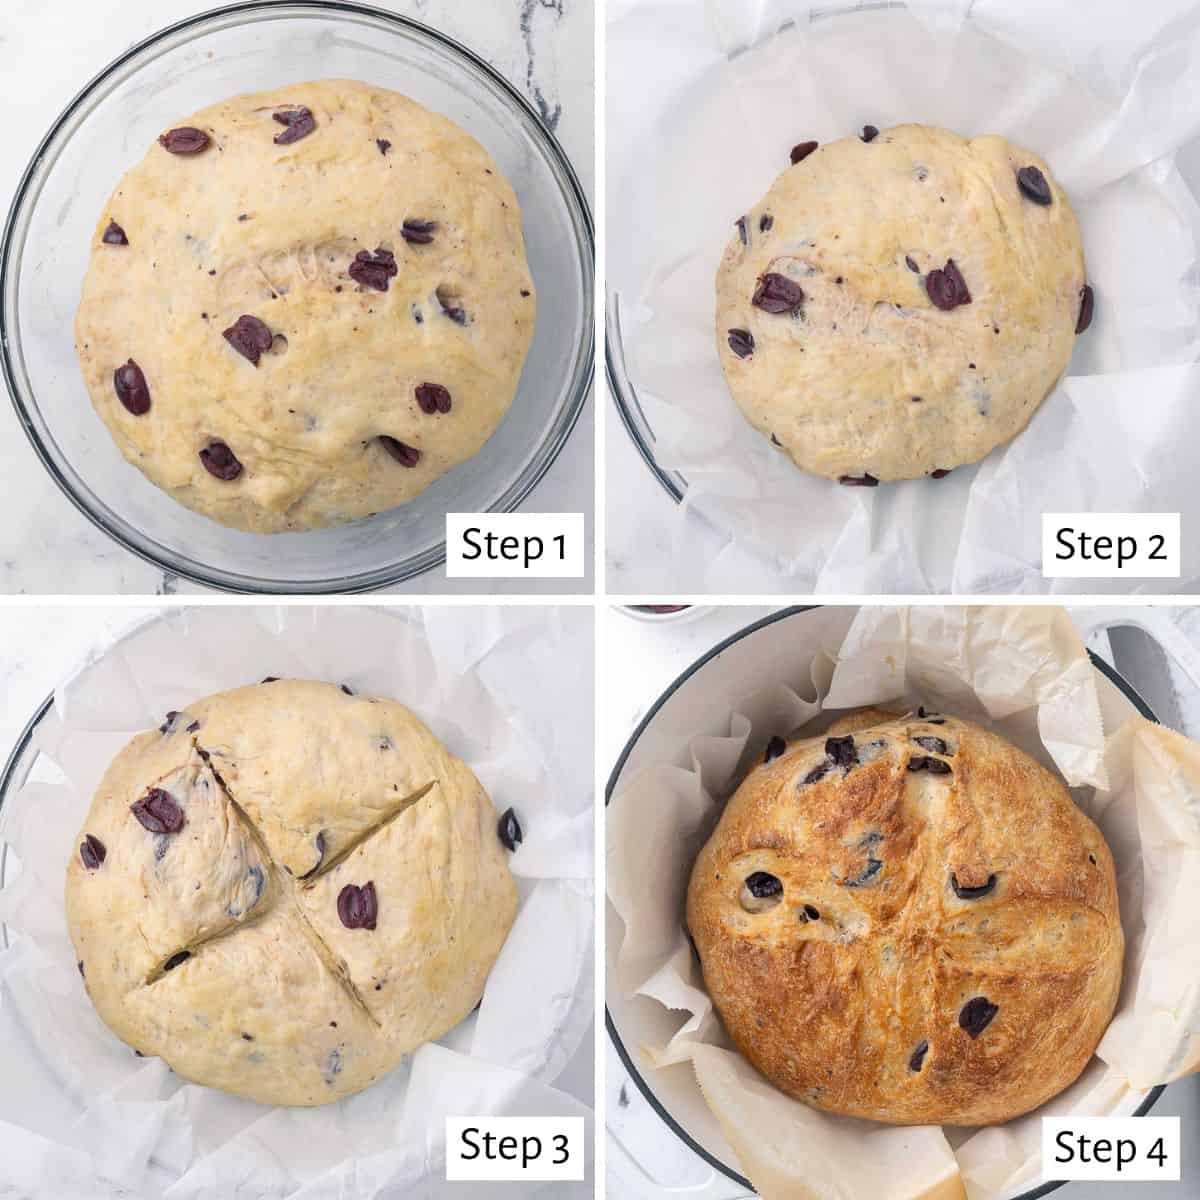
- Cover with a kitchen towel or plastic wrap and allow it to rise in a warm area until doubled in size.
- Shape the risen dough into a smooth ball by folding the dough under itself in the bowl. Transfer the shaped dough to the parchment paper. Cover and let it rise again.
- After rising, use a sharp knife to make a deep crosshatch cut on top of the dough. Carefully transfer the parchment paper and dough into the hot Dutch oven.
- Cover and bake until the bread is browned and crisp.
Tips for Making the Best Kalamata Olive Bread
- Use High-Quality Olives: The Kalamata Olives? They’re not just another ingredient; they’re what’s going to make your bread pop. Make sure they’re high-quality, give them a quick rinse, and pat dry to get rid of any extra saltiness that might overwhelm the flavor.
- First Rise Patience: Give the dough ample time to rise in a warm, draft-free spot until it’s doubled in size. The first rise is crucial for developing flavor and texture.
- Shaping the Dough: Gently shape the dough (you don’t want to squeeze it extra tight and undo all those air bubbles from the rise) into a round or loaf shape, trying to keep as much air in the dough as possible. This will help create a lighter bread texture.
- Slash the Top: Before baking, slash the top of the loaf a few times with a sharp knife. This helps the bread expand beautifully as it bakes.
- Cool Before Slicing: Allow the bread to cool on a wire rack before slicing. Cutting into hot bread can cause the inside to become gummy. I know it’s hard to resist that fresh baked bread smell when it’s hot out of the oven but it really does make a difference on the texture when you cut into it early.
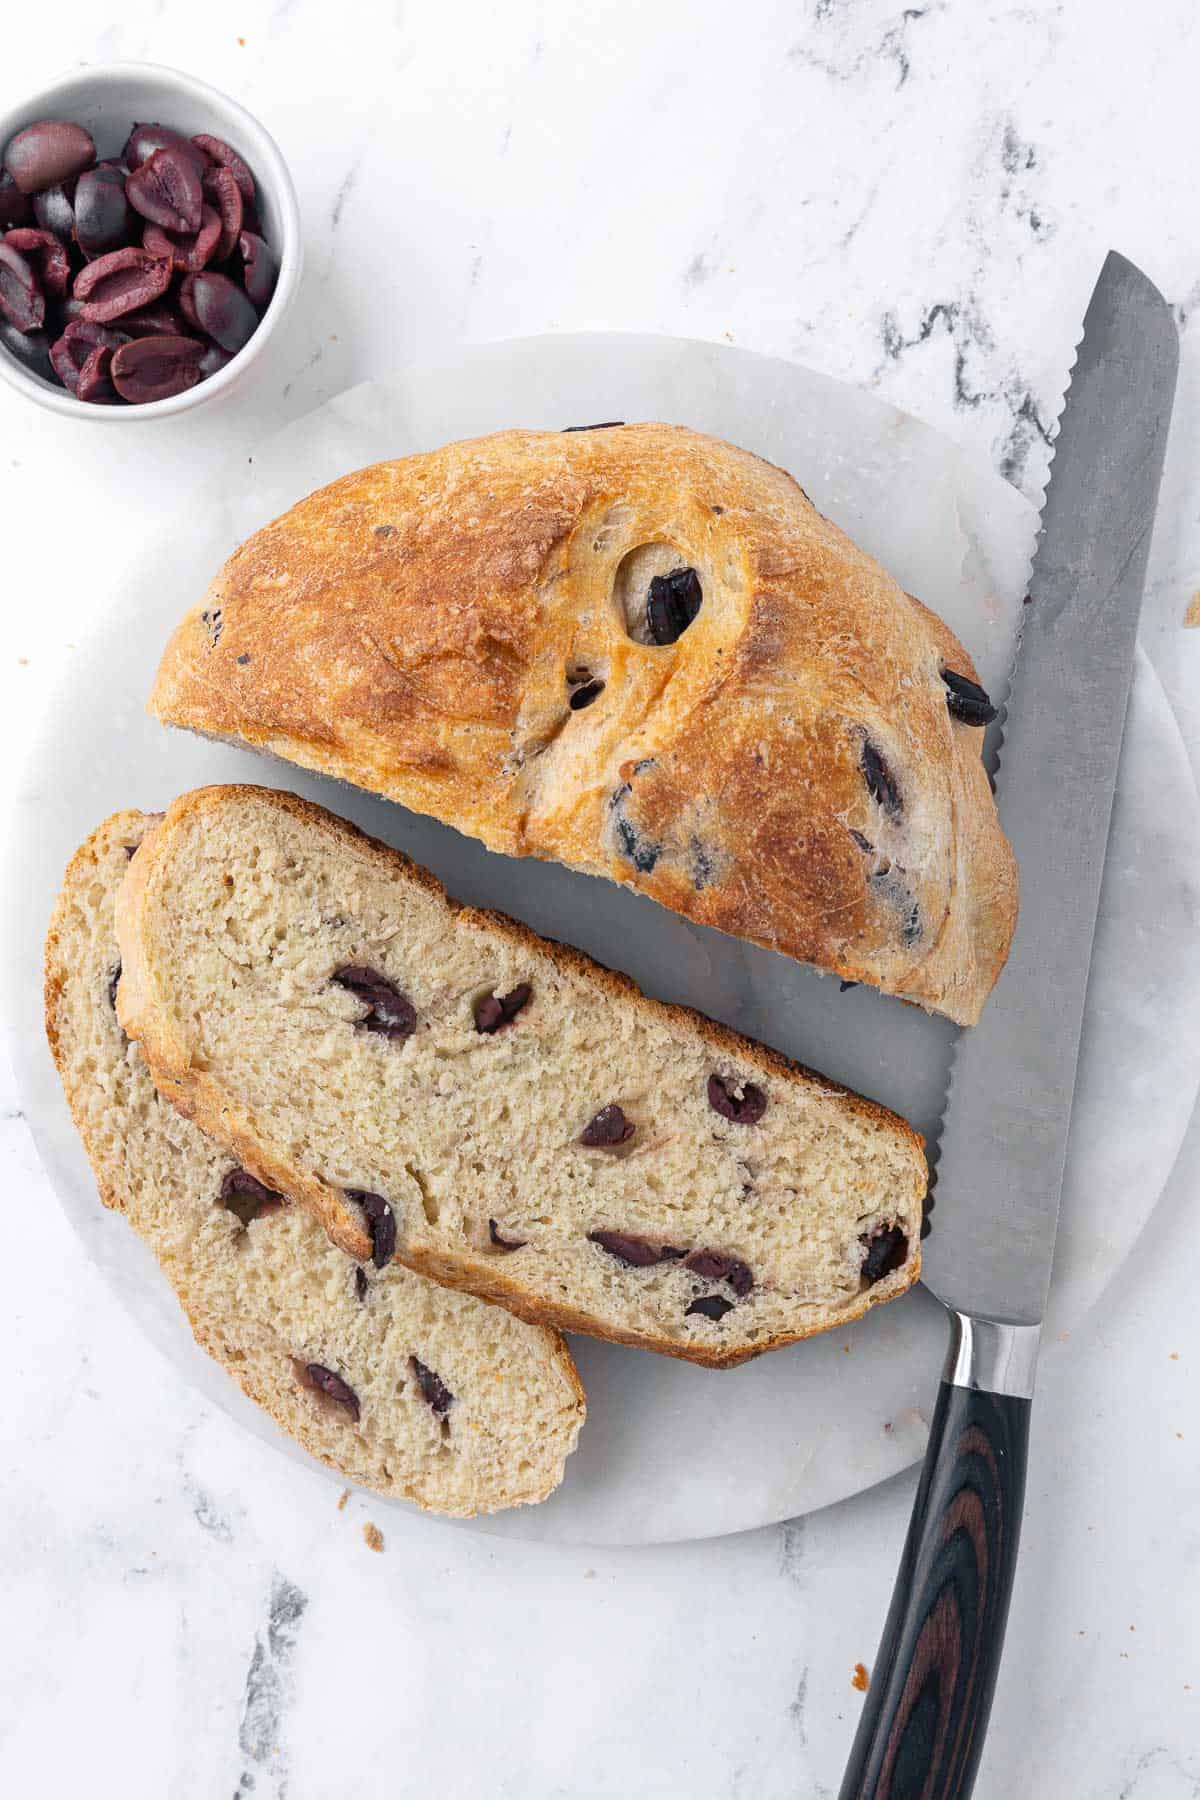
What to Serve With Mediterranean Olive Bread
- Homemade Muhammara Dip
- Quinoa and Vegetable Hummus Bowl
- Stuffed Chicken Breasts
- Mediterranean Mezze Platter
How to Store & Reheat Kalamata Olive Bread
Storing and reheating this Kalamata Olive Bread is easy. Just wrap it up tightly in plastic wrap or keep it in an airtight container to maintain its freshness. When you’re ready to bring back that just-baked warmth, pop it in the oven at 350°F for about 5-10 minutes. If you’ve sliced it already, a toaster works for getting those pieces nice and crispy again.
Can I Freeze Kalamata Olive Bread?
Absolutely, you can freeze it! Wrap the whole loaf or individual slices in plastic wrap, then tuck into a freezer bag. It’ll keep in the freezer for up to 3 months.
You can also freeze the dough before baking. It’s a fantastic way to have fresh bread ready whenever you want it. After you’ve mixed your dough and added olives, shape it into a ball and wrap it tightly in plastic wrap. Then, slip it into a freezer bag. When you’re in the mood for fresh olive bread, just thaw your dough in the fridge overnight, then follow your usual steps for the final rise and bake.
Frequently Asked Questions
Yes, you can, but bread flour gives the bread a chewier texture due to its higher protein content. If you use all-purpose flour, your bread might be a bit softer and less chewy, but it’ll still be delicious.
The bread should have a golden-brown crust, and when tapped on the bottom, it should sound hollow. An instant-read thermometer inserted into the center should read 190°F to 200°F.
Dense bread can result from not letting the dough rise enough or kneading it too much, which can make the gluten too tight and prevent the bread from rising properly. Ensure your dough has a warm, draft-free place to rise and try to handle it gently.
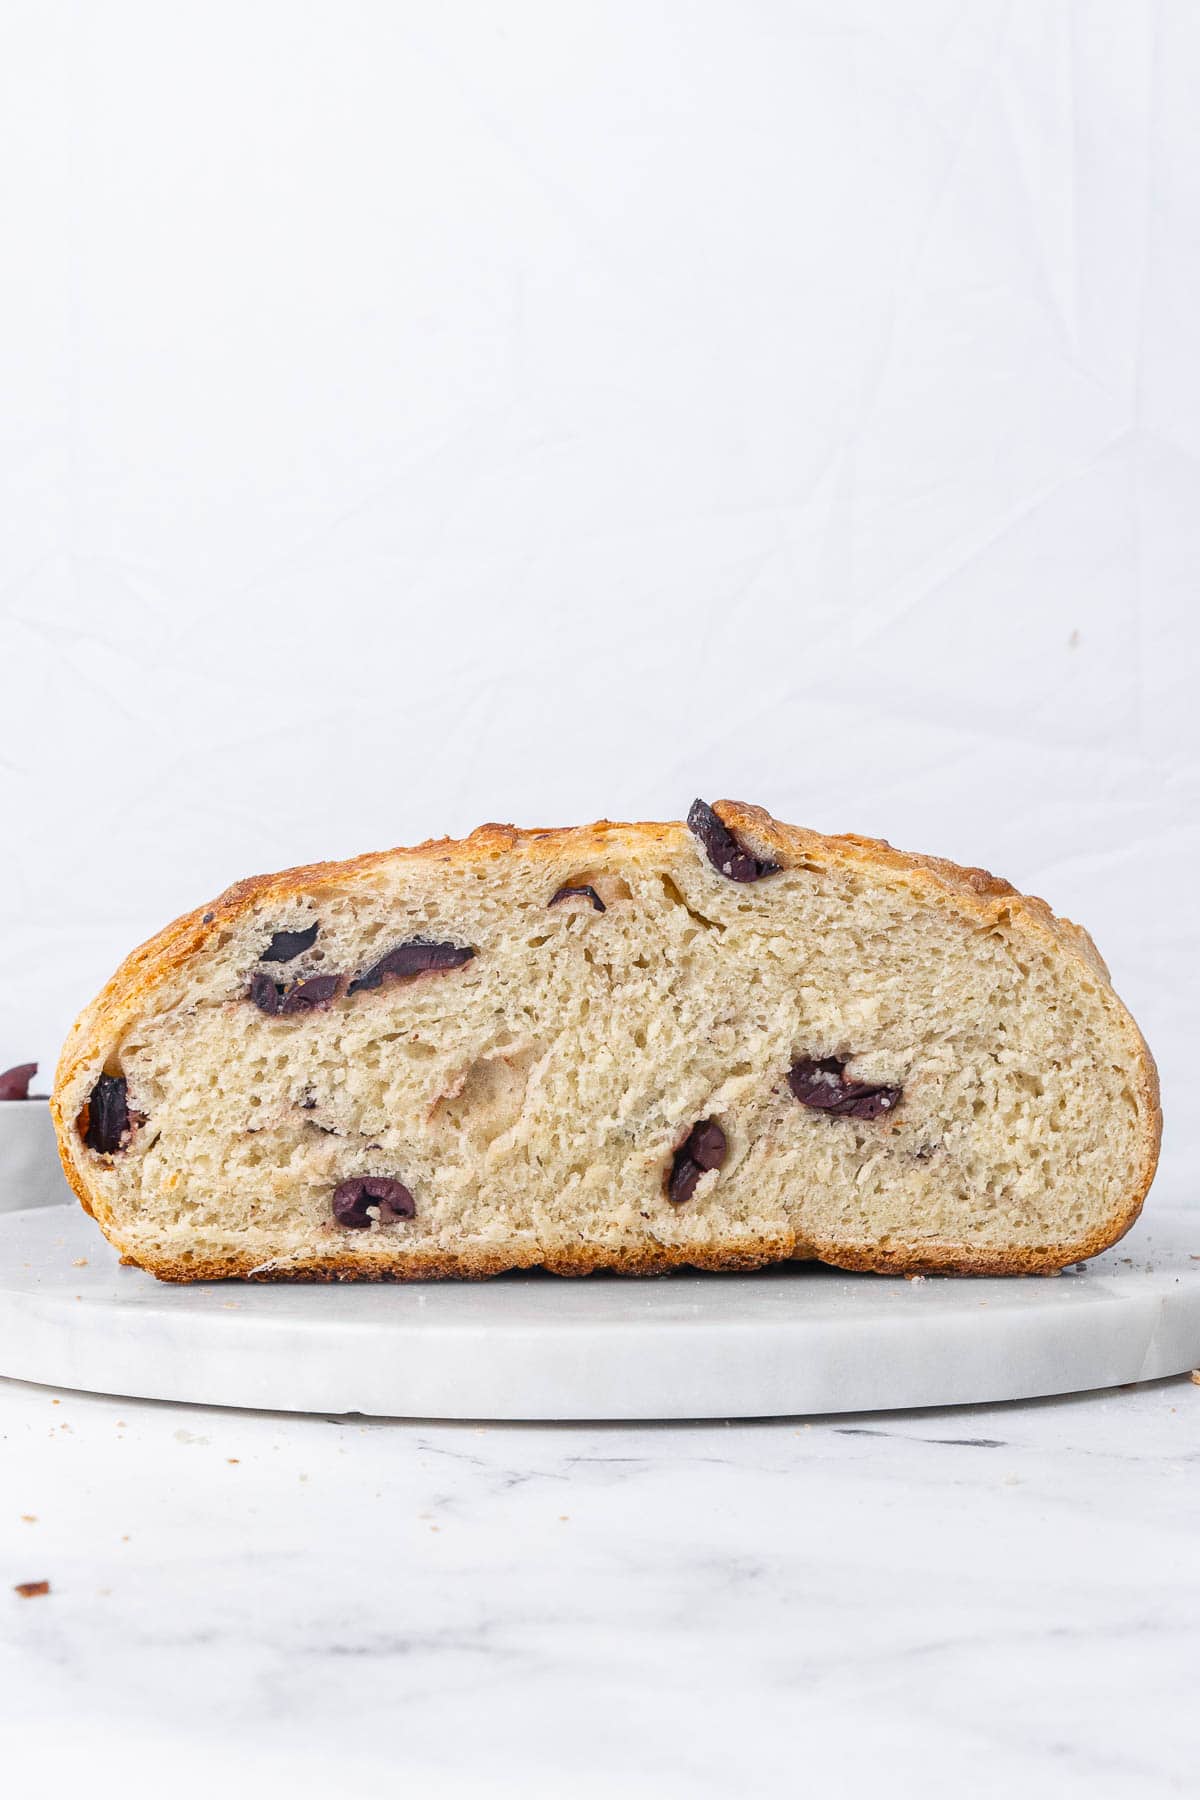
If you love kalamata olives and bread like me then combining the two is only natural! This olive bread is flavorful and so good!
More Bread Recipes:
- French Dinner Rolls
- Rosemary Sea Salt Focaccia
- Fresh Baked Pita Bread
- Cast Iron Skillet Dinner Rolls
- Cheesy Garlic Bread
- No-Knead Garlic Knots
- Traditional Cheesy Manakeesh
- Easy Homemade Bagels
If you try this feel good Olive Bread recipe or any other recipe on Feel Good Foodie, then don’t forget to rate the recipe and leave a comment below! It helps others who are thinking of making the recipe. We would love to hear about your experience making it. And if you snapped some shots, share it on Instagram so we can repost on Stories!

Olive Bread
Video
Ingredients
- 3 ½ cups bread flour
- 2 ¼ teaspoons (1 packet) instant yeast
- 1 teaspoon salt
- 1 ½ cups warm water (110°F)
- 1 tablespoon olive oil plus extra for coating bowl
- 2 teaspoons honey
- 1 cup (1 jar) kalamata olives chopped, drained, and dried well
Instructions
- In a large bowl, combine bread flour, yeast, salt, warm water, olive oil, and honey. Use a rubber spatula or wooden spoon to combine until a slightly shaggy, sticky dough forms. Sprinkle in the chopped olives and lightly flour your hands to fold the dough together until the olives are incorporated throughout.
- Set the dough aside, wipe the bowl, and then lightly coat it with oil before returning the dough. Cover with a kitchen towel or plastic wrap and allow it to rise in a warm area until doubled in size, about 35-40 minutes.
- Prepare a piece of parchment paper large enough to lift the bread in and out of the Dutch oven in a clean bowl. Lightly dust your hands with flour and shape the risen dough into a smooth ball by folding the dough under itself in the bowl. Transfer the shaped dough to the parchment paper. Cover and let it rise again for about 15 minutes.
- During the second rise, preheat the oven to 450°F and place the Dutch oven on a lower rack to heat up.
- After rising, use a sharp knife to make a ½-inch deep crosshatch cut on top of the dough. Carefully transfer the parchment paper and dough into the hot Dutch oven. Cover and bake for 30 minutes. Remove the lid, and continue baking uncovered for an additional 15-20 minutes until the bread is browned and crisp. Remove from the oven and use the parchment paper to lift the loaf out of the Dutch oven to a cooling rack. Allow it to cool for 45 minutes before slicing.
Nutrition
Nutrition information provided is an estimate. It will vary based on cooking method and specific ingredients used.


Comments
It’s a new favorite in our house. I bought a new Dutch oven. This (and some other new recipes) are a hit. This is a simple, but delicious bread. I see a lot of comments asking about adding more flour. Yes! If you feel you need it. Coat your hands too! I have been liberal with the flour to get the best bread texture. Parchment paper makes it easier to transfer, etc. But I ran short one day and had no issue baking, fwiw. I’ve got a sunflower bread in mind next. Thanks.
Awesome!! So glad you and your family love it, Steve! Thank you!!
I made this recipe and it came out great! Only comment would be add a bit more flour at the start.
Yay, so happy you liked it!! Thank you, Christopher!
Hi, what if my dough came out too wet and sticky? Is it okay to add more flour?
I would try adding a little more flour, but just enough to make it easier to knead. Too much might affect the bake. Please let me know how it turns out!
OMG! This rates up there with the best bread I have ever had! As a bonus, my husband is Greek, and he absolutely loves this bread. We could not stop eating it – just had to keep going back for one more piece 🙂 delicious! Try it! Thank you for a great recipe.
Yay, thank you!
Made this yesterday because I got inspired from the email sent out. Looked so easy AND IT WAS!!! I had all the ingredients except for olives so I just ended up omitting and making a white bread. And the dutch oven is the game changer 🙂 The bottom crust turned out so crispy and good! We had it for our spaghetti dinner and it was the perfect accompaniment!
I did use my bread proofing function of my oven which was nice. And of note I didn’t have parchment paper but just plunked it down into the dutch oven with my hands. It worked!
What if I don’t have a Dutch oven? What type of baking pan would I use? Or will it not work?
A heavy duty oven safe pan with an oven safe lid will work.
I don’t have a pan with a cover for the oven can I just put it on a baking sheet and cook it?
Technically, yes. You will need a way to create steam in the oven though and results will differ. I haven’t tested it this way, but usually adding a metal baking pan or cast iron skillet on the bottom rack with water should work. The bread will also spread more on a baking sheet since a Dutch oven helps keep a round loaf but overall, the bread taste and crumb should remain the same. Let me know how it turns out if you end up trying it!
I’d like to make this gluten-free would using gluten-free bread flour work
What if I don’t have a Dutch oven? Can I use a baking pan?