How to Make Jam
Updated Nov 21, 2025
A simple guide for how to make jam from scratch with fresh fruit, no pectin needed, ready in about 20 minutes, and perfect for storing in the fridge.
This post may contain affiliate links. Please read our disclosure policy.
Jump to Section
MAKE JAM AT HOME WITH FRESH FRUIT!

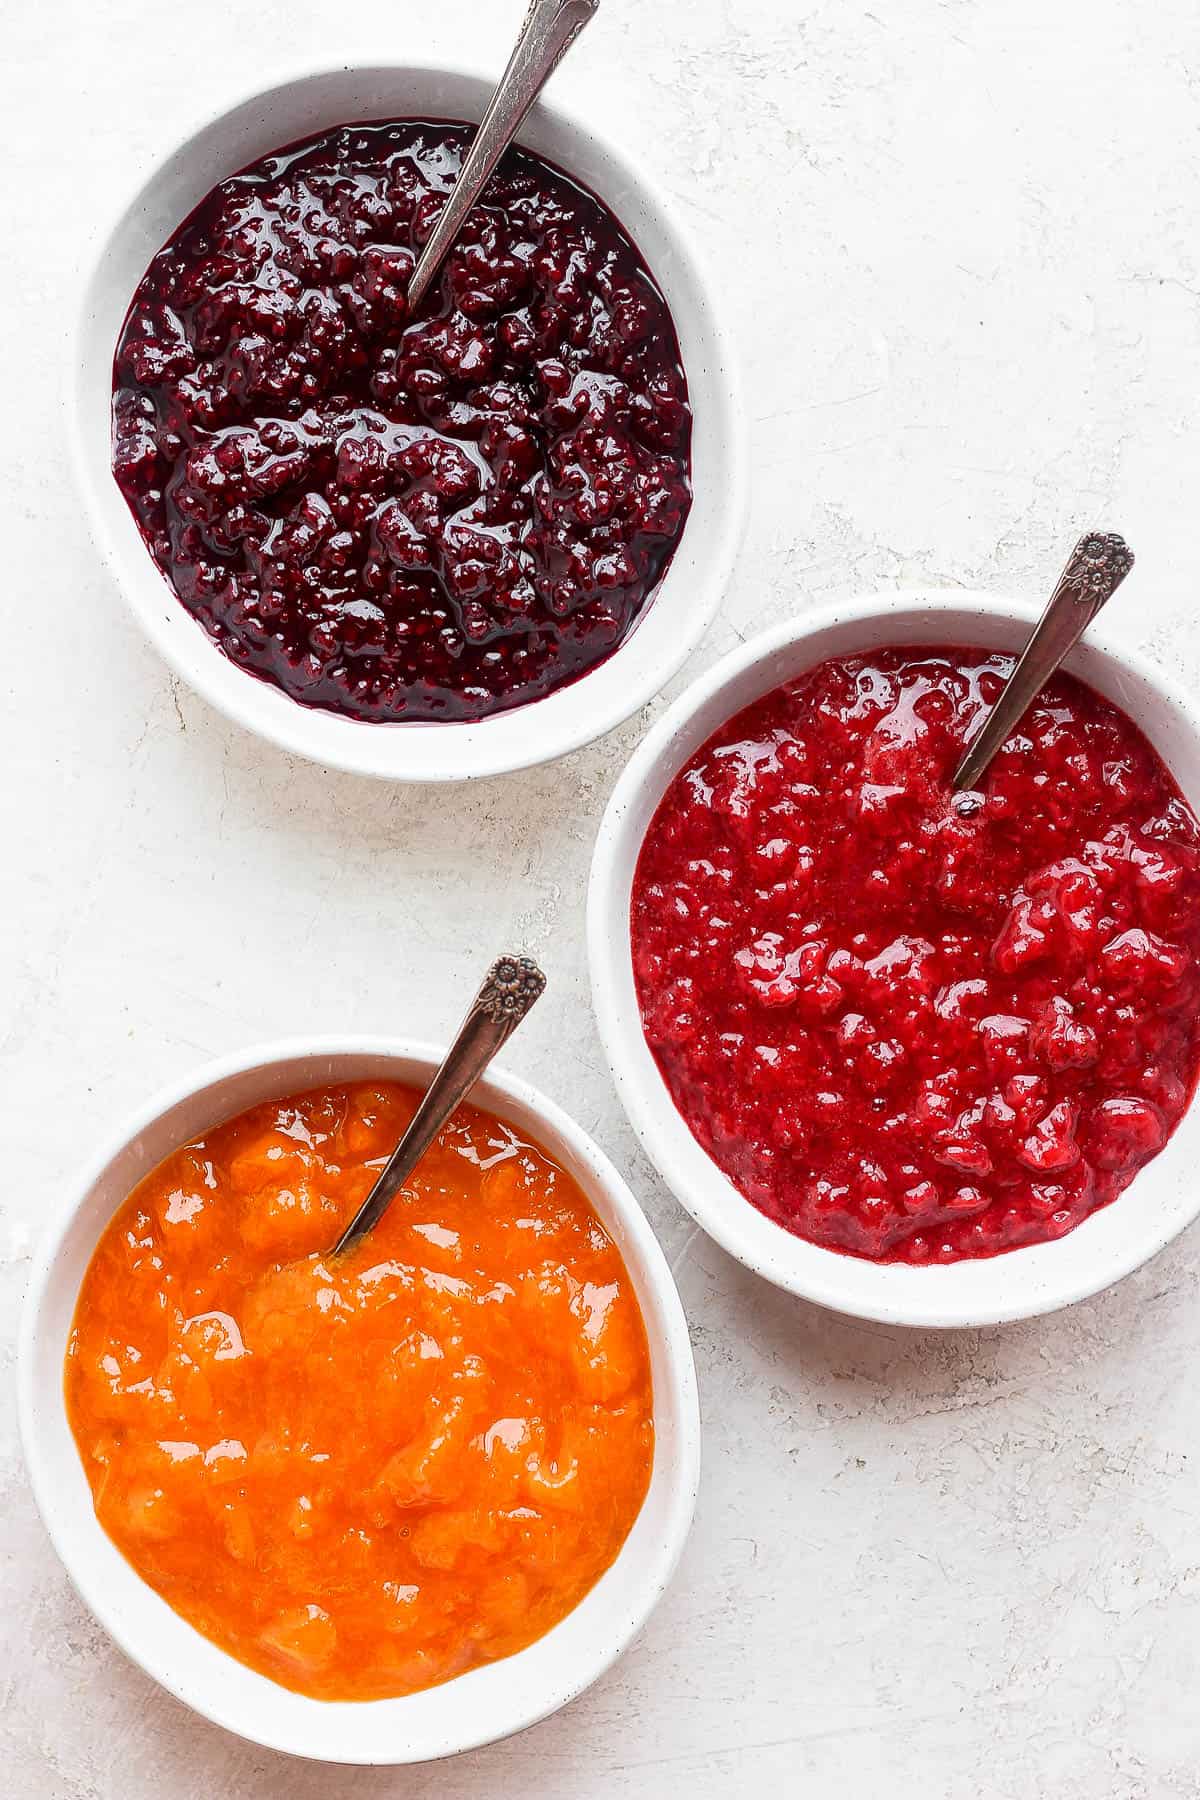
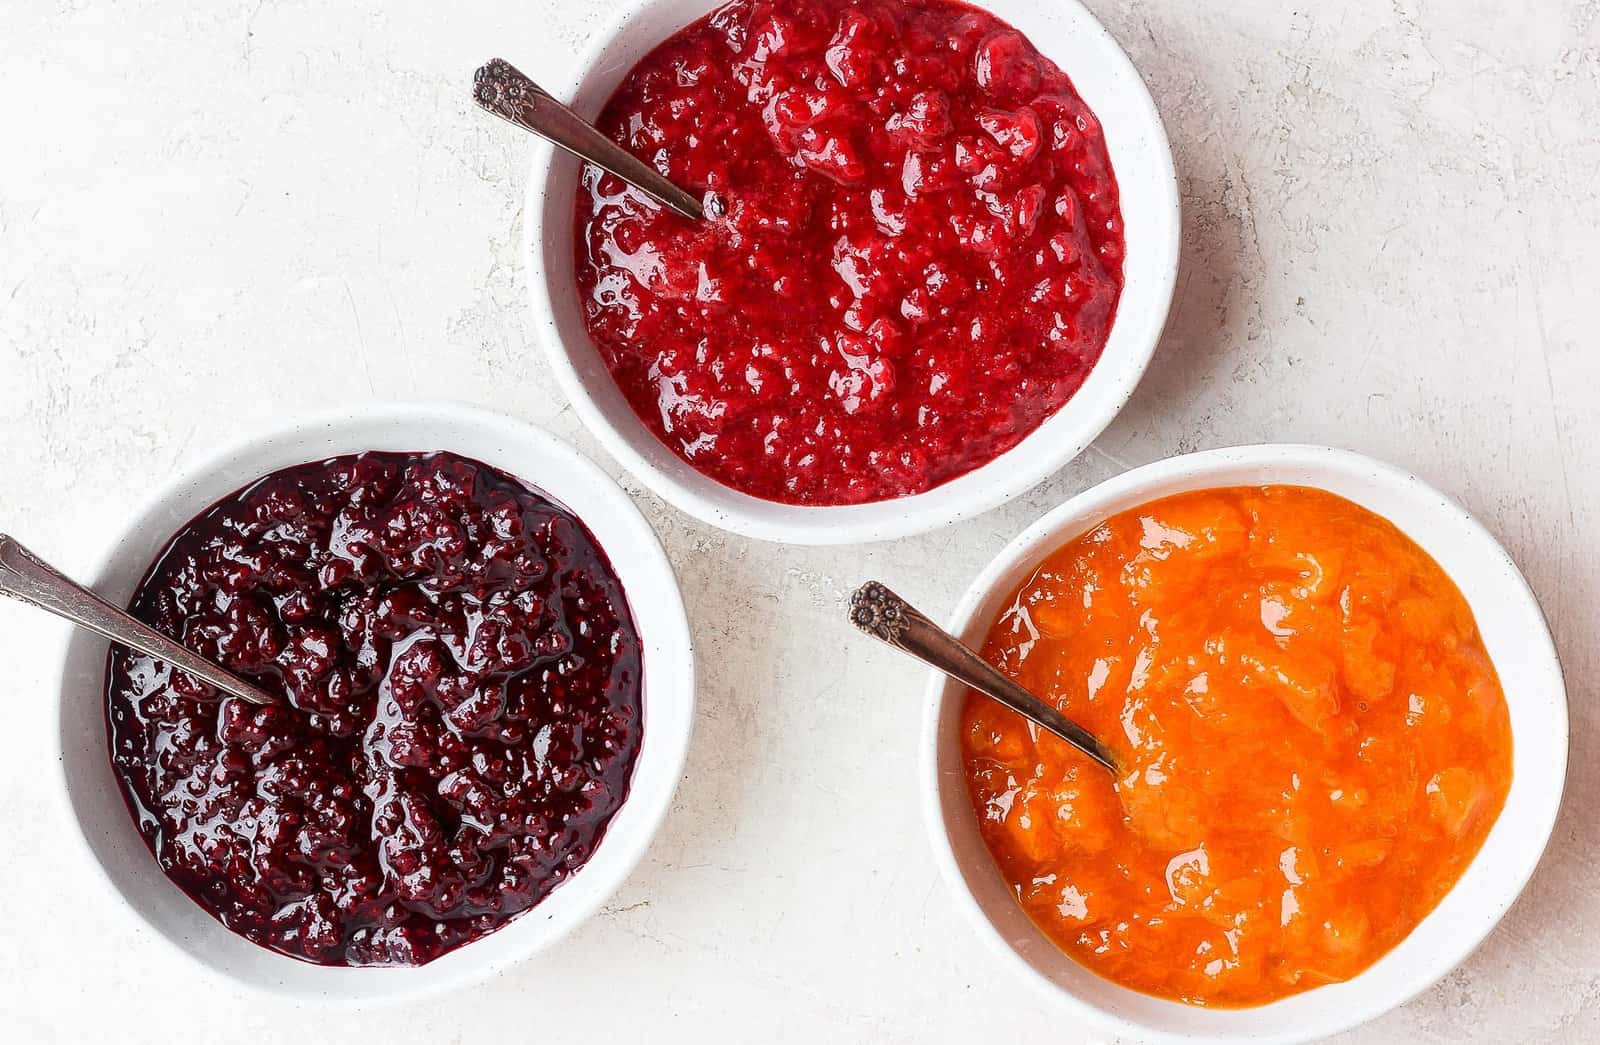
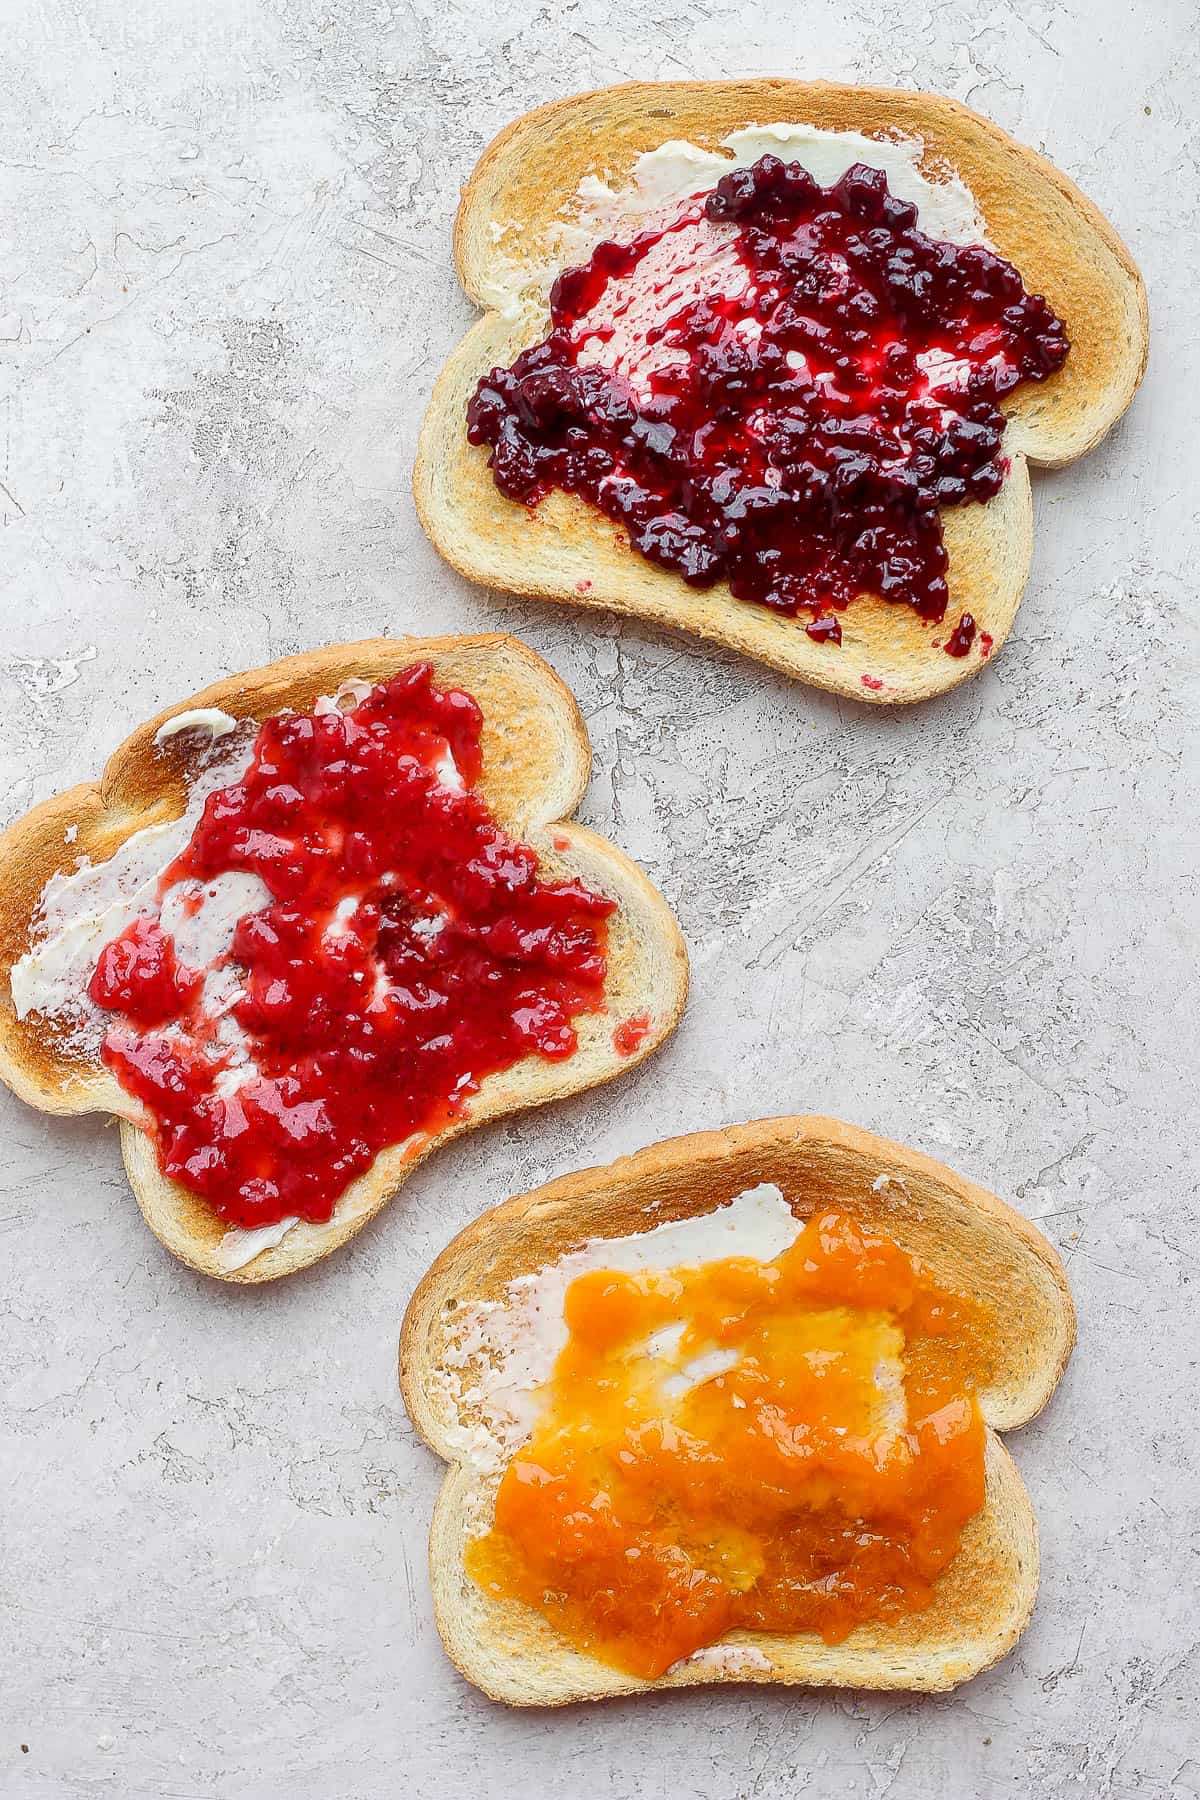
I started learning how to make jam when I kept buying fruit and letting it sit too long in the fridge. It turns out it’s way easier than I thought, just fruit, sugar, and lemon juice cooked down until it thickens. Knowing how to make jam at home means I can use whatever fruit I have, whether it’s fresh, a mix of odds and ends, or even frozen. I usually make small batches like this so it’s quick, and it lasts a few weeks in the fridge, which is perfect for toast, cottage cheese bowls, or spooning over desserts, like no-churn ice cream.
Happy Cooking!
– Yumna
Recipe Video Tutorial
How to Make Jam with Fresh Fruit

Test the Jam and Store


How to Make Jam
Video
Ingredients
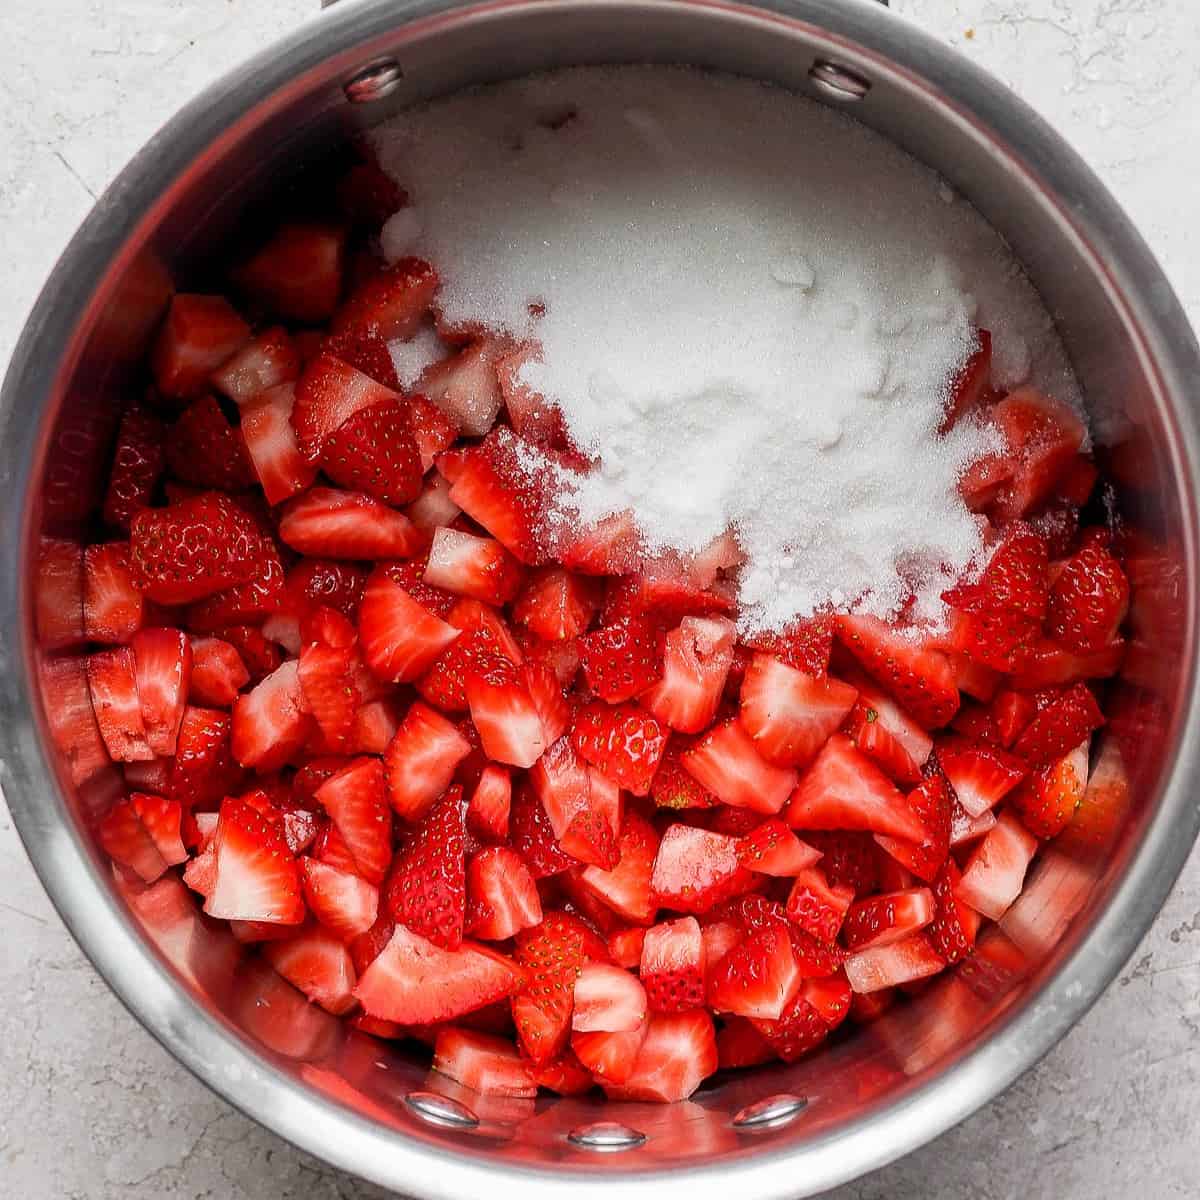
- 1 pound fruit chopped (strawberries, apricots, blackberries, etc.) (about 5 cups)
- ¾ cup granulated sugar
- 3 tablespoons lemon juice
Instructions
- Place 3 small plates in the freezer to use later for testing the jam.
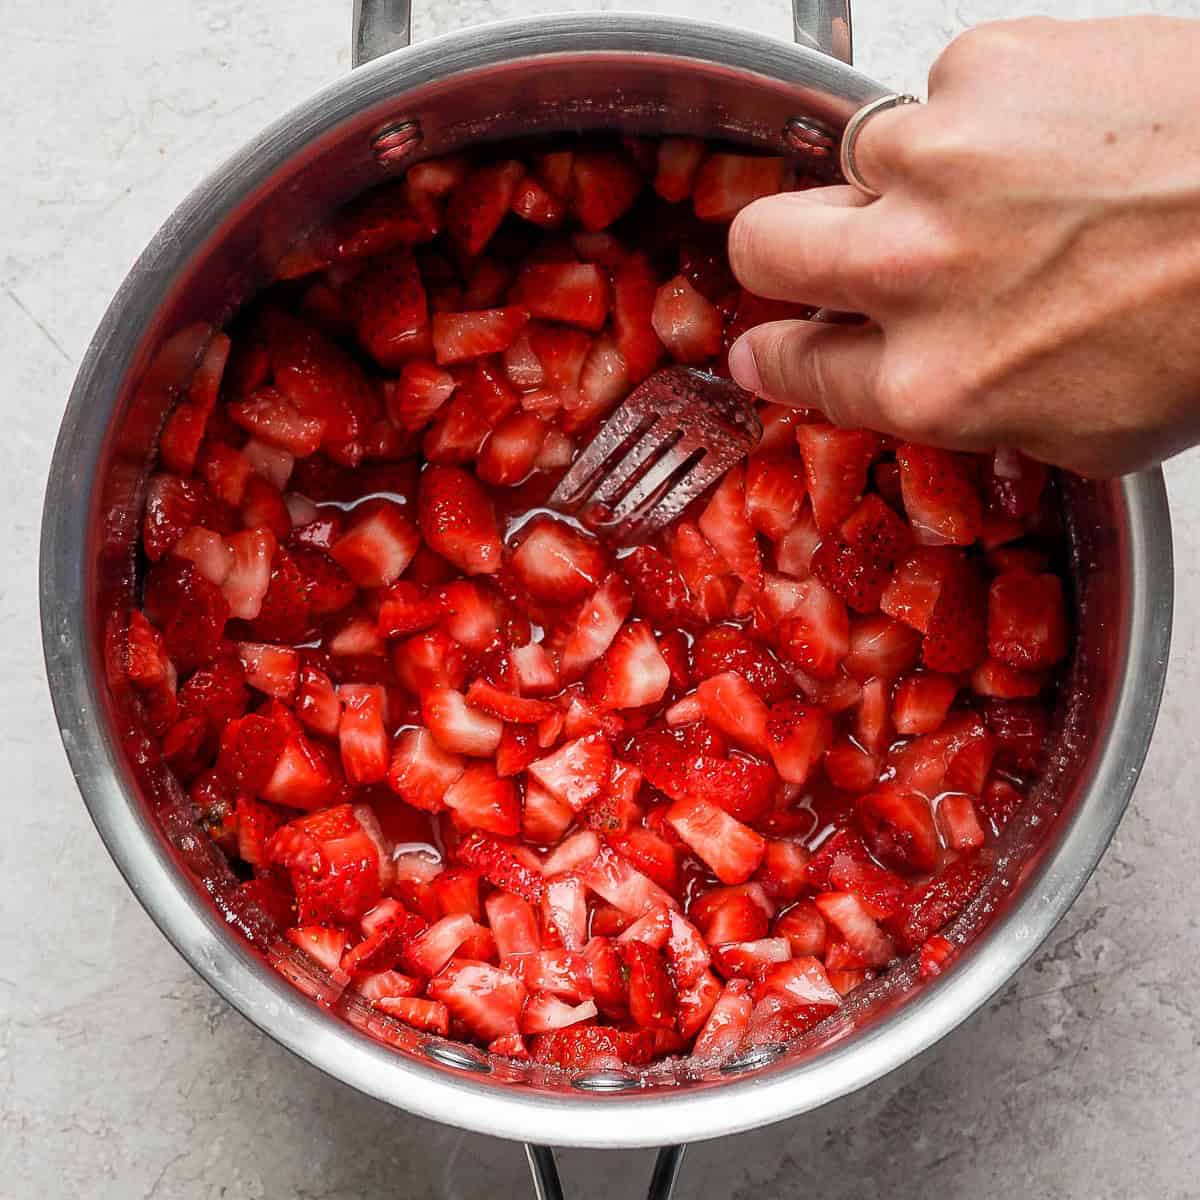
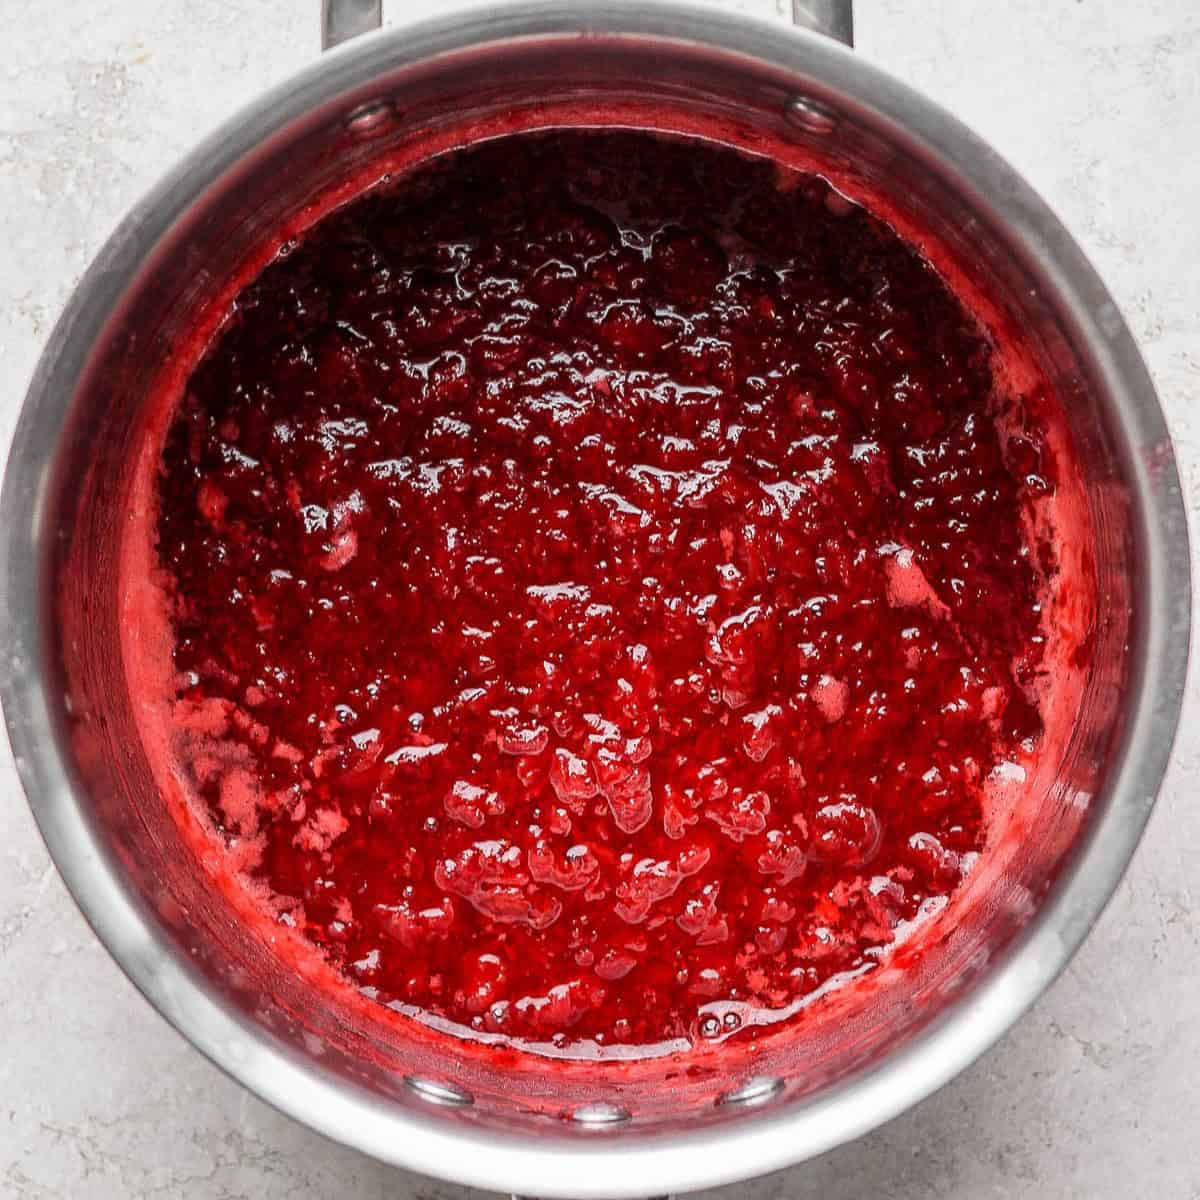
- Combine the fruit, sugar and lemon juice in a non-reactive heavy bottomed saucepan over medium heat. Mash the fruit with a potato masher or large fork to help break it down.
- Once the sugar has dissolved, turn the heat up to high and cook until thickened, stirring frequently, about 15-20 minutes.
- To check for doneness, drop a small amount of jam onto a small frozen plate. Let cool for a moment, then run a spoon or finger through the jam. If you can draw a line with clean edges that don’t drip, then it is ready. If it runs back together, then cook for a few more minutes.
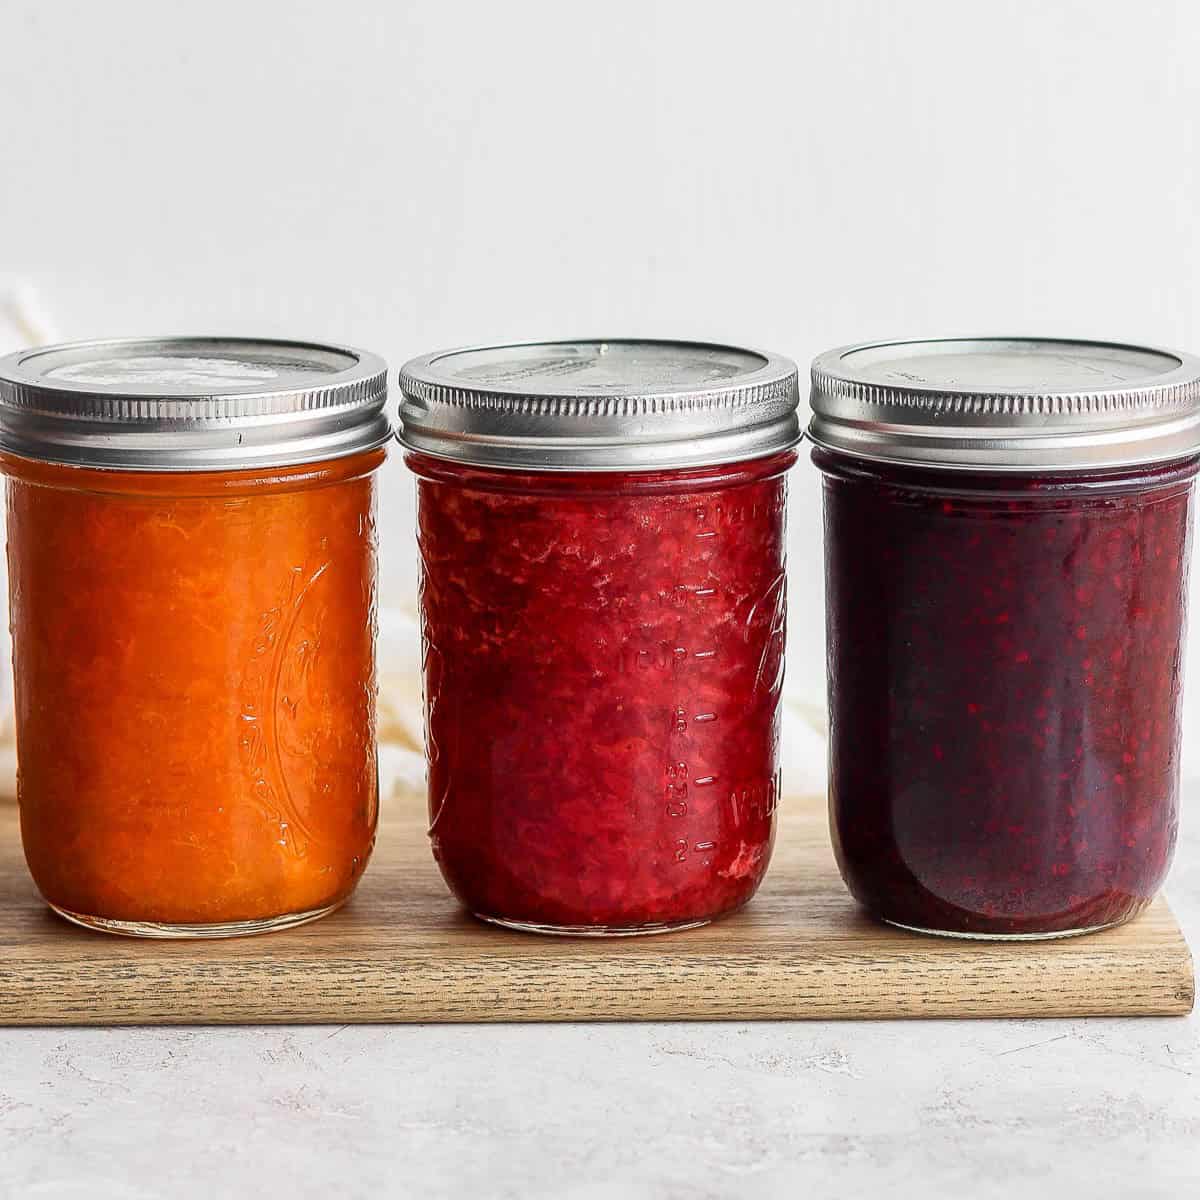
- Turn off the heat and transfer the jam into 2 clean 8-ounce mason jars. Cool the mixture, then store in the refrigerator for up to 3 weeks.
Equipment
Notes
- My Top Tip: Allow the sugar and fruit to sit overnight. This helps to extract the natural pectin in the fruit, which will help the jam set up once cooked. It will also allow you to cook the jam for less time since the overnight rest will draw a lot of the moisture out of the fruit, something that usually takes place while cooking.
- Storage: Store the homemade jam in a tightly lidded container in the refrigerator. This homemade jam will last for at least 3 weeks in the refrigerator.
- Freezing: Leave room (at least ¼ inch- ½ inch) for expansion at the top of your mason jars and make sure your jars are freezer safe, so they do not crack. Frozen jam is best used within six months.
Nutrition
Nutrition information provided is an estimate. It will vary based on cooking method and specific ingredients used.
Recipe Tips
- Test early and often. Test early so you do not overcook. The mixture can become overly jelled, or the sugar could potentially caramelize.
- Double-check with another test: You can also use an instant-read or candy thermometer to check the jam’s temperature. It gels around the range of 217° – 220° – depending on the recipe. If you live at a high altitude, add 8 degrees above the boiling point of water in your area to find the gelling point. There is also the sheet test, where the finished jam should drip off a spoon onto a sheet, not in individual droplets.
- Use nice fruit, not too ripe. Fruit is the centerpiece of jam. A bland or sour-tasting batch of fruit will not yield yummy jam. Also, overripe fruit has lost a lot of its pectin (the natural chemical that helps it gel) and does not work as well as slightly underripe fruit.
- Use a wide pan. It will allow for more surface area which means the jam will cook down faster, which helps preserve flavor and prevents the sugar from caramelizing.
Recipes to Make with Easy Small-Batch Jam
- In a homemade cookie like my Thumbprint Cookies or my Ghraybeh Cookies
- Or enjoy it in one of these breakfast recipes like Homemade Pop-Tarts or Stuffed French Toast
- Lastly, use it to top your favorite toast. I like it swirled into this Cottage Cheese Toast for sweet take on the recipe.
FAQs
A non-reactive pan is one made from materials like stainless steel, enamel, or glass that don’t react with acidic foods. It matters in jam making because fruit and lemon juice are acidic. In a reactive pan (like aluminum, copper, or unlined cast iron), the acid can cause off-flavors, discolor the jam, and even damage the pan.
You do not need to sterilize jars and lids when making refrigerator jams because the jars and lids are not being prepared for long-term, shelf-stable storage. Of course, they should be clean!
Yes, you can pour refrigerator jam into plastic containers, but because the jam is very hot when finished, let it cool to lukewarm before pouring it into plastic containers. Otherwise, the containers might melt or warp.


Comments
Can I use canned apricot in light syrup to make this jam?
Hi Jackie, I wouldn’t personally use canned fruit for jam, especially one with a sweetener. I recommend using fresh fruit to make this jam recipe.
Can I use honey?
THANK YOU!
I have not tested honey with this recipe, but I don’t see why not. You may want to do a little test batch first to make sure it sets up like you want it.
I loved everything
So happy to hear it! Thanks, Maria!
I just made this with frozen cherries. I just cut down the sugar a little. It’s amazing and so easy! Thank you!!
Yum, cherry jam sounds so good!! I’m so happy you liked the recipe!
Thanks for the great recipe! Trying out blackberries fingers crossed
I think it will be great!
Can I use Frozen strawberries? This is what I have on hand and didnt see it mentioned in the article.
Yes, frozen strawberries will work well, it will just take slightly longer to cook.
Can I use frozen peaches, strawberries, and blueberries? I have a big bag of all three and I want to use them. Could I use them for the jam recipe?
Yes, that sounds delicious! You will just need to cook the jam for a bit longer since your fruit is frozen. Enjoy!
🌟🌟🌟🌟🌟🌟
🙌💛