Peanut Butter Thumbprint Cookies
Updated Dec 09, 2023
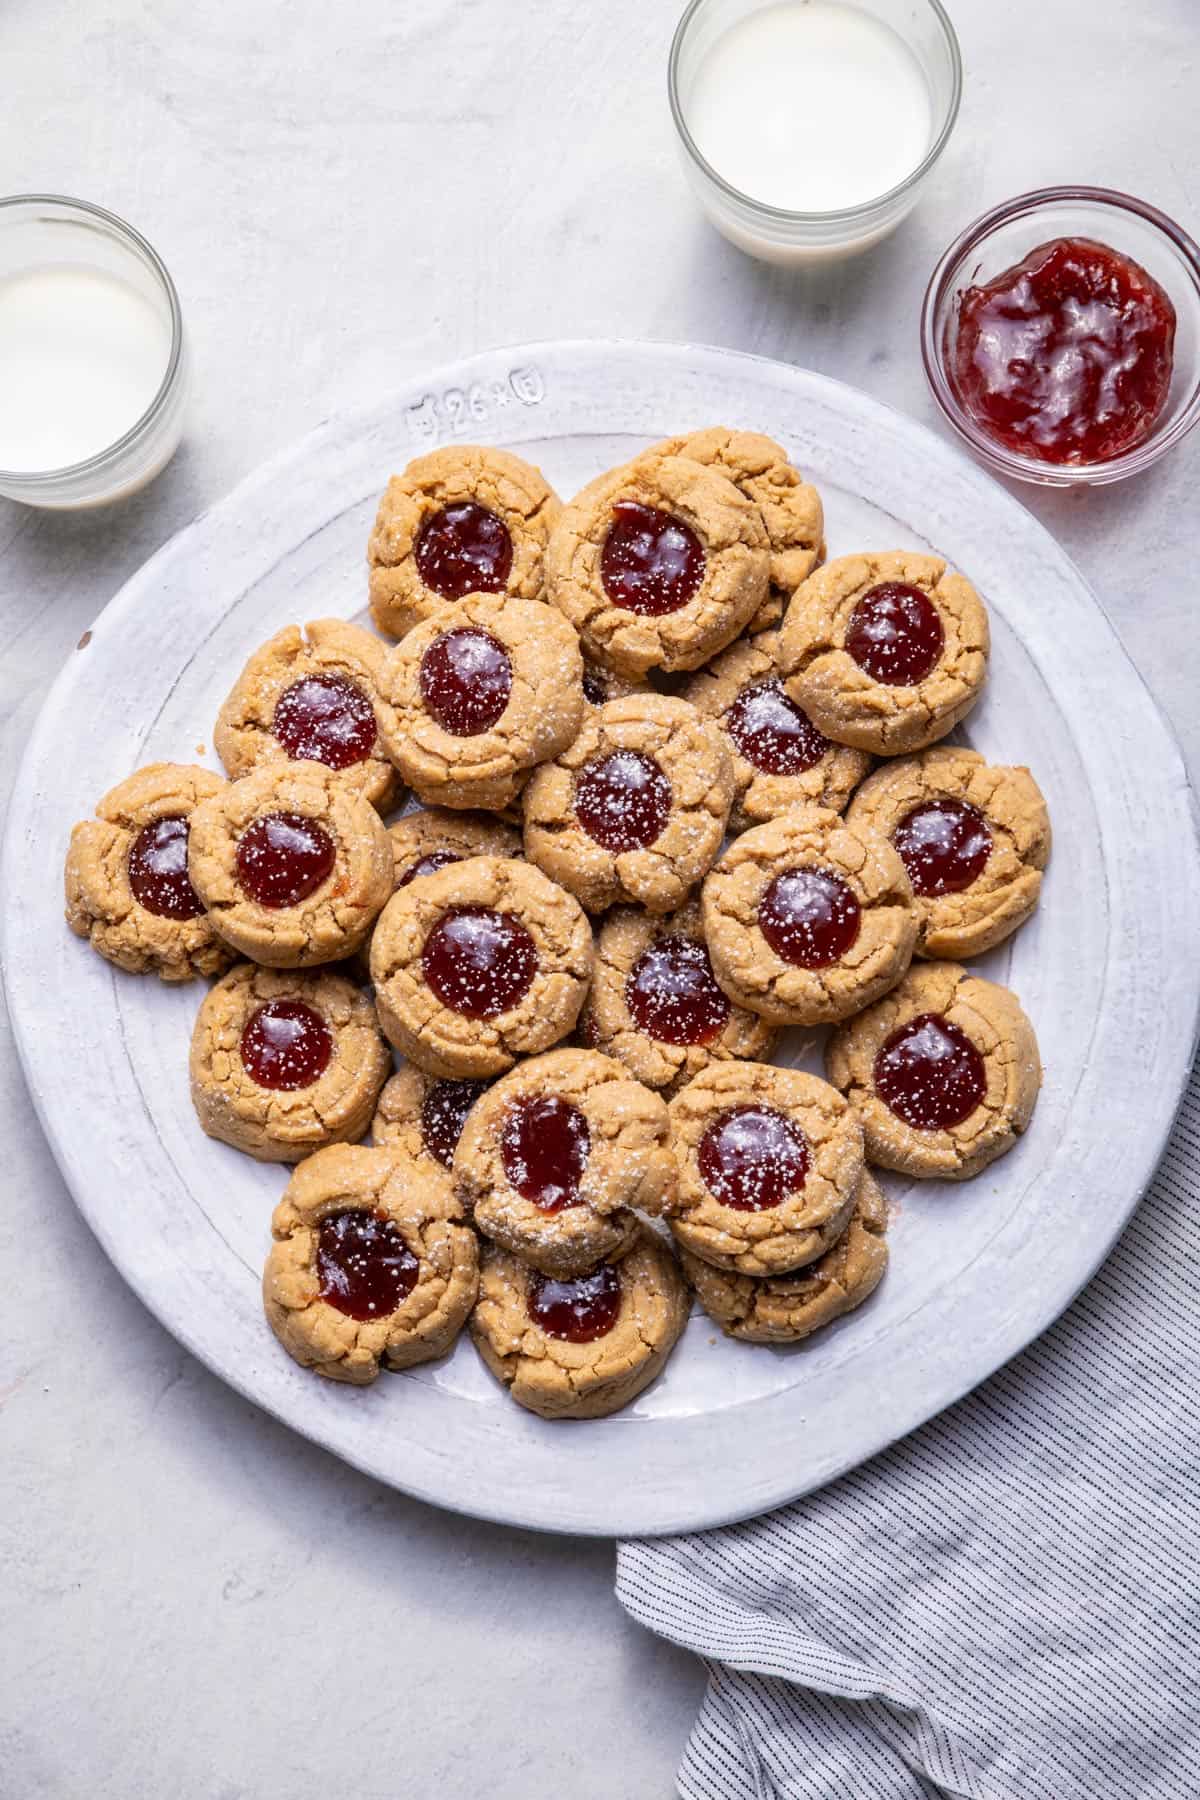
These peanut butter thumbprint cookies are filled with strawberry jam, but can filled with chocolate, kisses, nutella, and more!
This post may contain affiliate links. Please read our disclosure policy.
If you love all things PB&J, you are going to love these peanut butter thumbprint cookies! Delicious peanut butter cookies are filled with strawberry jam for one tasty bite! This is one thumbprint cookie recipe that needs to be on your Christmas baking list!
Enjoy your peanut butter thumbprint cookies sooner with this no-chill recipe! They’ll come out perfectly soft and chewy while maintaining their thumbprint indent that’s ready to be filled with yummy jam. Their not limited to just jam either. Chocolate ganache or hazelnut spread will be just as delicious.
Jump to Section
- Recipe at a glance
- Ingredients to make peanut butter thumbprint cookies
- Popular substitutions & additions
- How to make PB thumbprint cookies
- Tips for making the the best peanut butter thumbprint cookies
- What to serve with your PB cookies
- How to store peanut butter thumbprint cookies
- Frequently asked questions
- More cookie recipes:
- Peanut Butter Thumbprint Cookies Recipe
Recipe at a glance
Cuisine Inspiration: American
Primary Cooking Method: Baking
Dietary Info: Vegetarian
Key Flavor: Peanut putter
Skill Level: Easy
Summary
- Fun For Kiddos: They’ll have so much fun smashing their thumb into the cookies and filling it with jam when they are done baking, they’ll be asking for these again and again!
- Customizable: Easily change the jam flavor to suit your preferences or to add a bit of variety to your cookies.
- Ideal for special occasions: These peanut butter thumbprint cookies are great for parties, potlucks, bake sales, holiday gatherings, or just because. We love making these as part of our Christmas cookie baking.
- Quick and Easy: Quickly whip these up in one bowl, and have them ready to enjoy after only 13 minutes of baking time.
Ingredients to make peanut butter thumbprint cookies
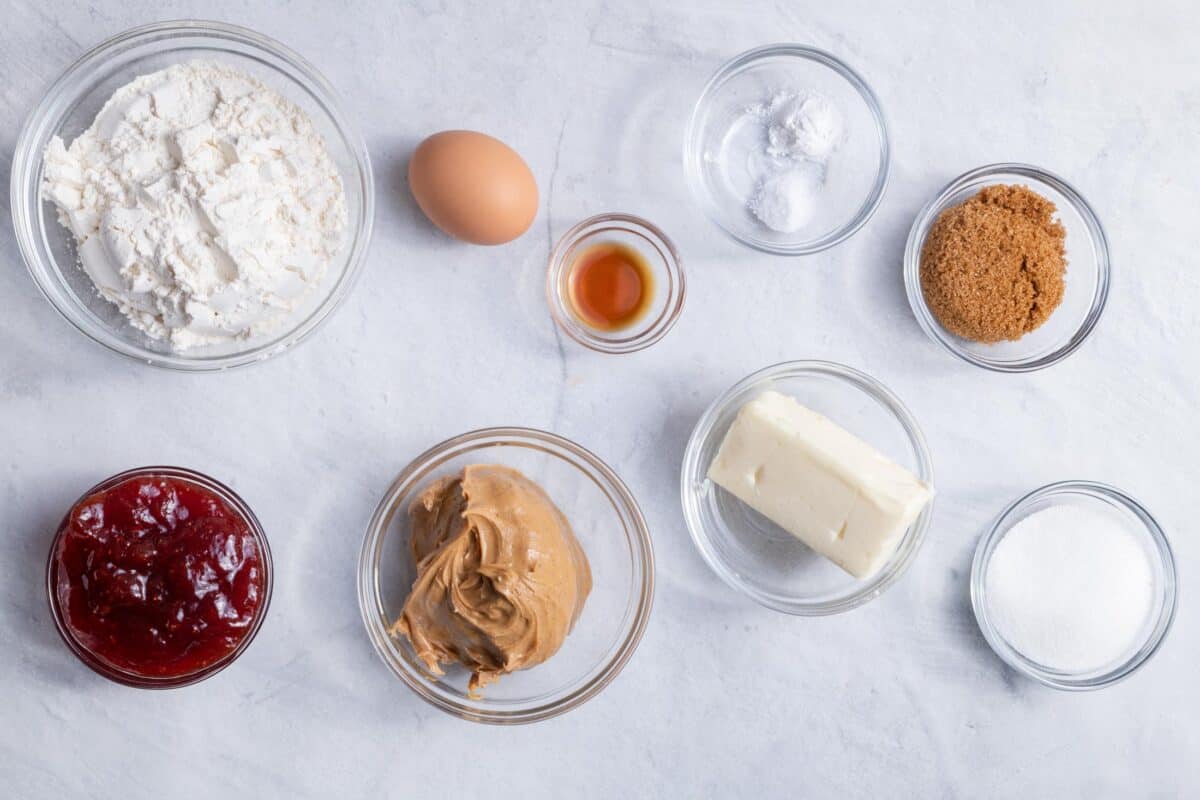
- Butter: Use unsalted butter for these cookies. It should be at room temperature so it’s easily mixed with the other ingredients.
- Peanut butter: Use creamy butter rather than crunchy for a smooth texture.
- Sugars: Use a mix of cane and light brown sugar for these cookies.
- Egg: For best results, your egg should be at room temperature.
- Flour: Use all-purpose flour to make this recipe.
- Vanilla extract and salt: For flavoring.
- Baking soda: So that your cookies come out light and fluffy and not dense.
- Jam: Finish the cookies with a little strawberry jam in the middle.
Popular substitutions & additions
- Gluten-Free Thumbprint Cookies: Swap out all-purpose flour 1:1 for your favorite brand of gluten-free flour.
- Jams Away!: Strawberry, grape, raspberry, blackberry, and blueberry jam are all great options for your cookies. For a citrus flavor, try orange marmalade. Or use preserves made from apples, apricots, cherries, peaches, or berries.
- Toppings: A sprinkle of regular granulated sugar, turbinado, or demerara sugar will provide a sweet, crunchy contrast. Including holiday-related sprinkles or a delicious chocolate drizzle will make your thumbprint cookies stand out.
- Peanut Butter: While it’s highly recommended that you use a real creamy peanut butter, swapping it out for an almond or cashew butter that’s just as creamy will work great as well.
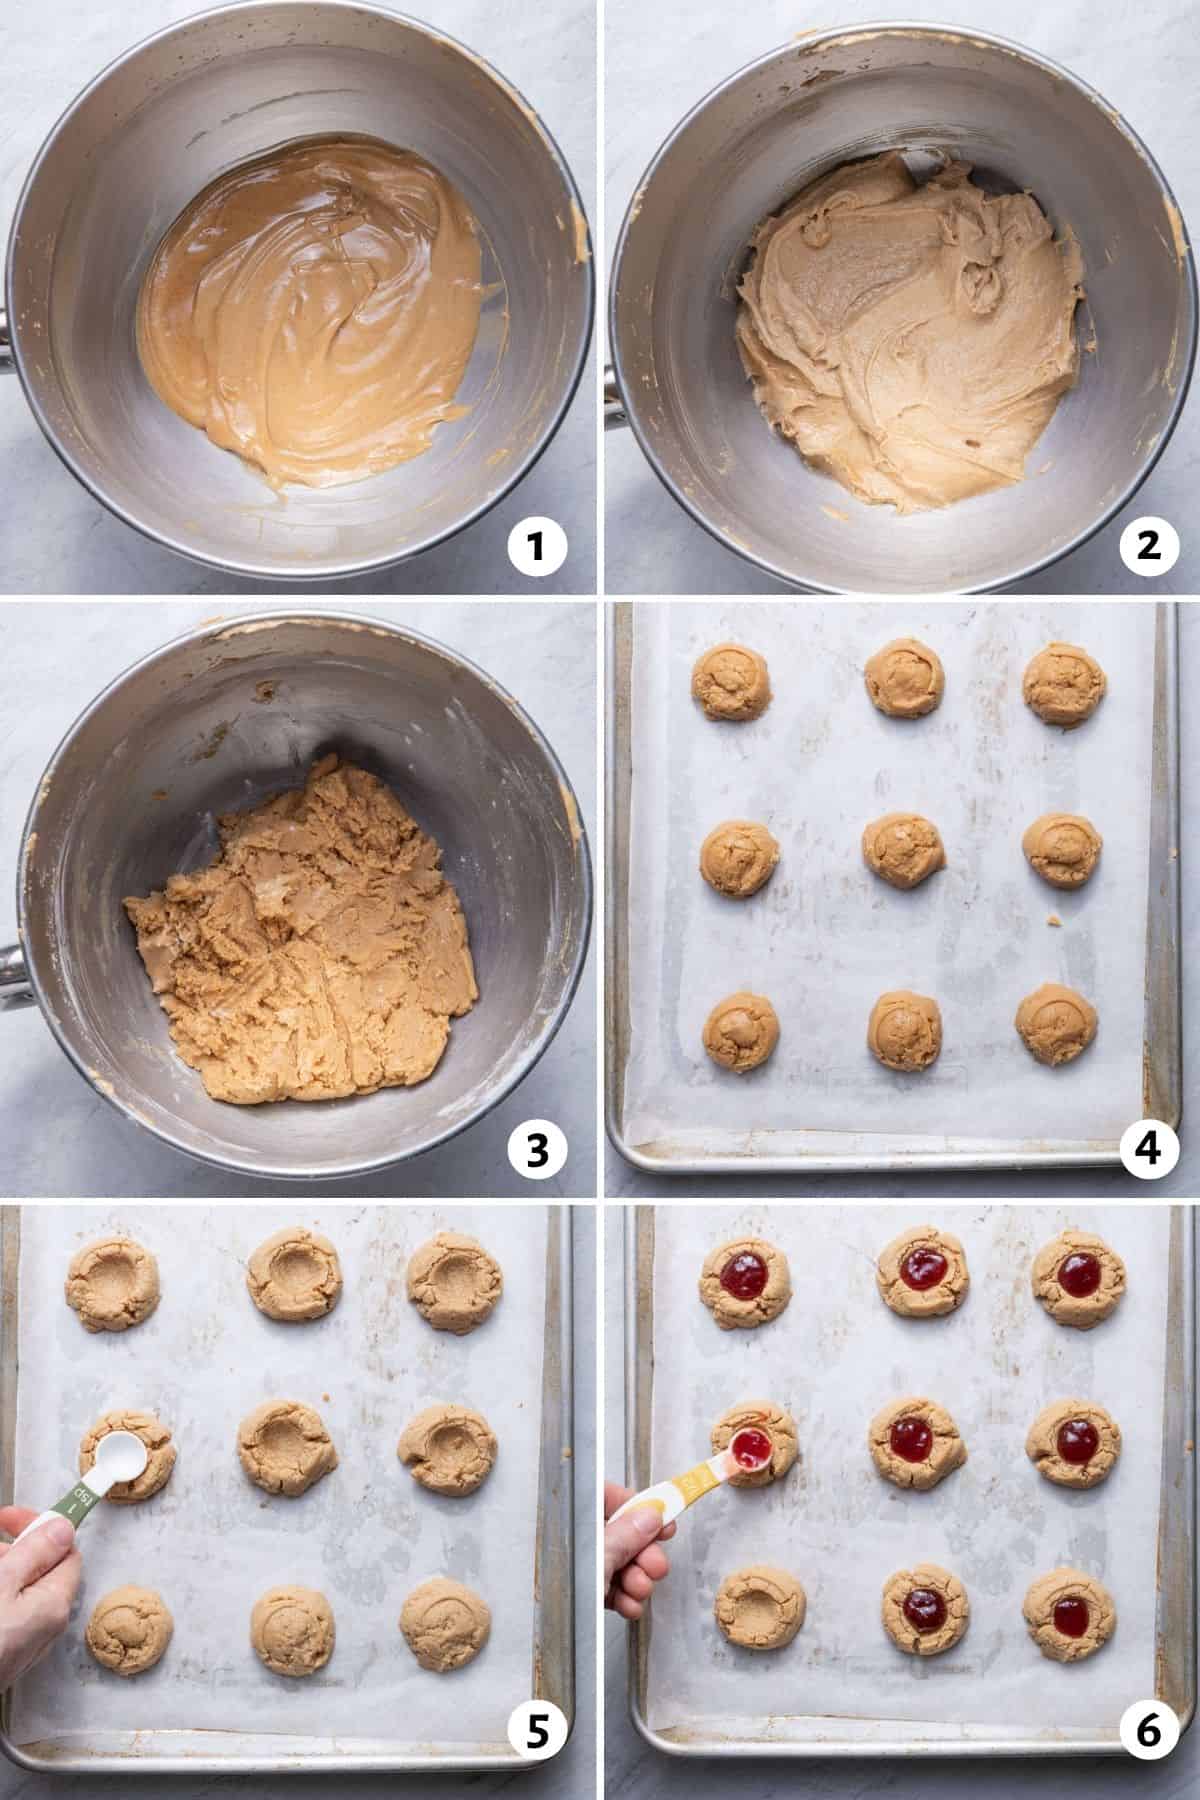
How to make PB thumbprint cookies
- Mix together the butter and peanut butter.
- Mix in the sugars, egg and vanilla.
- Stir in the dry ingredients.
- Spoon the cookie dough onto a prepared baking sheet.
- Make an imprint in the center of each cookie with your thumb, or the back of a measuring spoon.
- Bake the cookies, then add jam to the indent and let cool.
Tips for making the the best peanut butter thumbprint cookies
- Heat jam in a small saucepan or microwave to loosen. You only need about 30 seconds. This will make it easier to spoon the jam into the thumbprint of the cookie. As the cookies set, the jam will solidify again.
- Don’t over mix the ingredients when you add the flour. Stop mixing when you form a dough so that the gluten doesn’t over develop.
- Soften your butter before using. This will help it to combine more evenly so that your cookies have a uniformed texture. Take it out of the fridge about an hour before making this recipe.
- Let the cookies cool completely before serving or storing. Let the cool on a wire rack that will allow the air to circulate so that the peanut butter cookies crisp up nicely.
What to serve with your PB cookies
How to store peanut butter thumbprint cookies
These cookies have a great shelf life and will easily keep well for up to a week in an airtight container at room temperature. I doubt they will stay around for that long though!
How long do peanut butter thumbprint cookies last in the fridge?
Storing in the fridge may change the texture of the cookies making them harder to chew. But if you are running over the 7 days you can keep them fresh for up to another week in the fridge.
Can I freeze pb cookies?
Yes! These PB thumbprint cookies freeze really well (without the jams). Let them cool completely and then freeze solid on a baking sheet before transferring to a freezer bag or container. They will keep well for 2 to 3 months and can be thawed at room temperature.
Frequently asked questions
Because we make the thumbprint dent in these cookies halfway through cooking, I advise that you do not use your thumb! I find that a measurement teaspoon works great to make a perfect circle in the dough.
Yes, you can prepare the peanut butter cookie dough ahead of time. Making the dough in advance and chilling it in the refrigerator can actually help improve the texture and flavor of the cookies. Just be sure to store it properly in an airtight container or wrapped in plastic wrap. When you’re ready to bake, let the dough sit at room temperature for a little while to soften slightly, which will make it easier to shape into cookies.
Jams are made with crushed fruit leaving them thicker and chunkier with bits of fruit throughout. Jelly is made from fruit juice which results in a thicker spread that’s free of fruit chunks. For thumbprint cookies, jams are preferred due to their chunkier texture. Jellies are best left for spreading on things like toast.
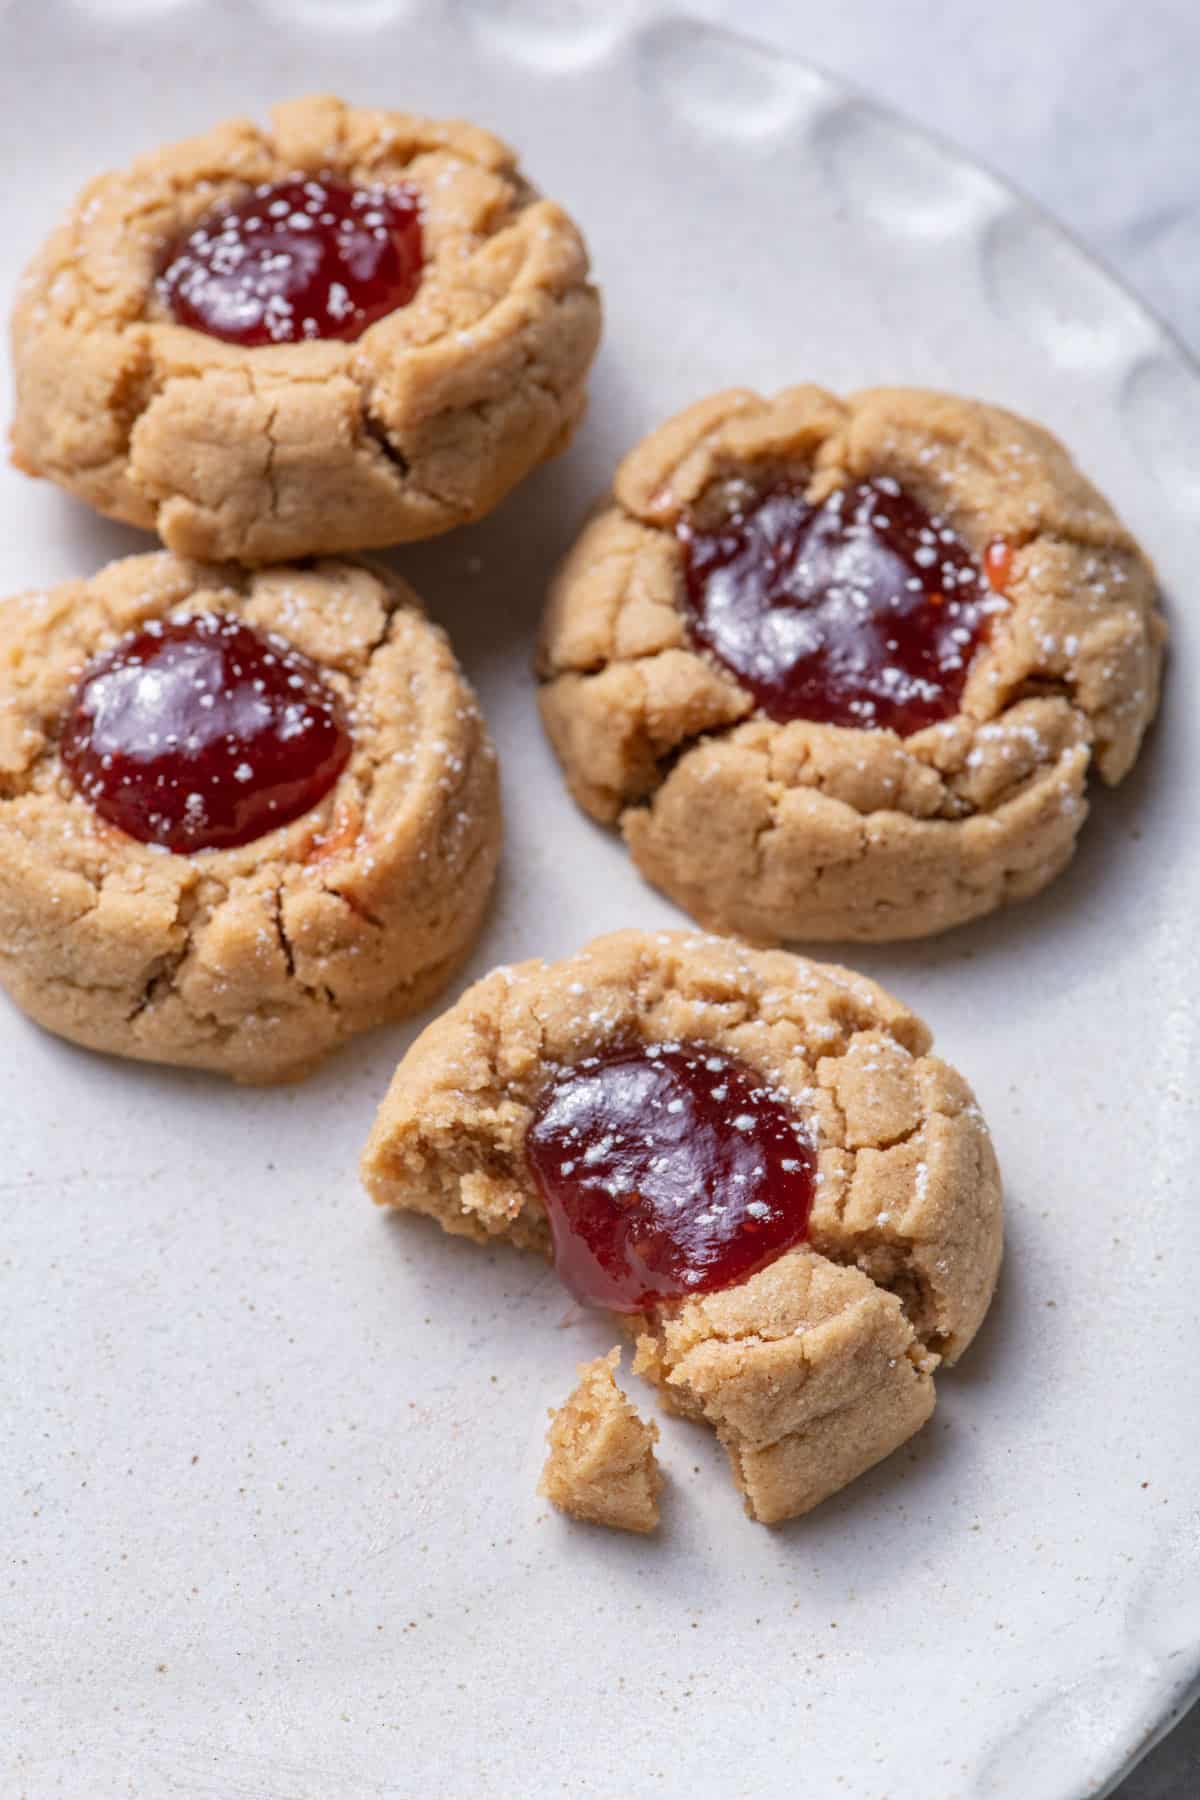
These PB thumbprint cookies are perfect to enjoy any time of the year, but they are so perfect for Christmas! Simple to make, be sure to make a double batch as they’ll disappear quickly!
More cookie recipes:
- Ginger Snap Cookies
- Holiday Sugar Cookies
- Oatmeal Cranberry Cookies
- Tahini Chocolate Chip Cookies
- Date Cookies
If you try this healthy-ish feel good Peanut Butter Jam Thumbprint Cookies recipe or any other recipe on Feel Good Foodie, then don’t forget to rate the recipe and leave a comment below! It helps others who are thinking of making the recipe. We would love to hear about your experience making it. And if you snapped some shots, share it on Instagram so we can repost on Stories!

Peanut Butter Thumbprint Cookies
Ingredients
- ½ cup butter room temperature
- ¾ cup creamy peanut butter
- ¼ cup cane sugar
- ¼ cup packed light brown sugar
- 1 large eggs room temperature
- 1 teaspoon vanilla extract
- 1 ¼ cups all purpose flour
- 1 teaspoon baking soda
- ½ teaspoon kosher salt
- ½ cup strawberry jam
Instructions
- Preheat oven to 350°F and prepare two baking sheets with parchment paper.
- In a stand mixer fitted with the paddle attachment, mix together the butter and peanut butter until combined. Add the sugars and cream together for 3-5 minutes or until light and fluffy. Add the egg and vanilla and beat until incorporated.
- In a medium bowl, whisk together flour, baking soda, and salt. Add the flour mixture slowly and continue mixing until the dough has formed.
- Scoop even balls of dough, about a tablespoon size and place them about two inches apart on the prepared baking sheet.
- Bake for 8 minutes and remove from oven. Using the tip of a spoon or the handle of a spatula, create a small “thumbprint” in the center of the cookies. Return to the oven to bake for 5-7 more minutes, until lightly golden and set.
- Remove cookies from the oven once the edges begin to brown. Add about ½ teaspoon jam to the center “thumbprints”. Cool on the baking sheet for 5 minutes, then transfer to wire racks to cool completely.
Notes
Nutrition
Nutrition information provided is an estimate. It will vary based on cooking method and specific ingredients used.


