Easy Apple Crisp
Updated Sep 19, 2025
For a quick and cozy fall dessert, try this easy no-fuss Apple Crisp recipe made with juicy apples, cinnamon and an streusel oat topping!
This post may contain affiliate links. Please read our disclosure policy.

Jump to Section
Easy Apple Crisp!

This easy Apple Crisp recipe is one of the first things I make after I go apple picking! That’s because the filling uses up 6 whole apples and is a basic beginner baker recipe that you just can’t mess up.
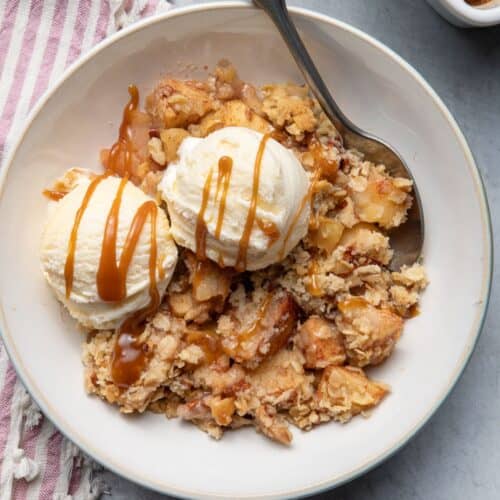
Just throw the apples into a baking dish and mix with sugar, lemon juice and cinnamon and the result is a warm and cozy fall dessert. This one’s easier than making an apple pie, because it takes less time and it’s easy to double or triple this recipe for bigger crowds. Make sure to serve the apple crisp with a scoop of vanilla ice cream or even whipped cream.
Happy Baking!
– Yumna
Apple Crisp Ingredients

- Apples: Choose juicy apples like Fuji or honeycrisp. Peel if you’d like and chop into bite-sized pieces.
- Dry Ingredients: You’ll need granulated sugar, light brown sugar, salt, cinnamon, all-purpose flour and rolled oats (not instant oats!) for this recipe. Feel free to sub in 1:1 gluten-free flour.
- Wet Ingredients: Lemon juice for mixing with the apples and cold unsalted butter for the oat topping.
- Pecans: I love the taste of chopped pecans in this apple crisp topping, but you can leave them out if you like, or sub in almonds or walnuts.
How to Make Apple Crisp


Easy Apple Crisp
Ingredients
Apple Filling
- 6 apples peeled and chopped
- 2 tablespoons granulated sugar
- 1 tablespoon lemon juice
- 1 teaspoon cinnamon
Crisp Topping
- ¾ cup rolled oats
- ¾ cup all-purpose flour
- ½ cup light brown sugar packed
- ½ cup finely chopped pecans
- ½ teaspoon cinnamon
- ¼ teaspoon salt
- ½ cup unsalted butter diced cold
- Vanilla ice cream for serving
Instructions
- Preheat oven to 375°F. Grease an 8-inch square baking dish or 7-inch x 11-inch baking dish.
- Place the apples into the greased baking dish; add the sugar, lemon juice and cinnamon on top, stir and set aside.
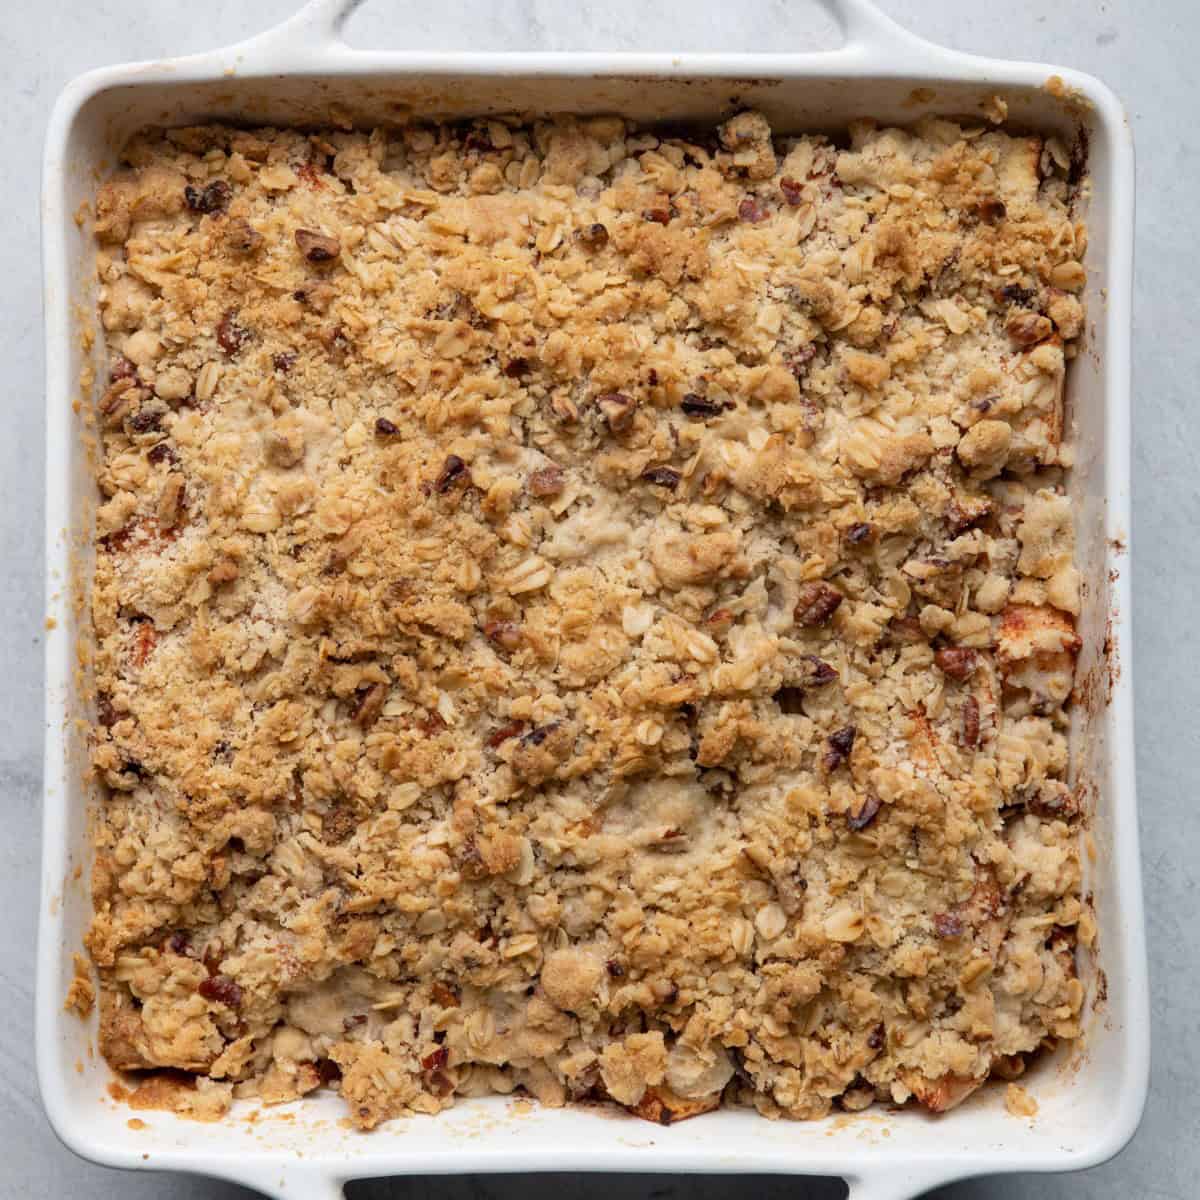
- In a small bowl, combine the oats, flour, brown sugar, pecans, cinnamon and salt. Cut in butter using a fork or your hands until mixture resembles coarse crumbs. Sprinkle the crisp topping mixture over the apple mixture.
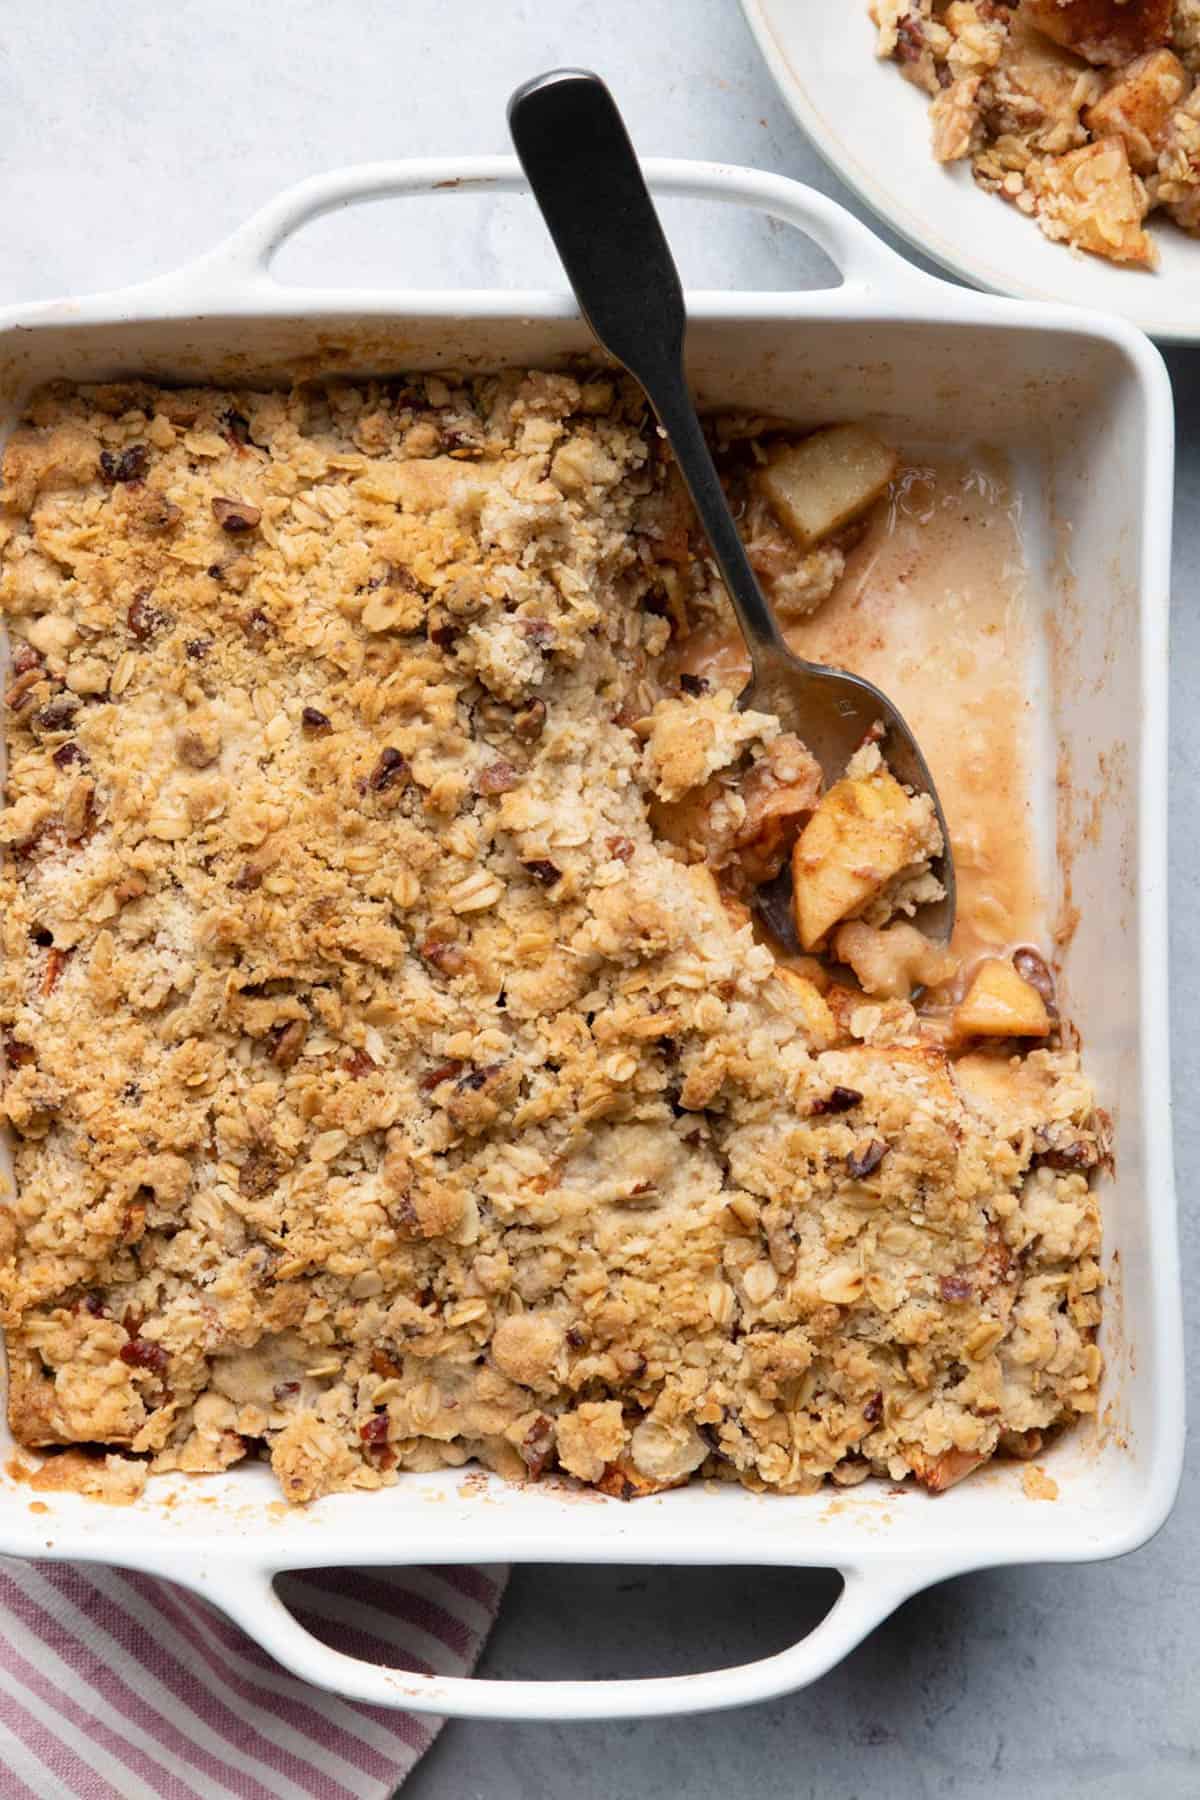
- Bake until the crisp topping is golden brown and the filling is bubbly, about 35-40 minutes. Allow to cool for a few minutes. Serve warm with a scoop of ice cream, if desired.
Equipment
Notes
Nutrition
Nutrition information provided is an estimate. It will vary based on cooking method and specific ingredients used.
Recipe Tips
- Peel your apples for a smoother texture. Apple skin doesn’t break down as easily as the fruit, which can create a tougher texture. But, no need to peel if you like the consistency!
- Keep your apple pieces small. I like to chop my apples up extra small because it helps them cook faster, so they’re super soft by the time the crumble is browned.
- Bake until bubbly. Go beyond just a golden topping; wait until the filling is bubbling around the edges. That’s a sign the apples are tender and the sauce has thickened properly
- Allow time to cool. Easier said than done! But this is very important because it will give the gooey apple filling a chance to thicken.
FAQs
Once your apple crisp has cooled down, you can cover it with plastic wrap or aluminum foil and store it in the fridge for 4-5 days. When you’re ready to eat, just pop a slice into the oven at 350°F for about 10 minutes. If you’re in a hurry, microwaving works too, but the oven keeps the topping crispier.
You can! Once cooled, place your apple crumble in a freezer-safe container or wrap it tightly with aluminum foil and then a layer of plastic wrap, and it should keep well for up to 3 months. When you’re ready to enjoy, thaw it in the fridge overnight and then follow the reheating steps.
If your apple filling isn’t thick enough, you can add cornstarch or flour to your apple mixture before baking. This helps absorb some of the juices and thickens things up. Also, make sure you’re giving your crisp enough time to rest after baking!


Comments
I’m confused about the ingredients. The video shows maple syrup but the ingredients don’t say there’s maple syrup in it. Is that a typo or is the video incorrect. Want to make sure before I make it
Sorry about that, I’ve changed the recipe since making that video in 2017. I deleted the video so there’s no confusion. Please use the recipe card for the final tested version. Thank you!
Coming back here to say that I tried this apple crisp yesterday and I can’t believe how easy yet fulfilling this dessert was! Everyone loved it! Now I need to figure out how to make it again but without the butter – for someone who loves apples but should lower his cholesterol! If you have a specific vegan butter or another alternative in mind, please let me know 🎈
Amazing!! Aww, so glad you loved it! You can use coconut oil or vegan butter instead of regular butter. Just make sure it’s cold, so you still get that crumbly texture. Hope that helps!!
I have a bunch of apple pie filling I made last year and wanted an apple crisp. Using the equivalent of 2 cans apple pie filling (1 quart jar), I dumped it into the prepared dish and proceeded with step 3. Same cook time and it was fantastic. The topping was exactly what I was looking for! Delicious!!
Amazing!! Aww, so happy the recipe worked out with your apple pie filling and that you loved the topping! Thank you, Carrie!!
Delicious! I used 3 Granny Smith and 3 Cosmic Crisp. Perfect combination!
To apple filling, I used a King Arthur spice called Speculaas Spice. It’s cinnamon, nutmeg, clove and some other warm spices and it’s awesome in apple pie! I also always put a quarter tsp almond extract in my apple pie filling. I used just cinnamon in topping.
Serving it tonight with salted caramel vanilla icecream to guests. They’re gonna love this! Thank you!
Yum! Your tweaks sound amazing!! I’ve never thought of adding almond extract to the filling, I will have to try that myself! And salted caramel vanilla ice cream sounds like the perfect pairing, too. Thanks for the inspiration, Candi!!
This is an excellent recipe. I appreciated the reasonable amounts of sugar in the whole deal. The sweetness was just right. I’ll never go back to using sliced apples either. Chopping them gave a great, consistent bite, especially since I prefer to leave the skins on. I added ginger cardamom and nutmeg along with the cinnamon in the topping, and toasted my pecans before adding them. We all loved it. A real keeper, thanks so much.
Love that you made it your own, your tweaks sound so good!! Thank you, Anna! So happy you liked it!!
This recipe kept coming up on my social media feeds so I knew it was a sign I had to make it. I’m glad I did because this apple crisp came out perfect! I used honeycrisp apples and it was so easy to make. I love that it’s not overly sweet. The topping to apple ratio is spot on. Highly recommend making this recipe!
Yay, so happy you loved the recipe! Honeycrisp apples are so good, especially this time of year!
Delicious and easy.
So happy you liked it!
The Apple Crisp was the first recipe of yours that I made. It was fresh, easy, and the instructions were very clear, which I love. I probably overbaked it because the juices were almost gone when I went to reheat, but I will make again. I used Honeycrisp and Jazz apples. Looking forward to making more of your recipes.
Yum! Honeycrisp and jazz apples sound like the perfect combination. So happy you liked it, Marie!
GREAT and super easy to make
So glad you liked it!
Can I use sprouted rolled oats instead of old fashioned oats. Would that change the taste or baking time?
Yes, it should work without having to change the time. Let me know how it turns out!
See All Comments