Chocolate Dipped Peanut Butter Cookies
Updated Nov 30, 2025
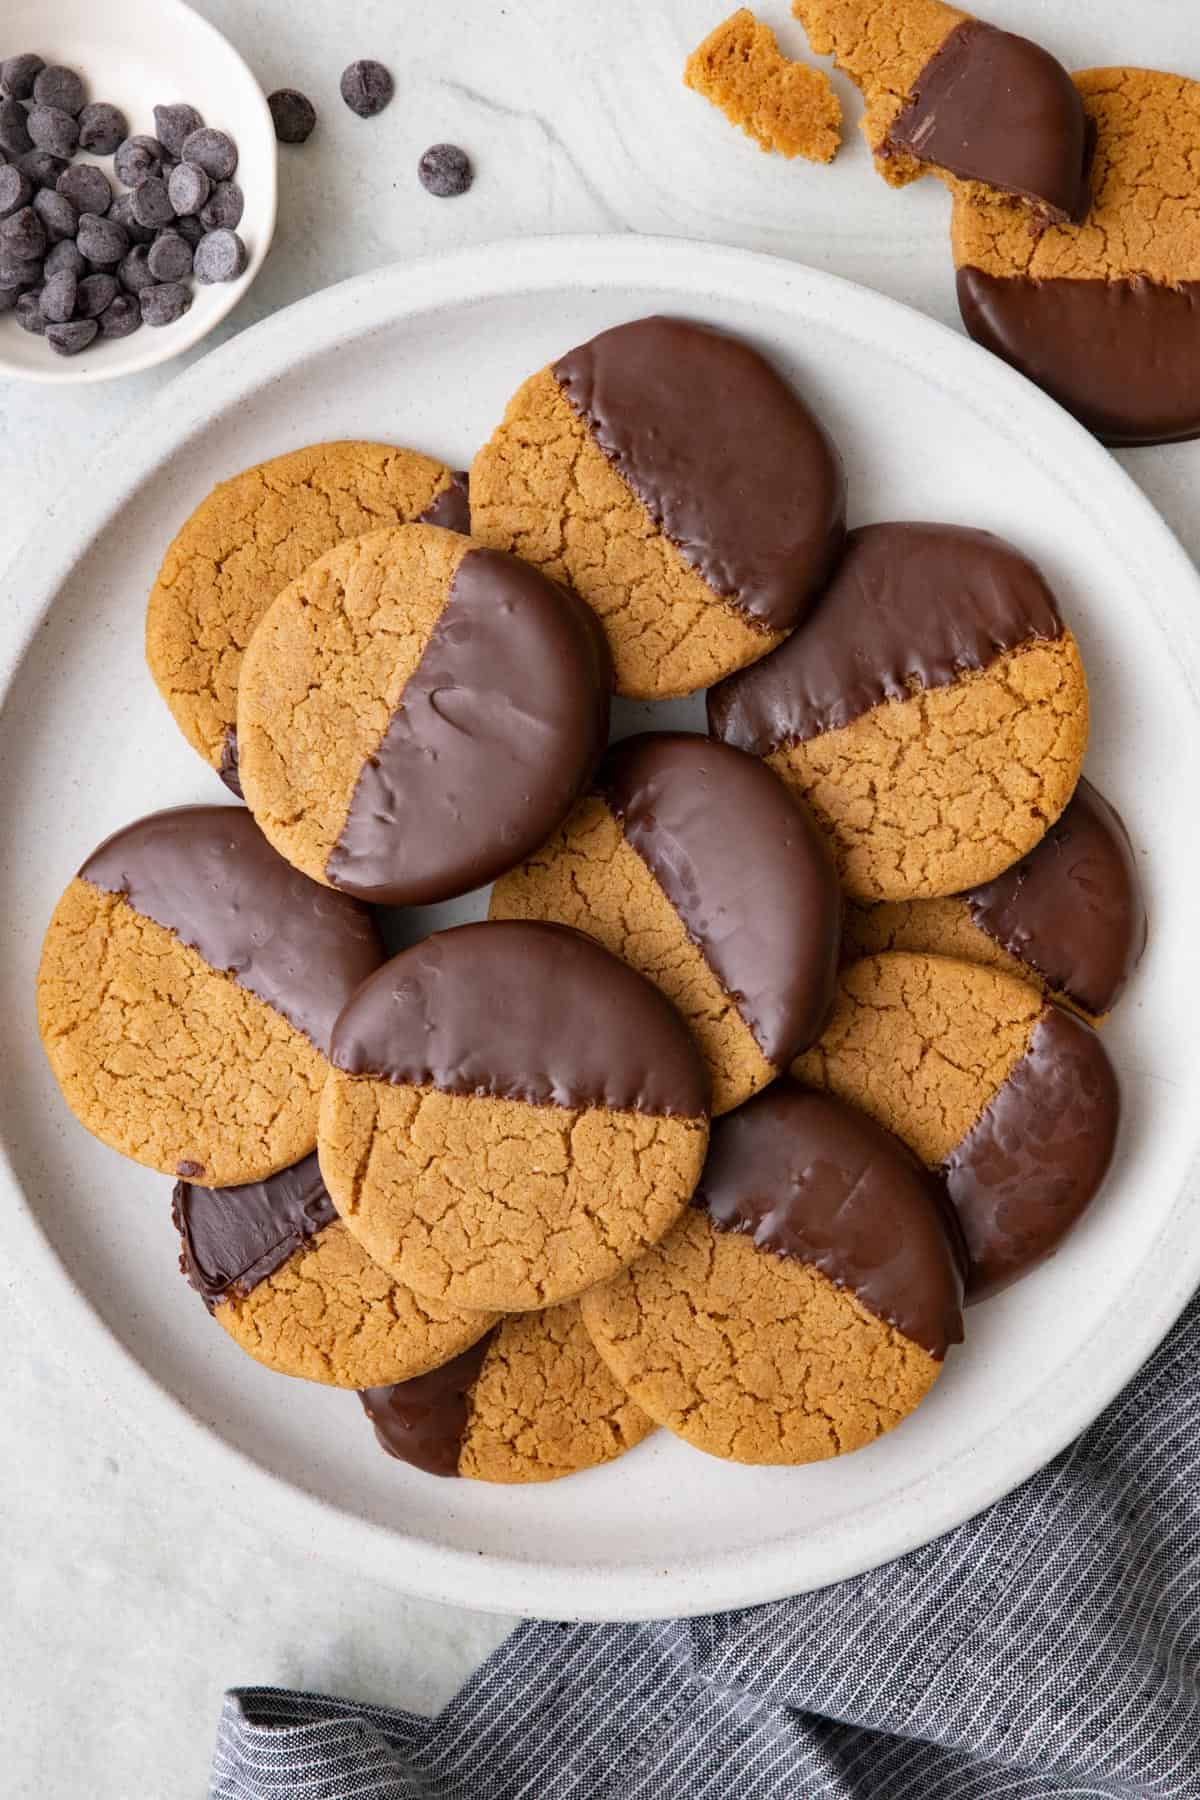
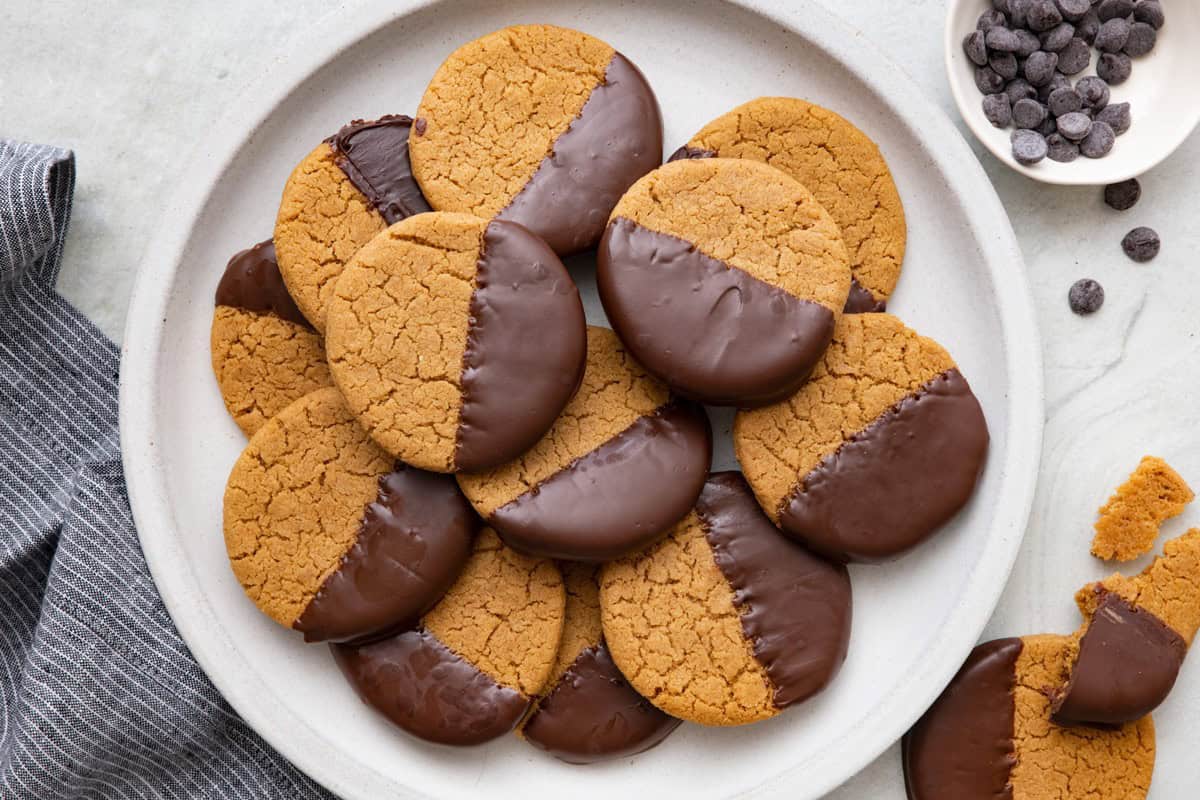
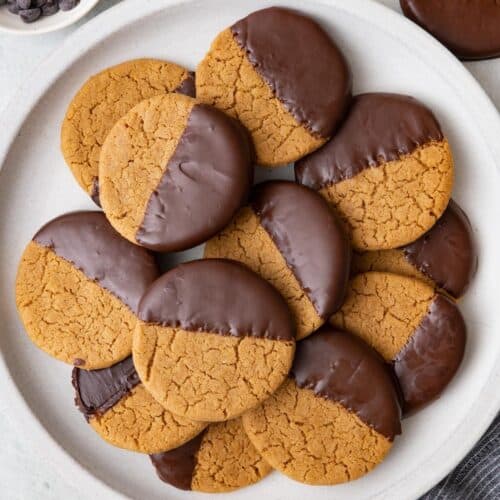
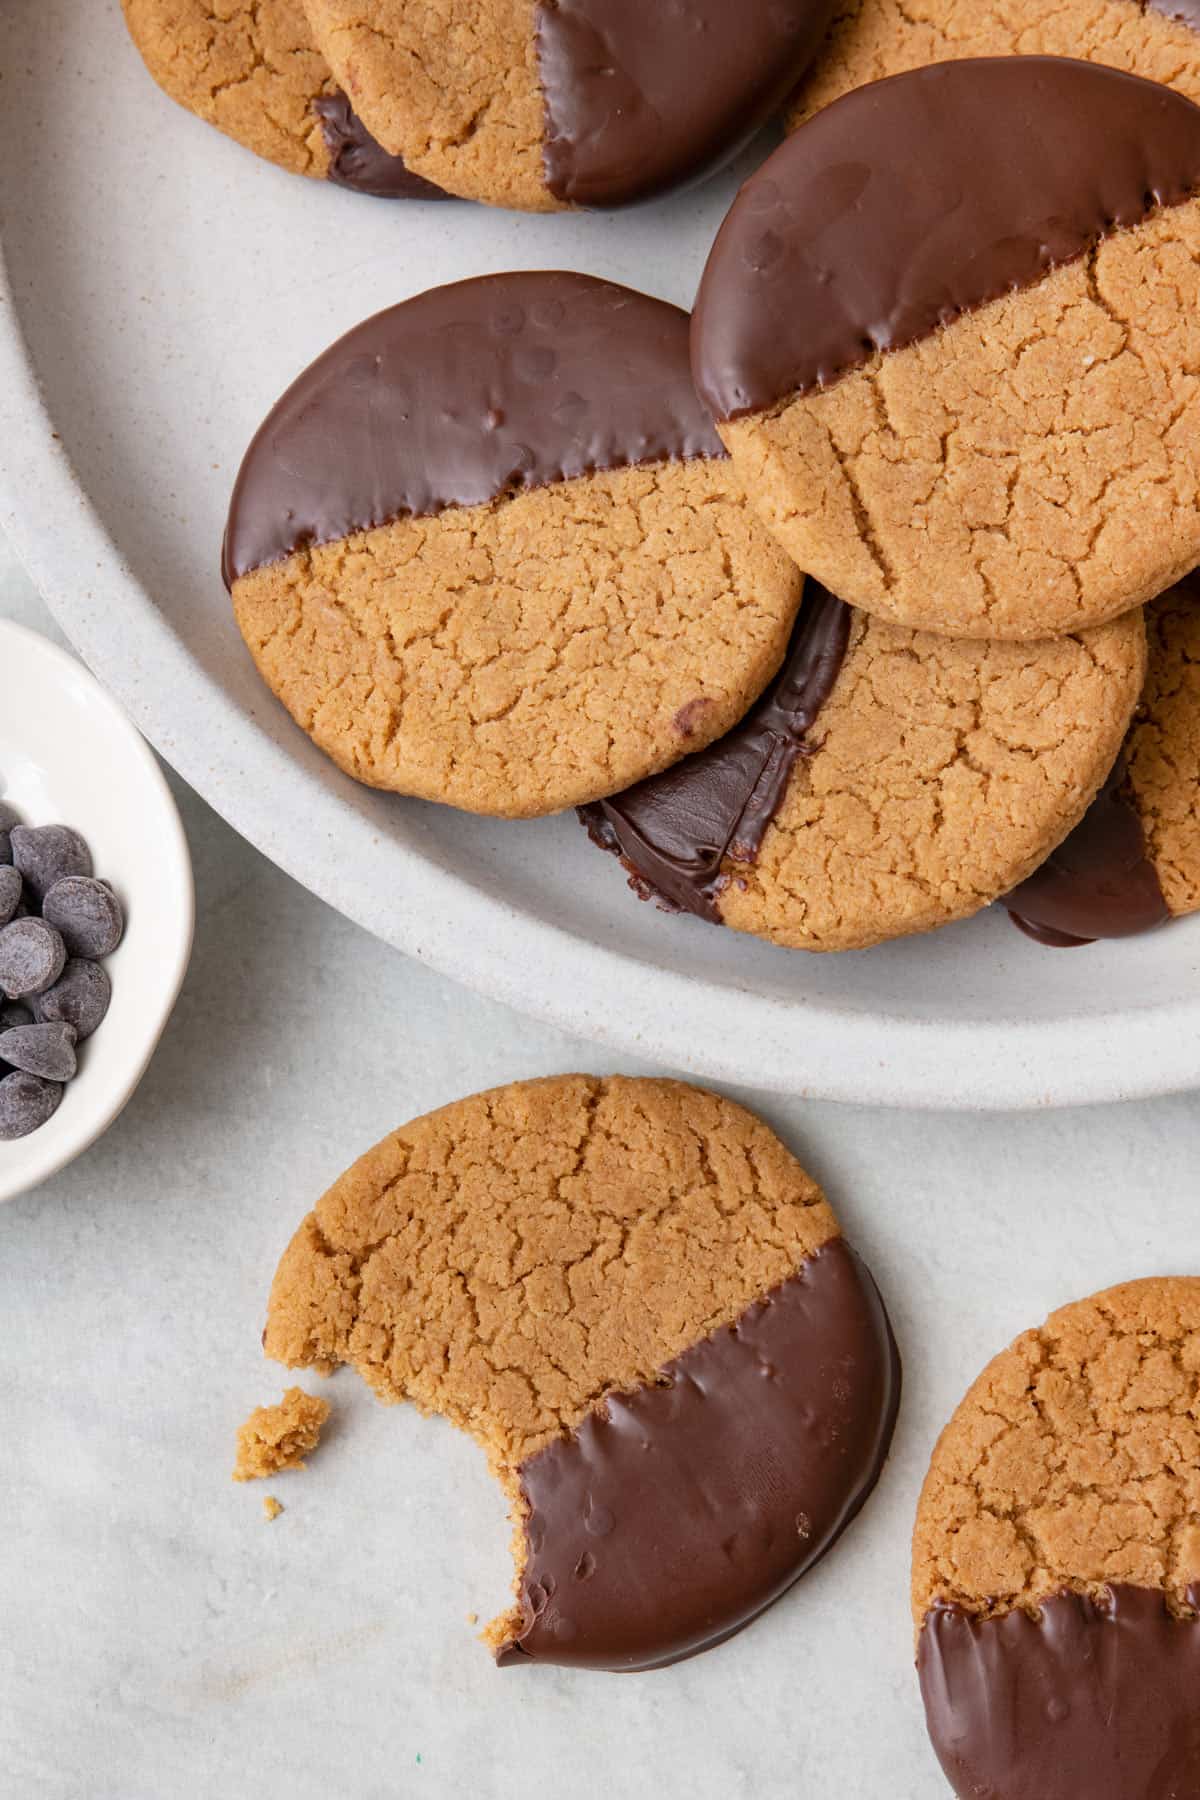
These chocolate dipped peanut butter cookies come together in one bowl and bake in minutes made with simple ingredients and dipped in melted chocolate.
This post may contain affiliate links. Please read our disclosure policy.
Jump to Section
chocolate dipped peanut butter cookies are soo good!

I grew up on peanut butter cookies, but chocolate dipped peanut butter cookies are the version I secretly love most. They’re soft and chewy, super peanut-buttery, and the chocolate dip makes them feel a little extra without being complicated. I love that I can mix the dough in one bowl and have a batch ready in under 30 minutes. If you’re into peanut butter and chocolate together, chocolate dipped peanut butter cookies are one of those recipes that disappear fast around here.
Happy Cooking!
– Yumna
Chocolate Dipped Peanut Butter Cookie Ingredients
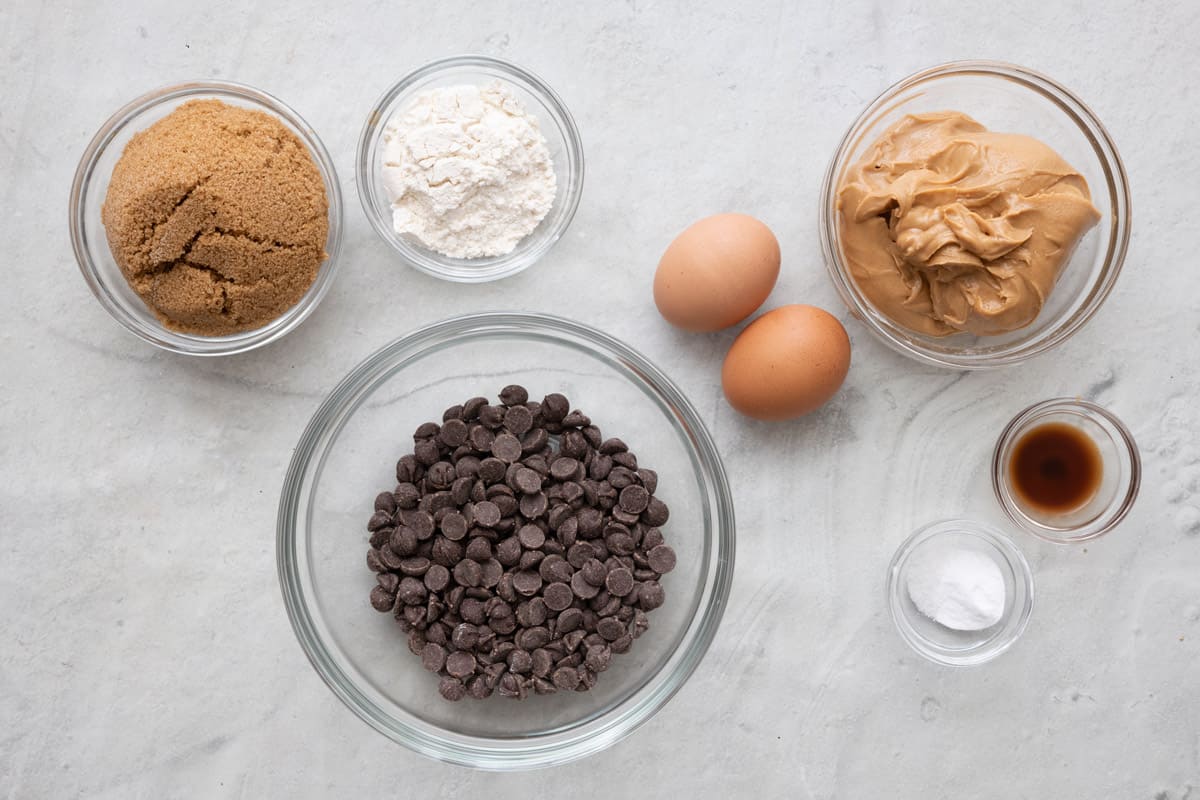
- Peanut butter: I like to use unsweetened creamy peanut butter for this chocolate dipped cookie recipe!
- Chocolate Chips: Any kind of chocolate chip will work here but I usually go for small milk chocolate chips.
- Wet ingredients: You’ll need vanilla extract and eggs (room temperature eggs are best) for these cookies.
- Dry ingredients: This peanut butter cooke recipe calls for brown sugar, flour, baking soda, and salt. Feel free to sub in gluten-free flour!
How to Make Chocolate Dipped Peanut Butter Cookie


Chocolate Dipped Peanut Butter Cookies Recipe
Ingredients
- 1 cup smooth unsweetened peanut butter no stir is best
- 1 cup packed light brown sugar
- 1 egg plus 1 egg yolk
- 1 teaspoon vanilla extract
- ¼ cup all-purpose flour
- ½ teaspoon baking soda
- ¼ teaspoon salt
- 1 cup chocolate chips melted
Instructions
- Preheat the oven to 350˚F. Line a large rimmed baking sheet with parchment paper.
- Add the peanut butter to a large microwave safe bowl. Heat in the microwave for about 30 seconds, just to soften it slightly. Add brown sugar, egg and egg yolk, and vanilla extract and stir with a rubber spatula until smooth.
- Add flour, baking soda and salt and use the spatula to knead the dry ingredients into the batter until incorporated.
- Using a 1.5 tablespoon-size spring loaded cookie scoop, scoop 15 cookies on the prepared baking sheet about 2 inches apart. Use your hands to roll the dough into smooth flattened balls. Alternatively, you could roll the dough and use a cookie cutter to cut them into rounds.
- Bake for 8 to 10 minutes, or until the edges are slightly golden brown. Remove from the oven and let cool on the sheet pan for 5 minutes, or until they are firm enough to handle. Then transfer to a cooling rack until completely cool, but save the baking sheet with parchment paper.
- Dip the cooled cookies in the melted chocolate, covering each cookie about halfway. Place on the reserved baking sheet and let set in the fridge for about 10 to 15 minutes, or until the chocolate is firm to the touch.
Notes
Nutrition
Nutrition information provided is an estimate. It will vary based on cooking method and specific ingredients used.
Recipe Tips
- Freeze your cookies after they cool for easier dipping. To make dipping easier, I like to freeze my cookies for about 15 minutes on the baking sheet. The melted chocolate will instantly harden on the cookies that way.
- Don’t over-bake your cookies! Once you start seeing golden brown edges, your cookies are ready to remove from the oven (they’ll continue to cook for a few minutes after being removed, especially when sitting on a hot baking sheet).
Serving Ideas
- Serve with ice cream. My kids and I both love eating these cookies with a bowl of homemade vanilla ice cream (or as an ice cream sandwich). Whipped cream is a great addition, too!
FAQs
There are a few reasons your cookies may be dry or crumbly! First, you may have used too much flour. Try using a spoon to transfer your flour into the measuring cup (rather than dipping the cup directly into the flour) to avoid compacting the flour. Secondly, you may have over-baked your cookies. As soon as you see the edges turning golden brown, you can remove them.


Comments
These came out great! Nice and soft and chewy with a yummy chocolate layer! My 5 year old and I really enjoyed baking and eating them 🙂
Aww, yay!! So happy to hear that you and your little loved baking them together! Thanks, Charm!!
I love your recipes but could it be possible for you to also give the option of metric amounts? Cup measurements are not really for us expats, we’re used to metric 😏 This is just a suggestion 🤷 Thanks 👍
I wish I could, Su! My website doesn’t have the ability to convert measurements, unfortunately. I recommend Googling a measurement conversion calculator to convert individual ingredient amounts. So sorry for the inconvenience!
Hi sweetheart. I have a question about the eggs. Why not use both parts of the eggs? White and yolk?
Great question! Adding an extra yolk helps make the cookies creamier and chewier thanks to the fat content. Egg yolk is also more binding than the white, which is why I like to use 1 egg plus an extra egg yolk. Hope that helps!
Can you use crunchy peanut butter instead?
As long as you’re using unsweetened no stir crunchy peanut butter, then this is a great alternative for adding more texture to your cookies.
There are no measurements for the ingredients?
If you click “jump to recipe” the full ingredient list and method are at the bottom of the page.
The perfect mix of sweet and savory! They hit the spot every time and aren’t too sweet.
So glad you like them!
Wow! It’s so delicious!!! My kids loved it so much!
When I made it the second time, I added almond milk a bit more flour, it changed the texture of the cookies but it was still so good!
Thank you for the recipe! It’s one of my favorite now 🙂
Hi Tatiana! I am so glad you and your kids enjoyed the cookies! If you like PB cookies, I’d love for you to try my 3 ingredient PB cookies. They are flour-free and oh-so-good. You can dip them in chocolate too!
Oh my these were insane! The texture along with flavor came out perfect! Make sure you let them cool because I got impatient and while dipping in chocolate they nearly fell apart. So, I placed them back on the cooling rack and once completely cooled I enjoyed a few. Perfect next day with cup of black coffee.
TY! <3
Thank you so much! Definitely wait for them to cool. Glad you enjoyed!
Made these and they were super dry. I think the flour being added was what did it. Left them in for only 8 minutes and some of the ones around the edges burned on the bottom. Probably won’t make these again 🙁
Thank you for the feedback! I am sorry to hear that. There are a few reasons your cookies may be dry or crumbly. The first is adding too much flour. This recipe uses only ¼ cup of flour to ensure they have great form and for a chewier bite. To resolve this, use the spoon method of measuring your flour. Instead of dipping the measuring cup directly into the flour, which can compact it and possibly add much more than a recipe calls for, use a spoon to scoop the flour into a measuring cup and scrape the top flat. Another reason cookies may be crumbly is from overbaking. As soon as you see the edges turning golden brown, you can remove them to prevent baking too long. A crunchy cookie is still good, but a crumbly one is less desirable.