Garlic Aioli Recipe
Updated Aug 31, 2025
Learn how to make homemade aioli in the food processor. Authentic and versatile aioli dip and spread uses just a few kitchen pantry staples!
This post may contain affiliate links. Please read our disclosure policy.

Jump to Section
Homemade Aioli Recipe!

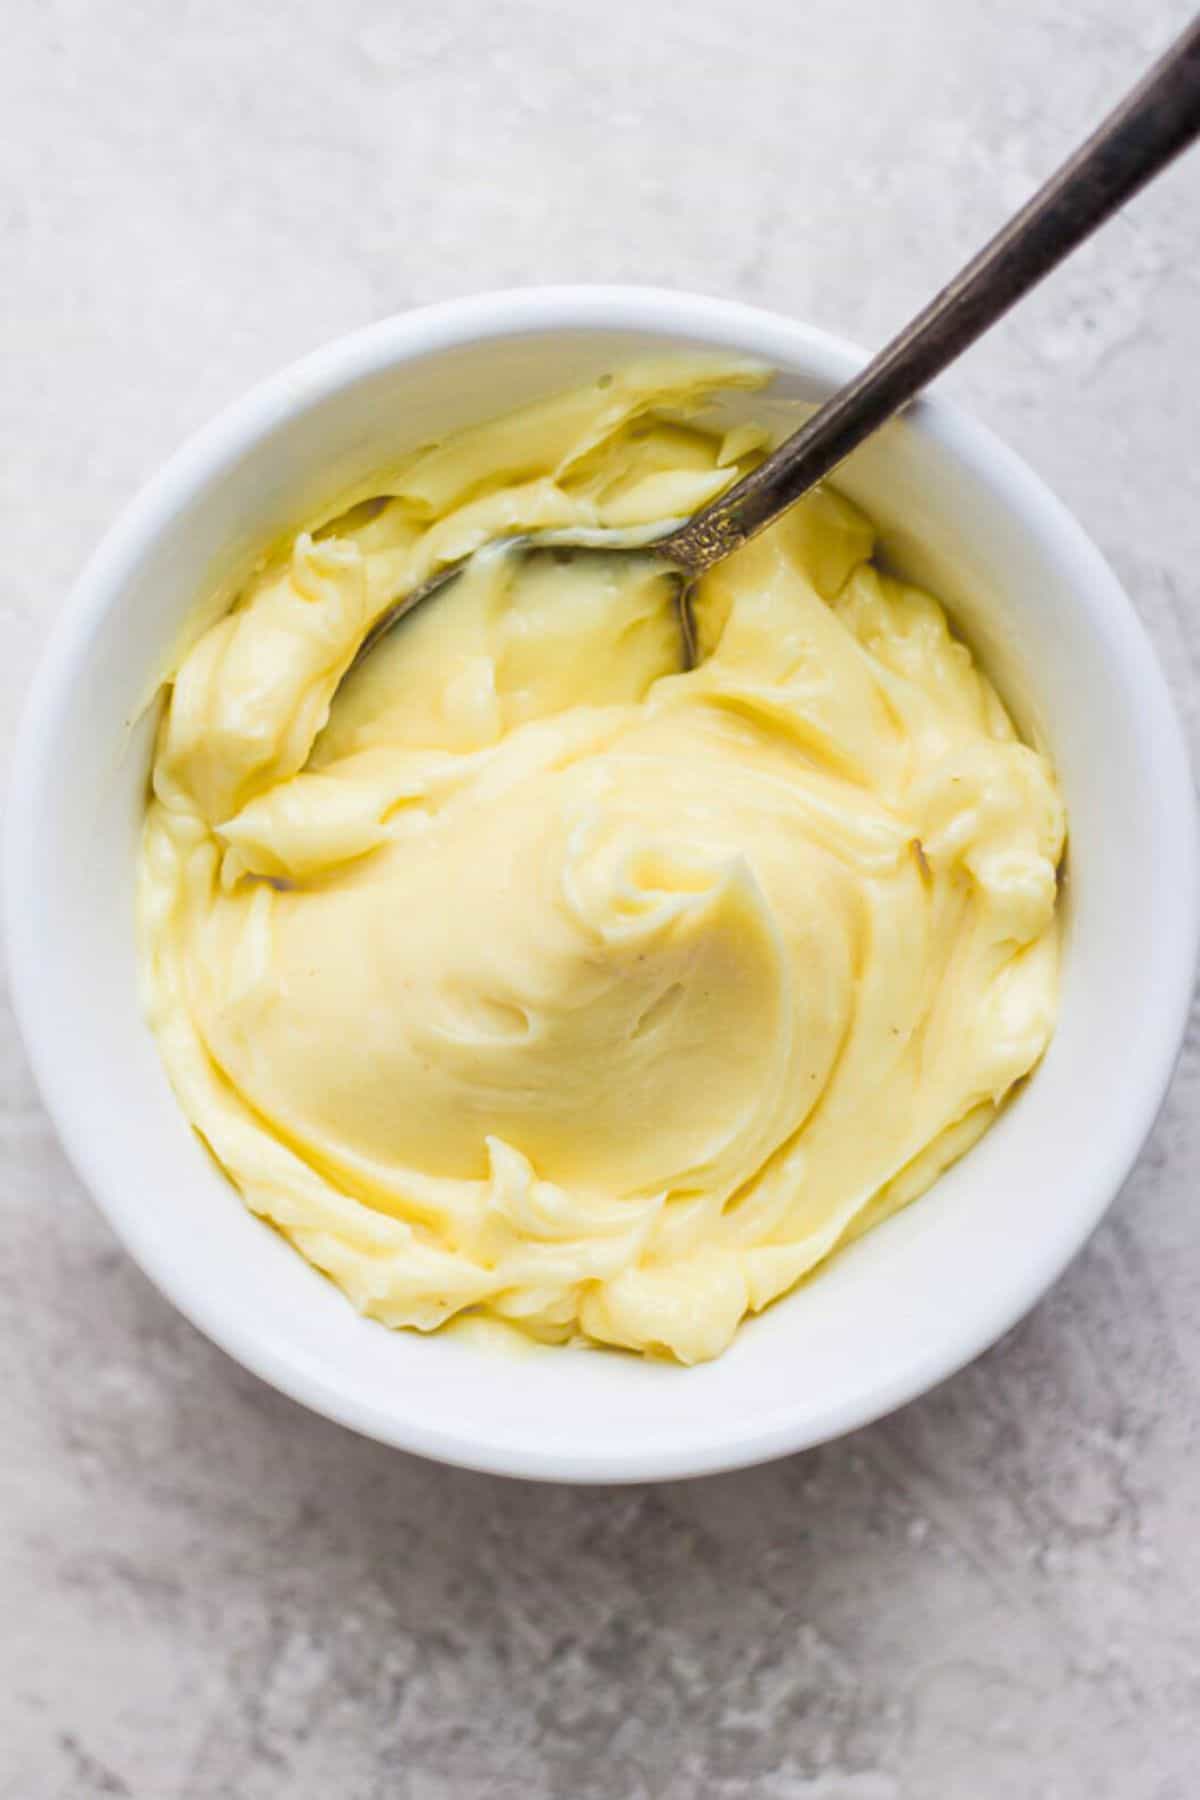
Here is my recipe for aioli – a garlic-flavored mayonnaise that is a great dip for fries, a spread for sandwiches, or a topping for veggies and grilled foods. You do not have to be in a restaurant to eat it! You can seriously make an authentic aioli at home in your food processor in minutes. That way, you know that there’s no added sugar or food starch commonly found in store-bought aioli, and you can control the seasonings.
Happy Cooking!
– Yumna
Garlic Aioli Ingredients

- Garlic: Use fresh garlic for the best flavor. I use two cloves as I love the flavor of garlic, but if you want it more mellow, use one. Grab my tips for how to peel garlic fast.
- Eggs: You’ll only need the yolks, so save the egg whites for another use like these egg white bites.
- Oil: You can use any neutral oil or olive oil. The darker the oil though, the darker the aioli recipe. So opt for avocado oil if you can.
- Dijon mustard: You’ll use just a little to help the aioli emulsify. Make sure it’s Dijon, not whole grain or yellow.
- Lemon juice or white vinegar: Any acid will do here, but I love lemon.
How to Make Garlic Aioli


Garlic Aioli Recipe
Ingredients
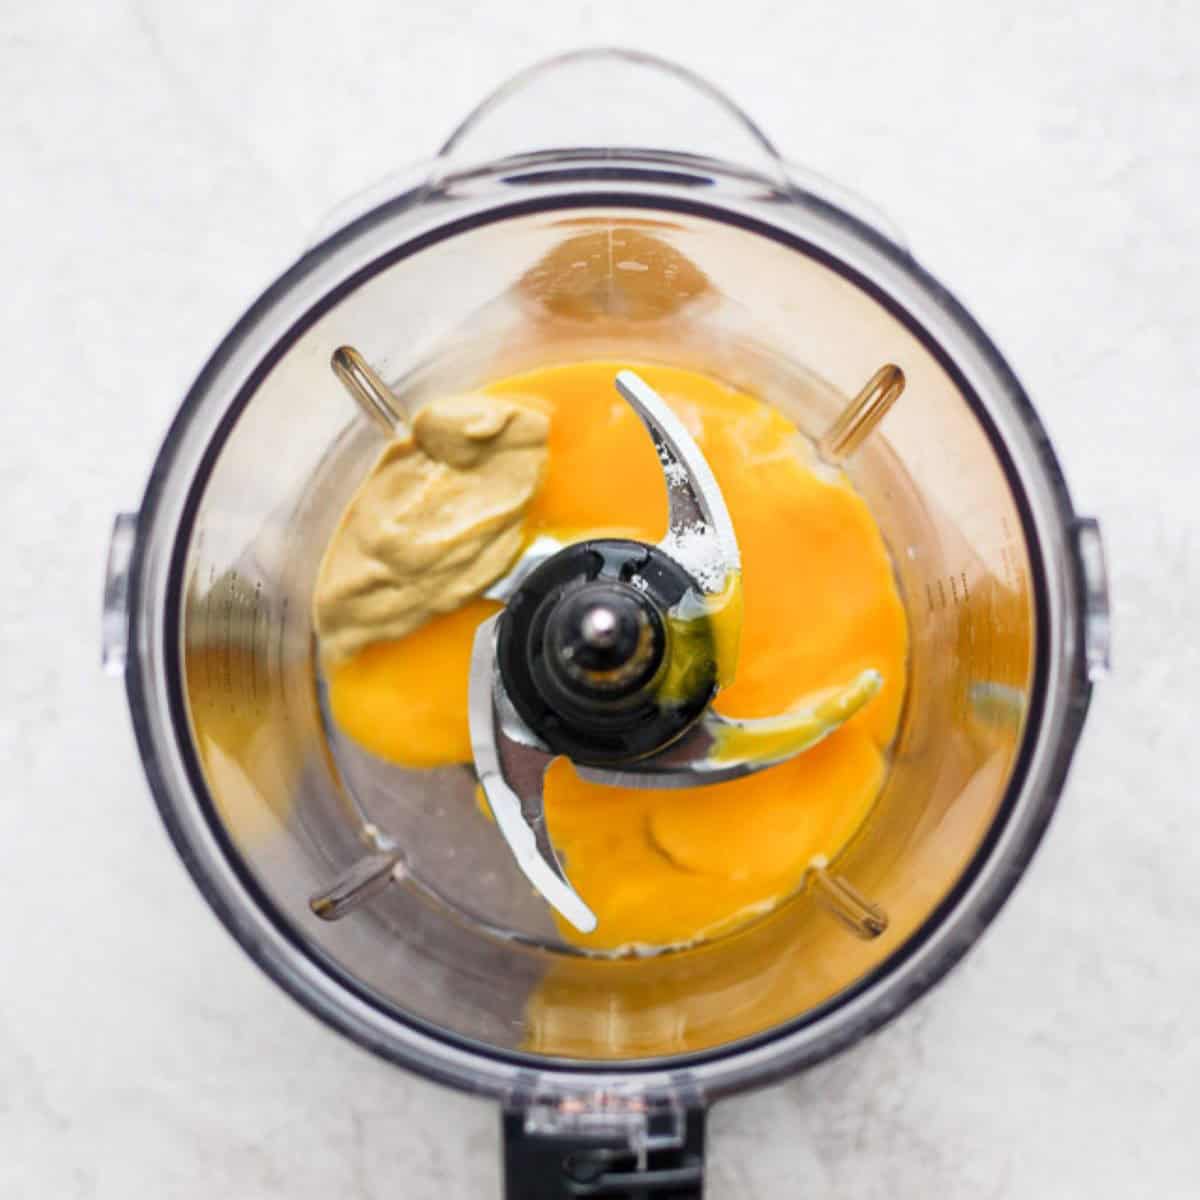
- 2 garlic cloves
- 3 egg yolks
- 1 tablespoon Dijon mustard
- 1 tablespoon lemon juice or white vinegar
- ½ teaspoon salt
- 1 ½ cups oil avocado, olive, safflower or grapeseed
Instructions
- Place the garlic, egg yolks, Dijon mustard, salt, and vinegar in the bowl of a food processor.
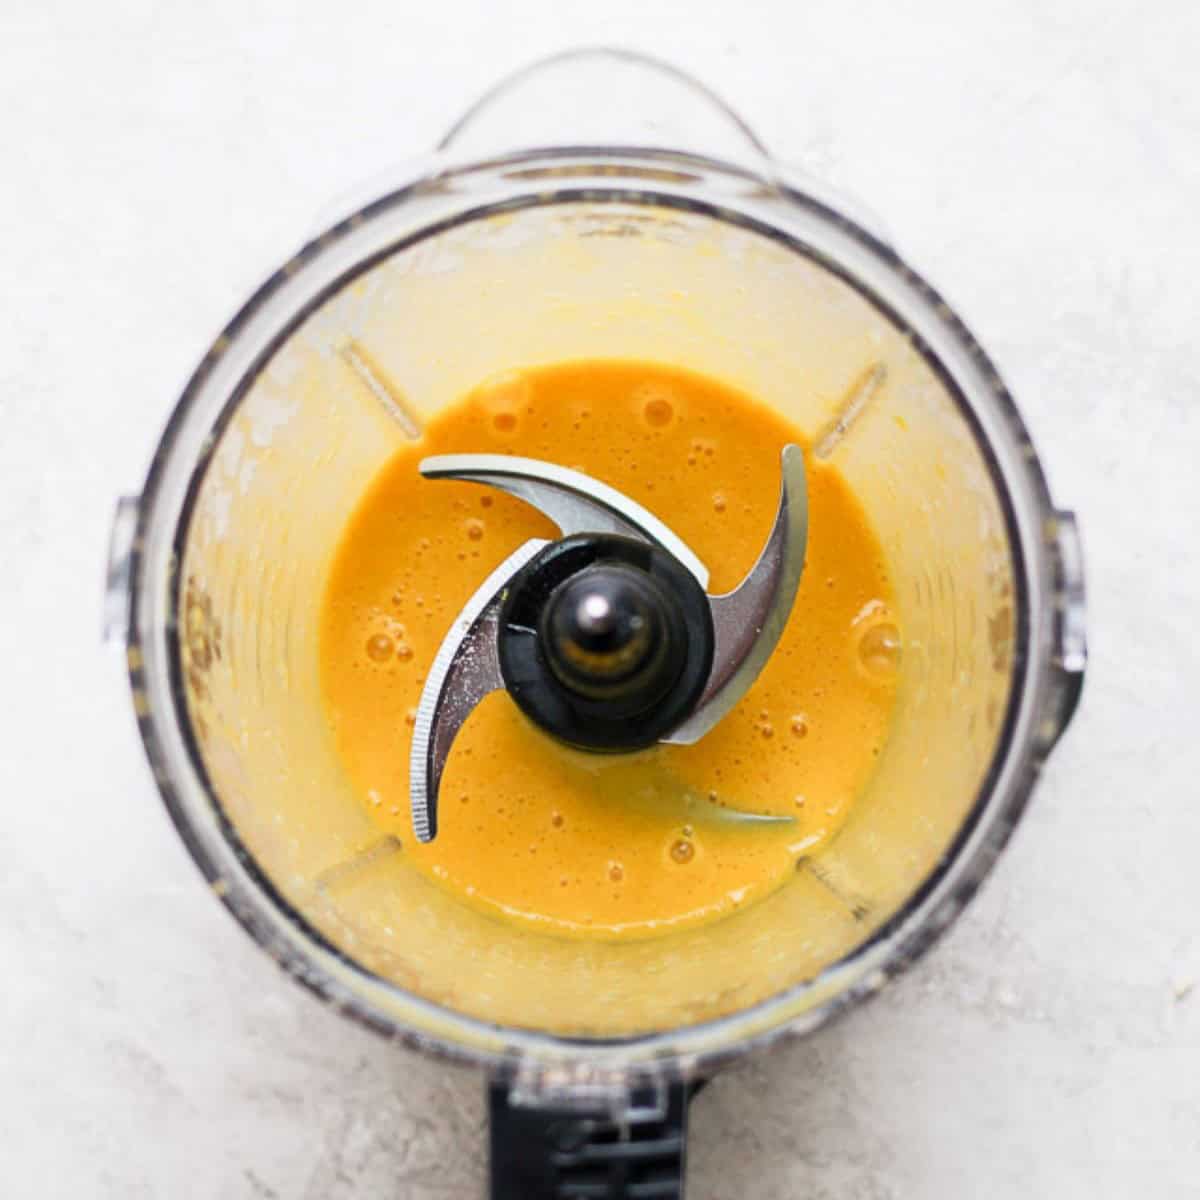
- Run the food processor until everything is well blended, stopping to scrape down the bowl as necessary.
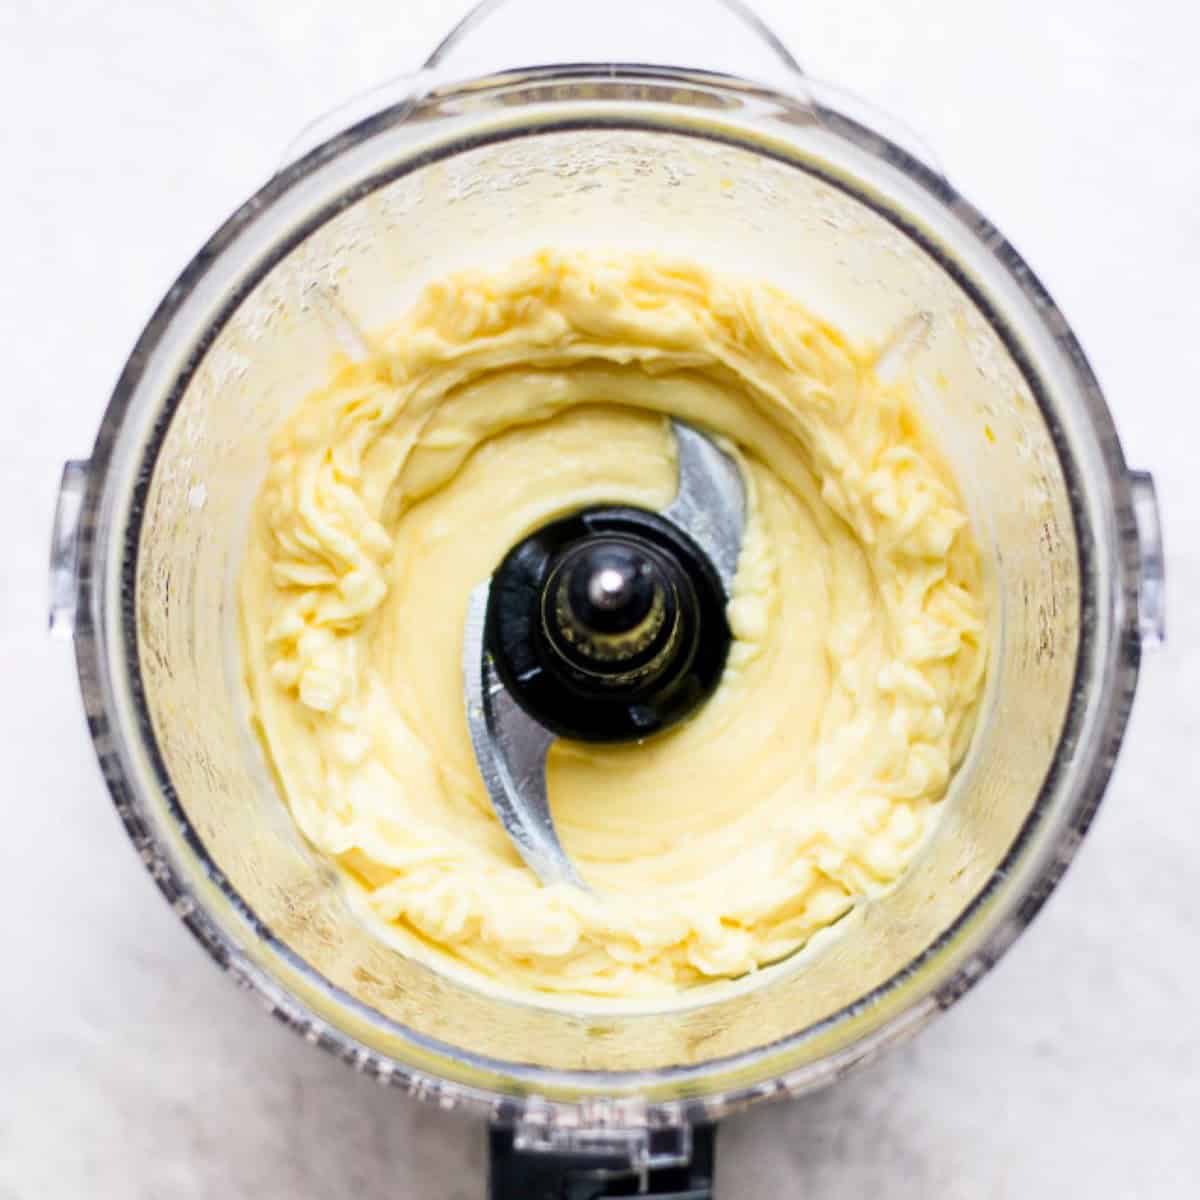
- While the food processor is running, slowly stream in the oil until it has been fully incorporated and it starts to look creamy
- Taste and adjust the seasoning as needed.
Equipment
Notes
Nutrition
Nutrition information provided is an estimate. It will vary based on cooking method and specific ingredients used.
Recipe Tips
- Use room temperature eggs. You want the eggs and oil to have the same temperature so they mix more easily. Eggs are easiest to separate when they are cold, so I like to separate them, then let the egg yolks sit at room temperature for a bit before blending.
- Taste and adjust for seasoning after mixing. Some flavors, like garlic, will intensify over time.
- Thin out the aioli by adding water to it after mixing. This is a great tip if you want to thin it out for drizzling over grilled meat, fish, or veggies like baked asparagus.
- Try this tip if your emulsion doesn’t happen (if it breaks). Pour the mixture into a separate container, rinse out your food processor, and start again. This time, use a new egg yolk or a tablespoon of mustard as your new base, start slowly blending the broken mixture (which will act like the oil in this case) into the base until emulsified.
- Add flavorings after emulsified. If you want to add any additional ingredients, wait until it’s completely done and then add as needed. For fish, I like a little lemon juice or zest. As a sandwich spread, it is nice to add heat via some chili pepper.
Recipes to Make with Garlic Aioli
- As a Burger Sauce: Ground Chicken Burgers, Homemade Hamburgers, Grilled Turkey Burgers
- As a Dip: Air Fryer Coconut Shrimp, Chickpea Fritters or Oven Baked French Fries
- Thinned Out and Drizzled: Grilled Shrimp Skewers, Lemon Ricotta Pasta, Air Fryer Whole Chicken
FAQs
Store homemade aioli in an airtight container in the refrigerator for up to 5 days. Store bought aioli will last longer because the raw eggs in homemade versions reduce its shelf life.
No aoili doesn’t freeze well. Freezing breaks down the emulsion. The defrosted aioli will be separated and weird, so it’s best to enjoy within a few days of making.


