Cherry Pie
Published Jul 14, 2024
This cherry pie is so easy to make! I use frozen cherries, store-bought pie crust, and just a few ingredients to make the perfect filling!
This post may contain affiliate links. Please read our disclosure policy.
Cherry Pie is one of those desserts I’ve always loved but avoided making at home for one reason: Pitting fresh cherries takes a lot of time. My solution was to develop my own recipe…one with a simpler, fuss-free filling. This cherry pie with frozen cherries is exactly that. The frozen berries are already pitted, which means the hardest part is waiting for the pie to bake.
Jump to Section
Another thing I love about using frozen cherries for the homemade cherry pie filling is that it makes this an anytime dessert instead of having to wait for when sweet, fresh cherries are in season. I’ve literally made this cherry pie in the winter. A little taste of summer when it’s snowing outside? Why not!
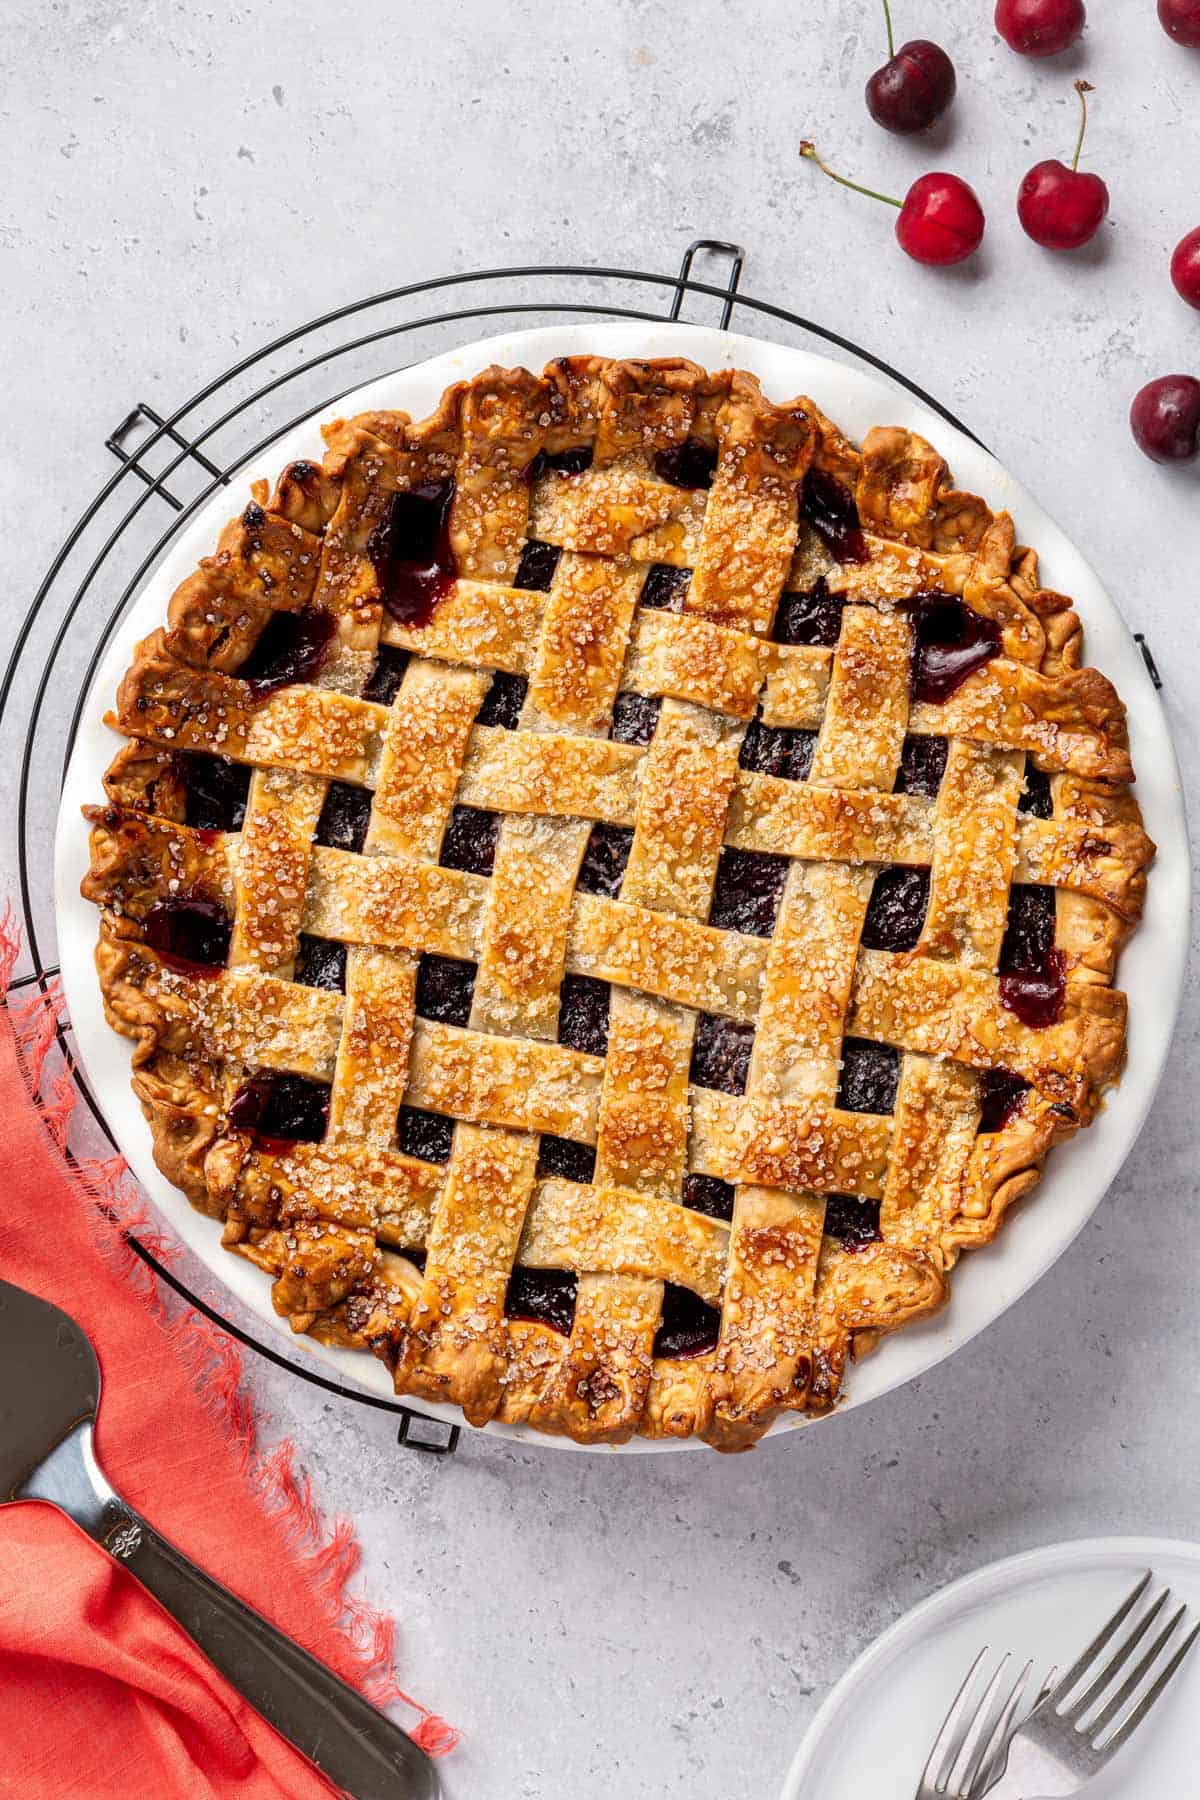
The pie starts with making a simple filling by boiling the berries with sugar, cornstarch, and some other flavorings until everything thickens and becomes syrupy. You can get started on the pie crust while the filling cools. I like to do a lattice, which allows moisture from the fruit filling to bake off without making the top crust soggy. Plus…it just looks so beautiful—a win in my book.
Recipe At a Glance
Cuisine Inspiration: American
Primary Cooking Method: Oven
Dietary Info: Vegetarian
Key Flavor: Cherries
Skill Level: Intermediate
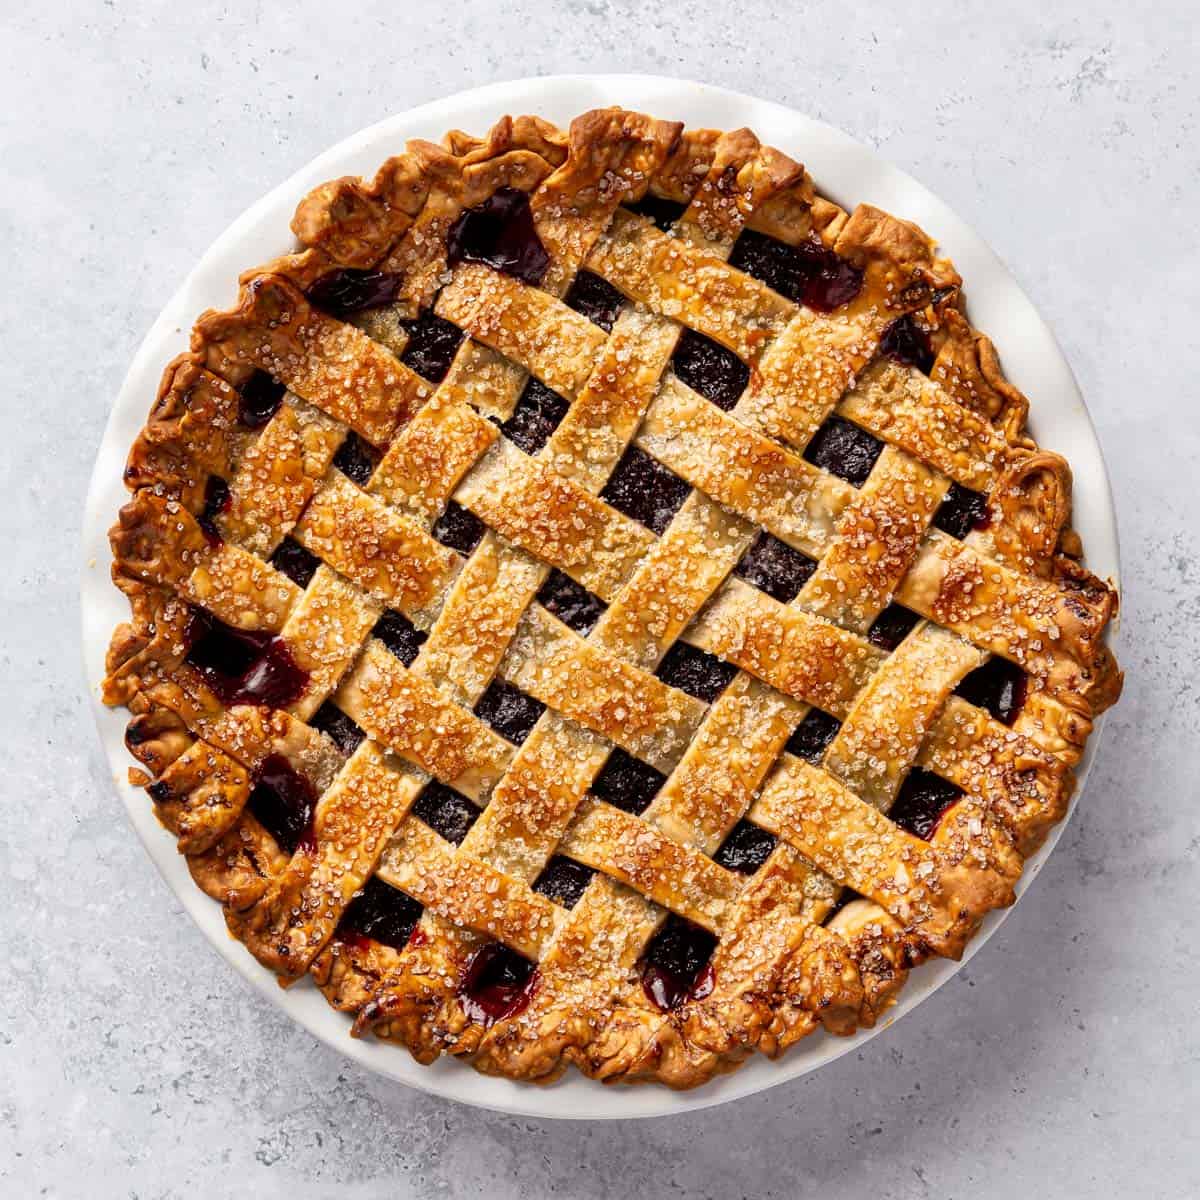
- Impressive-looking: A lattice-crusted pie will never not look beautiful. I like to sprinkle coarse sugar on top of the crust before baking to make it more professional-looking.
- Uses smart shortcuts: Frozen cherries and store-bought pie crust seriously cut down the amount of work this pie requires!
- Cheaper: Baking a cherry pie with frozen cherries is much cheaper than using fresh ones.
- Make-ahead: This pie can be made a few days ahead, which is super helpful if you’re planning for a big dinner or event!
Ingredients to Make Cherry Pie

- Frozen cherries: While pitting fresh cherries can be oddly satisfying, frozen ones will work great.
- Sugar: Frozen cherries aren’t very sweet. Sugar makes a more balanced filling.
- Cornstarch: This will help to thicken the homemade cherry pie filling.
- Lemon: You’ll use the zest and juice.
- Vanilla and almond extracts: Make sure to measure out the almond extract—it’s very potent!
- Pie crust: I call for pre-made pie crust, but you can make your own.
- Butter: This will add richness to the filling. I like to use unsalted butter to control the final amount of salt that ends up in the pie!
- Egg: You’ll use this (plus a little water) for the egg wash. More on this later!
- Coarse sugar: Also called sanding or turbinado sugar, sprinkling this on top of the pie will make it glisten and add crunchiness.
Popular Substitutions & Additions
- Make it gluten-free. You can always use your favorite gluten-free store-bought dough or pie crust recipe!
- Do a galette instead. If you’re not feeling the double pie crusts, you can turn this pie into a galette and use just one for what’s basically an open-faced pie.
- Add spices. Try adding ground cardamom, nutmeg, or ginger to the cherry filling.
- Swap out the citrus. Instead of the lemon, use lime juice and zest.
How to Make Cherry Pie
Ever pie-baking newbies shouldn’t feel intimidated by this cherry pie: I’ve made it as simple as possible. Trust me…you will feel accomplished when you pull this pie out of the oven.

Tips for Making the Best Cherry Pie with Frozen Cherries
- Don’t skip the cornstarch. This is what will help to thicken the pie’s filling and set it so the filling doesn’t ooze out when you slice the pie. Other thickeners (like tapioca starch) will work, but I like cornstarch because it’s cheap and widely available.
- For the best browning, use egg wash. This is basically just egg whisked with water, but brushing it all over the pie dough before baking won’t make it taste eggy. Instead, egg wash helps the crust become a beautiful, even golden brown.
- Make sure not to cover the entire pie with foil if the edges are darkening. You want to ensure that the center of the pie gets cooked, so only cover the edges. I find it’s easier to do it with 4 pieces of foil draped over the pie edges.
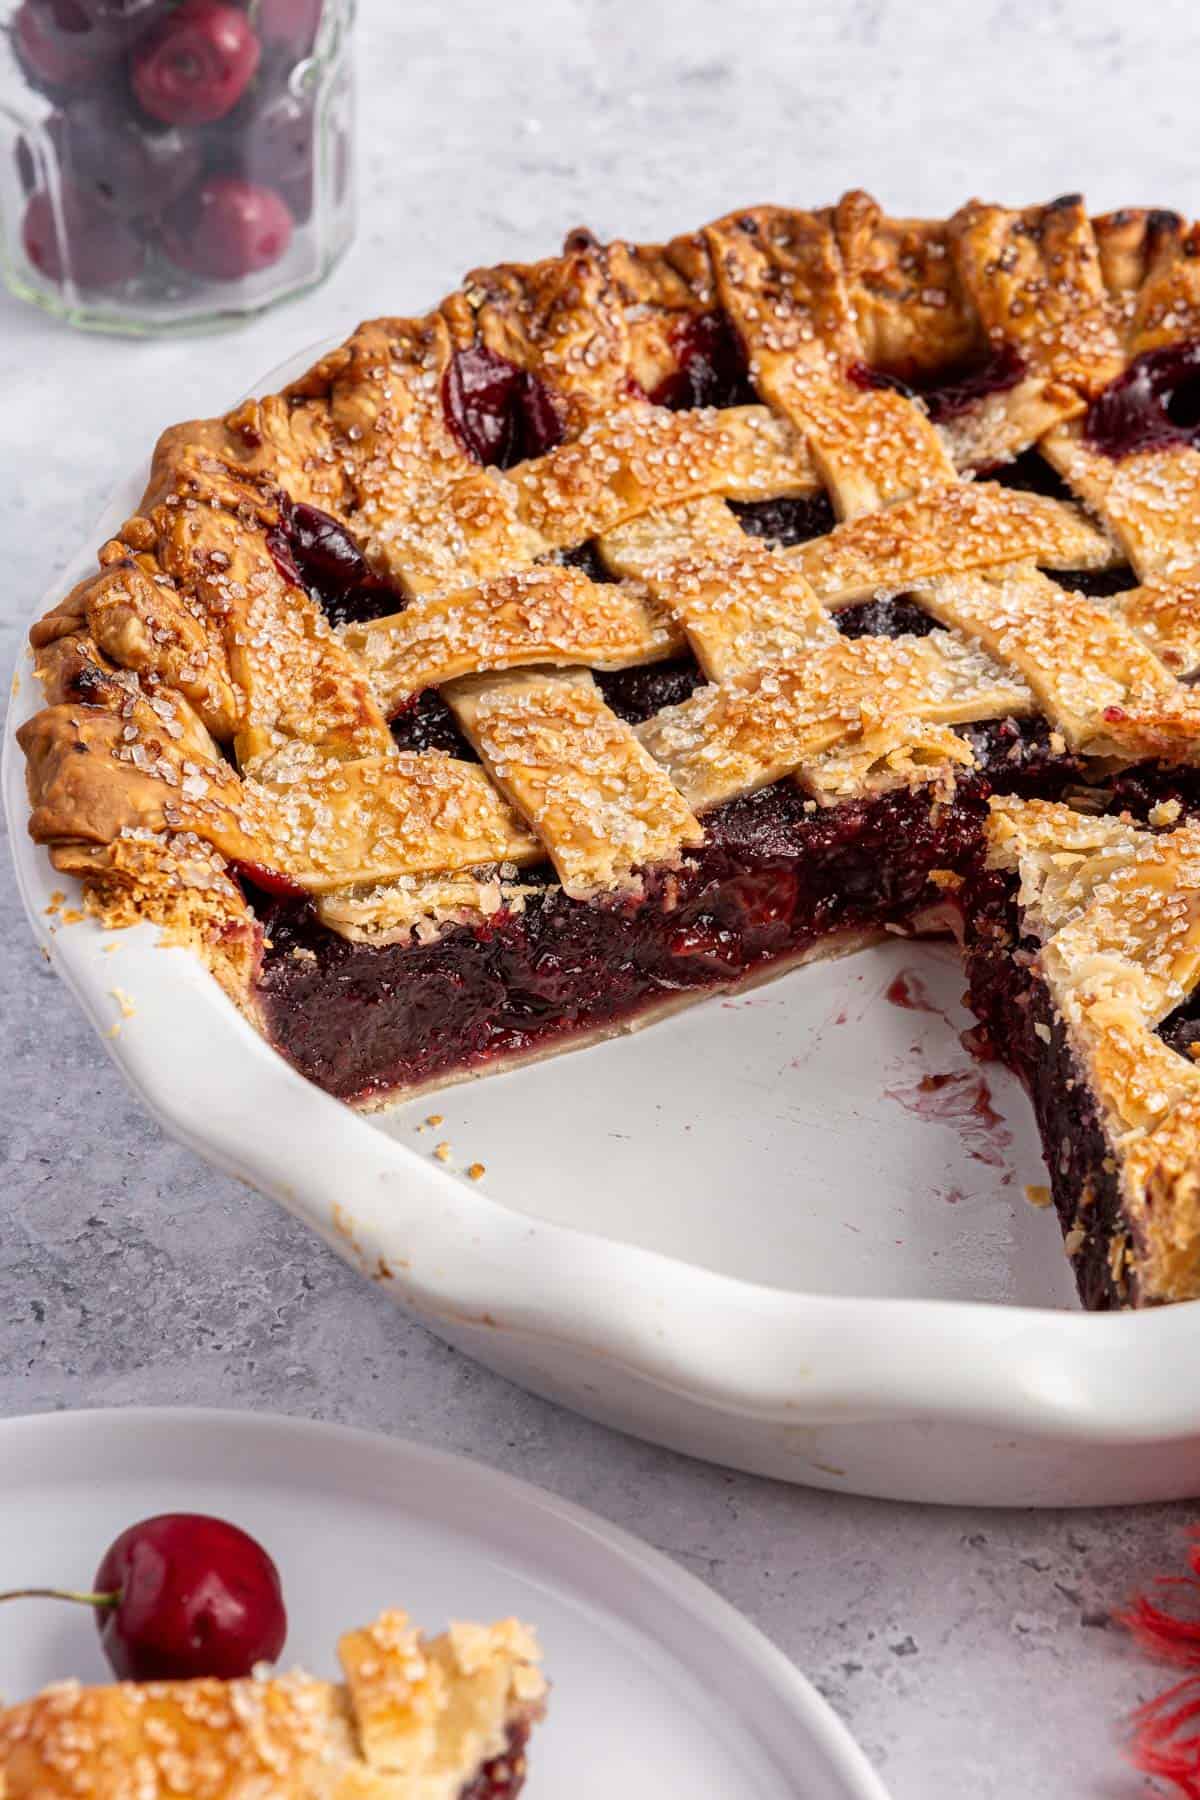
- Don’t cut into the pie too early. I know that waiting hours for a pie to cool might not seem ideal, but don’t try to cut it short. The cooling time makes sure the filling is set. Cutting into it while it’s too warm will lead to messy slices.
Frequently Asked Questions
You can cover this cherry pie and leave it on the counter for a couple of days or pop it in the fridge in an airtight container and for up to 5 days.
Pre-baking a pie crust is good for fillings that don’t need a lot of time in the oven (meaning the crust wouldn’t become fully cooked otherwise). Because cherry pie bakes for longer—about an hour—there’s no need to pre-bake the crust.
To avoid a runny filling, make sure to use a thickening ingredient, like cornstarch. Allowing the pie to cool completely before slicing it will also set the filling. Cornstarch turns into a gel when it’s heated, but also helps set and further thicken things as it cools.
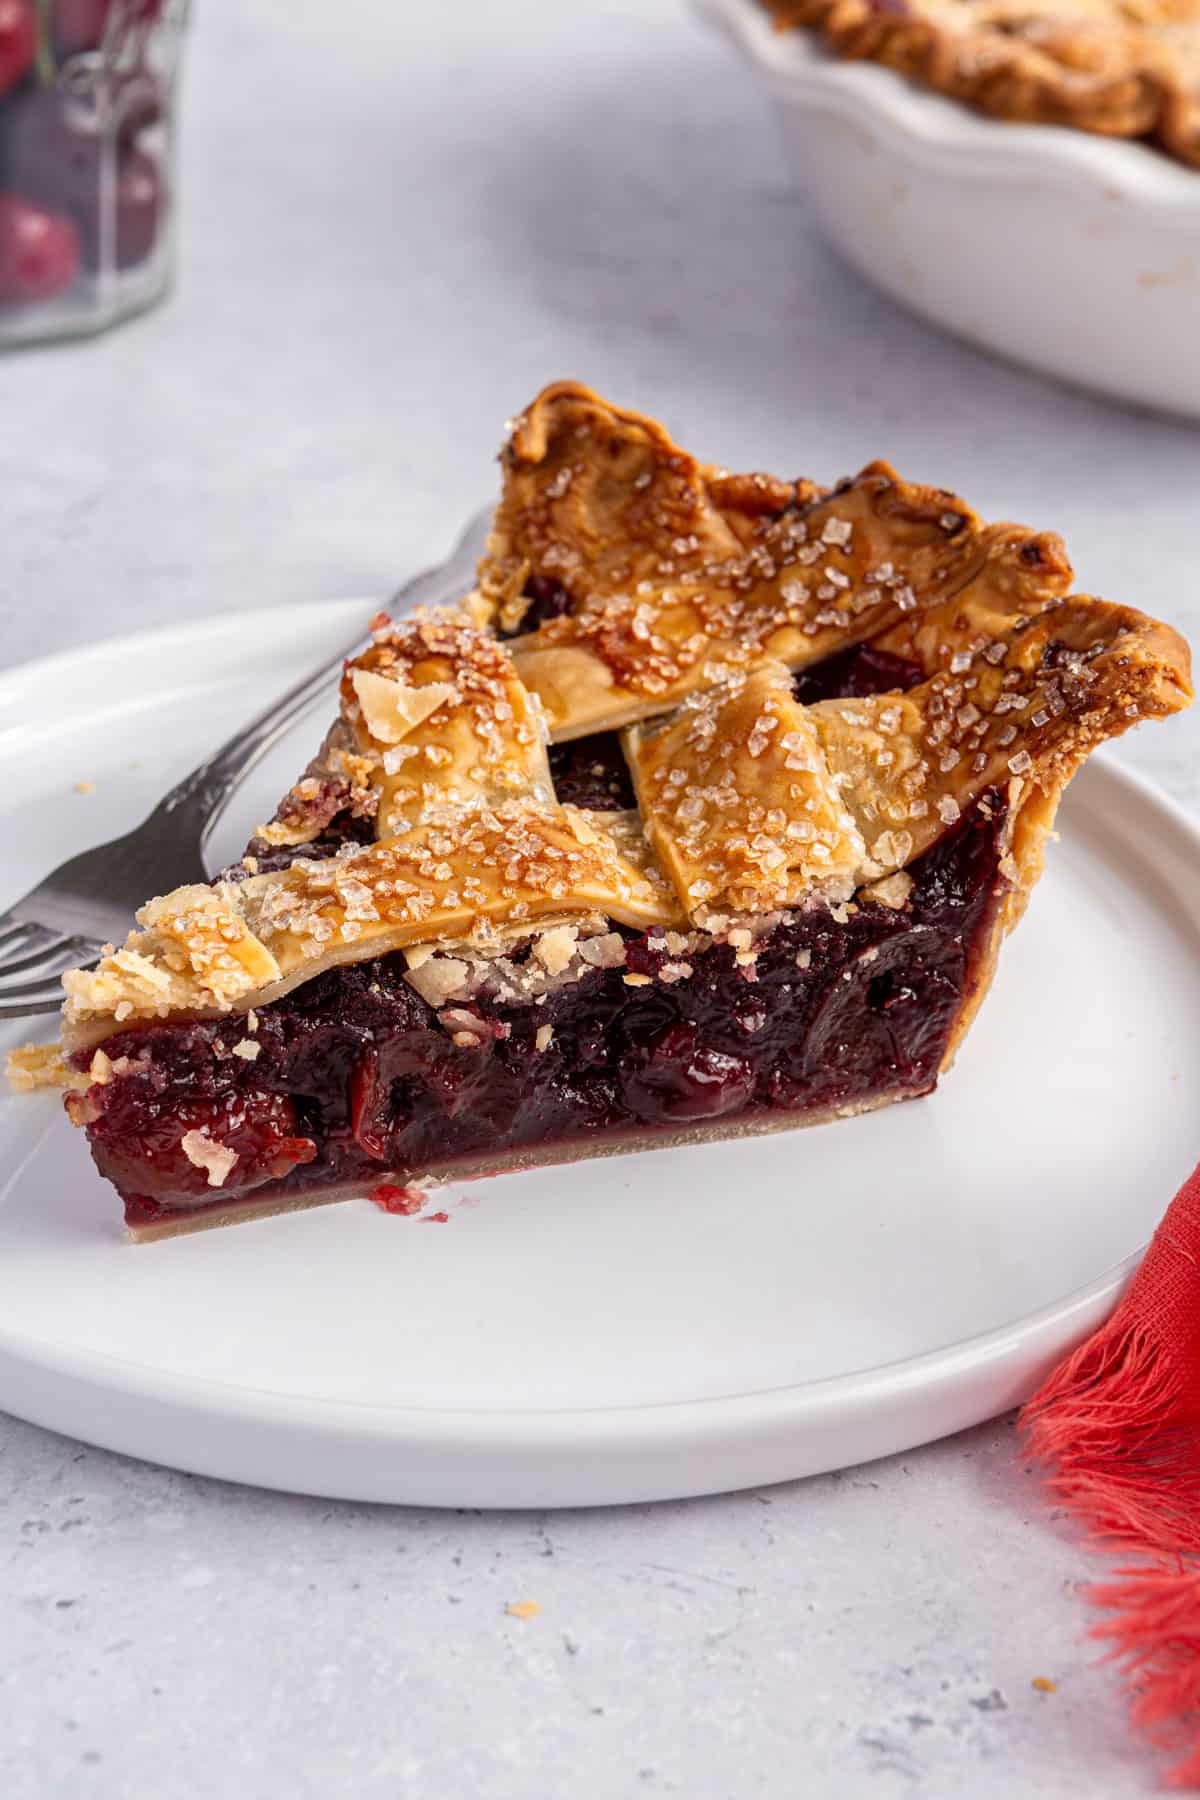
There you have it: My cherry cherry pie that can be made any time of the year. I recently shared this recipe with a friend who swears pie is too fussy and even they loved it. Give it a go and you’ll feel the same.
More Pie Recipes:
- Fresh Strawberry Pie
- No-Bake Peanut Butter Pie
- Vegan Sweet Potato Pie
- Pumpkin Pie with Graham Cracker Crust
- Pecan Pie
- Vegan Pumpkin Pie
- Rose Apple Pie
- Peach Galette
If you try this feel good Cherry Pie recipe or any other recipe on Feel Good Foodie, then don’t forget to rate the recipe and leave a comment below! It helps others who are thinking of making the recipe. We would love to hear about your experience making it. And if you snapped some shots, share it on Instagram so we can repost on Stories!

Cherry Pie
Ingredients
- 2 pounds (32 ounces) frozen pitted cherries
- ⅔ cup granulated sugar
- ⅓ cup cornstarch
- 1 small lemon zest and juice 2 tablespoons lemon juice
- 1 teaspoon vanilla extract
- ¼ teaspoon almond extract
- ¼ teaspoon salt
- 2 (9-ounce) whole refrigerated pre-made pie crusts
- 2 tablespoons unsalted butter cut into small pieces
- 1 large egg
- Coarse sugar optional
Instructions
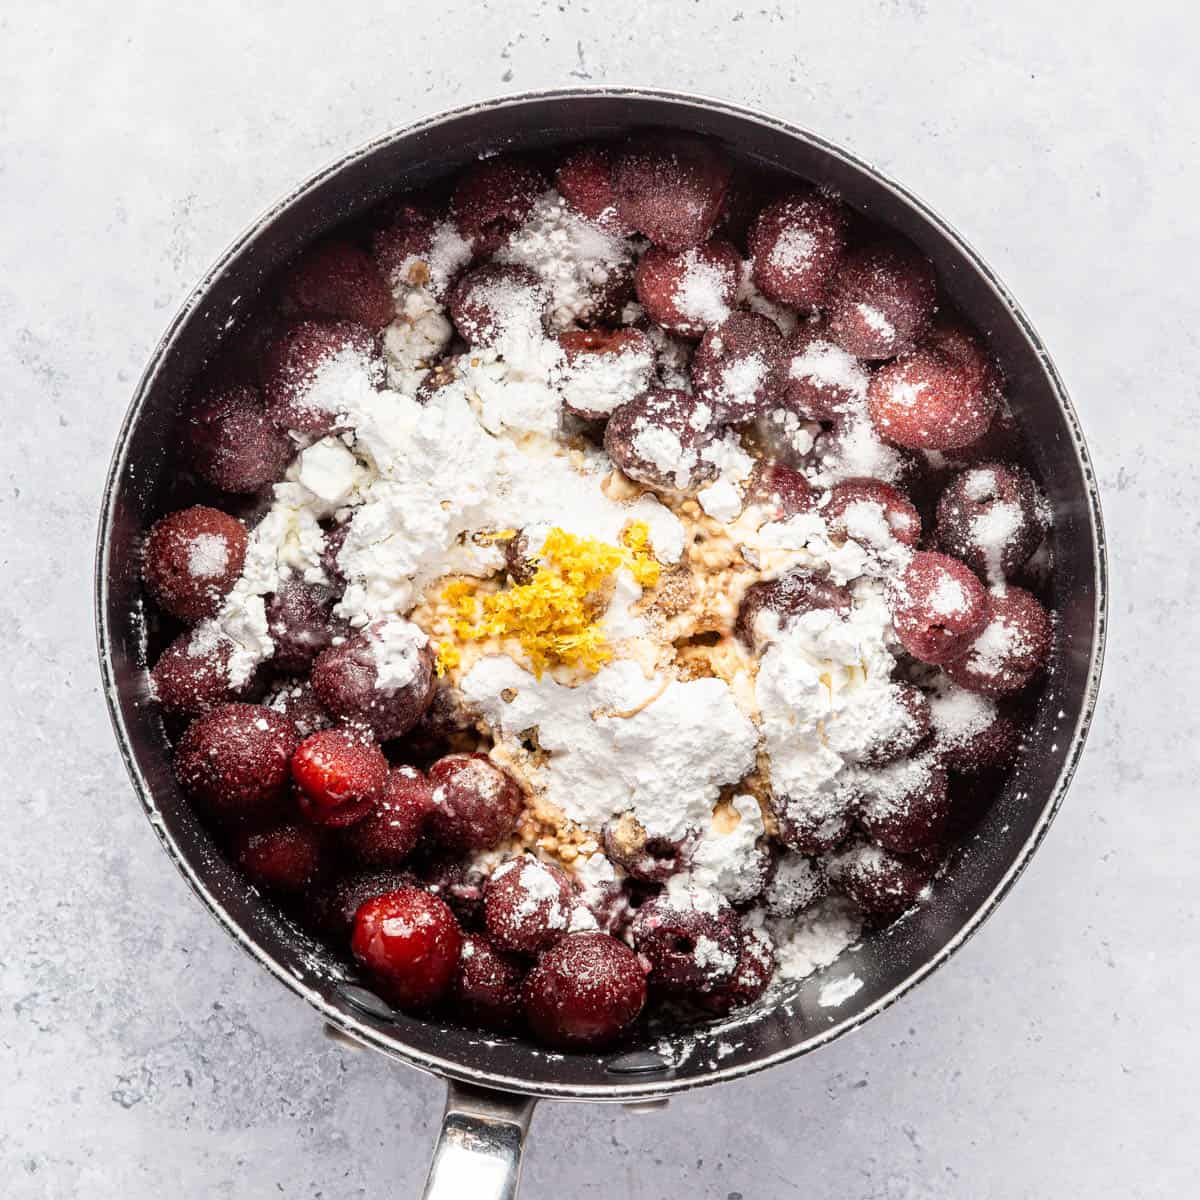
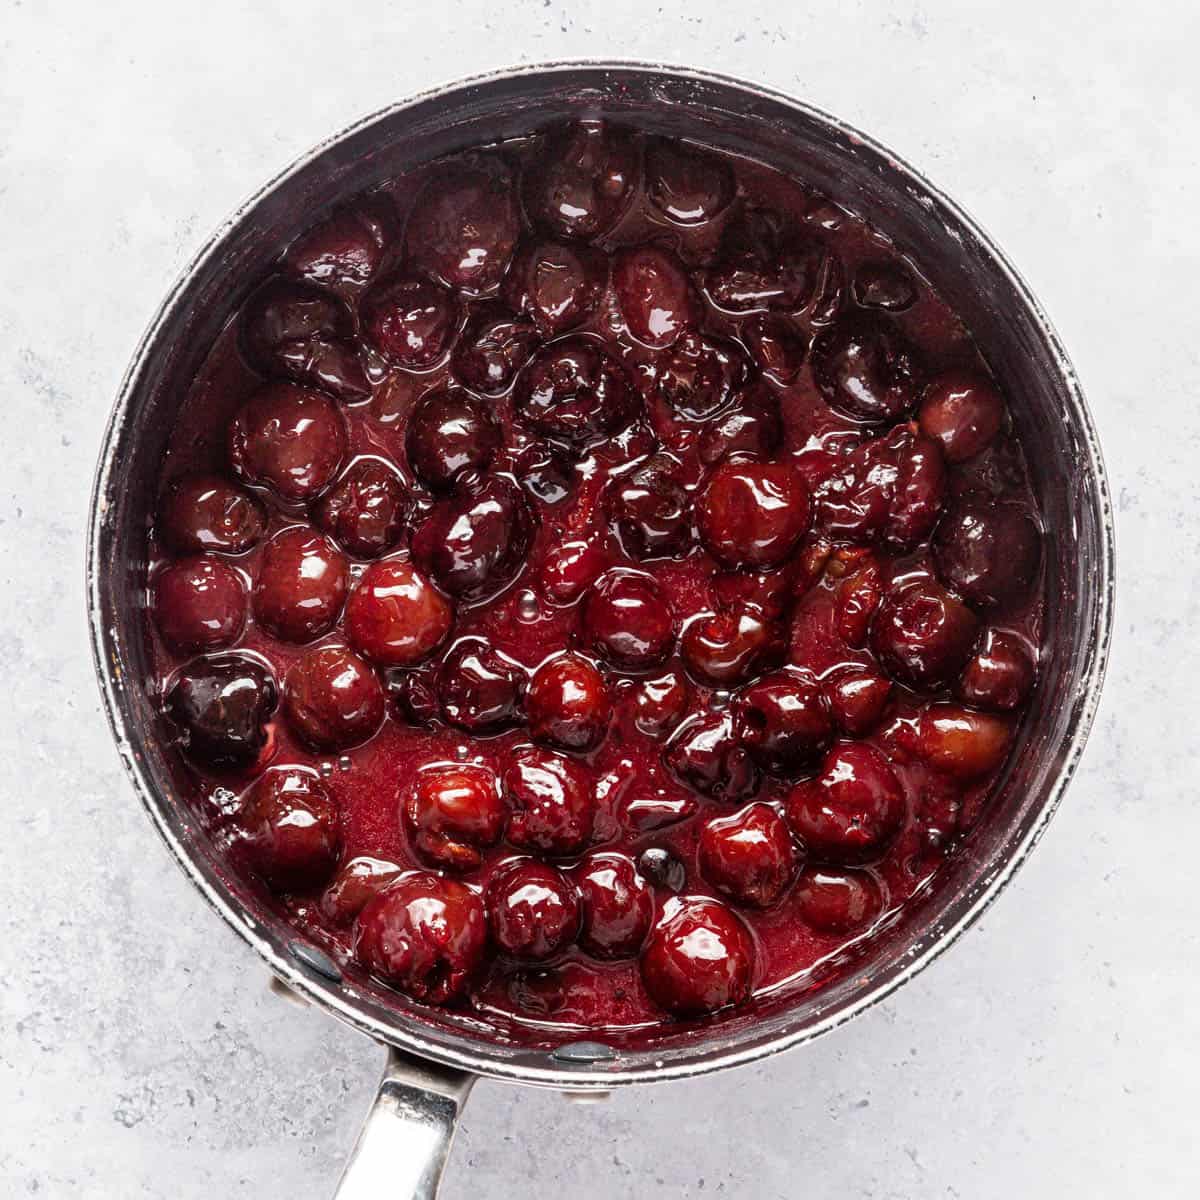
- Combine the frozen cherries, sugar, cornstarch, lemon zest, lemon juice, vanilla extract, almond extract, and salt in a saucepan. Heat over medium-high, gently stirring occasionally. Bring to a boil for 1 minute before setting to the side to cool to room temperature.
- Preheat the oven to 425°F with a baking sheet inside and prepare the pie crusts.
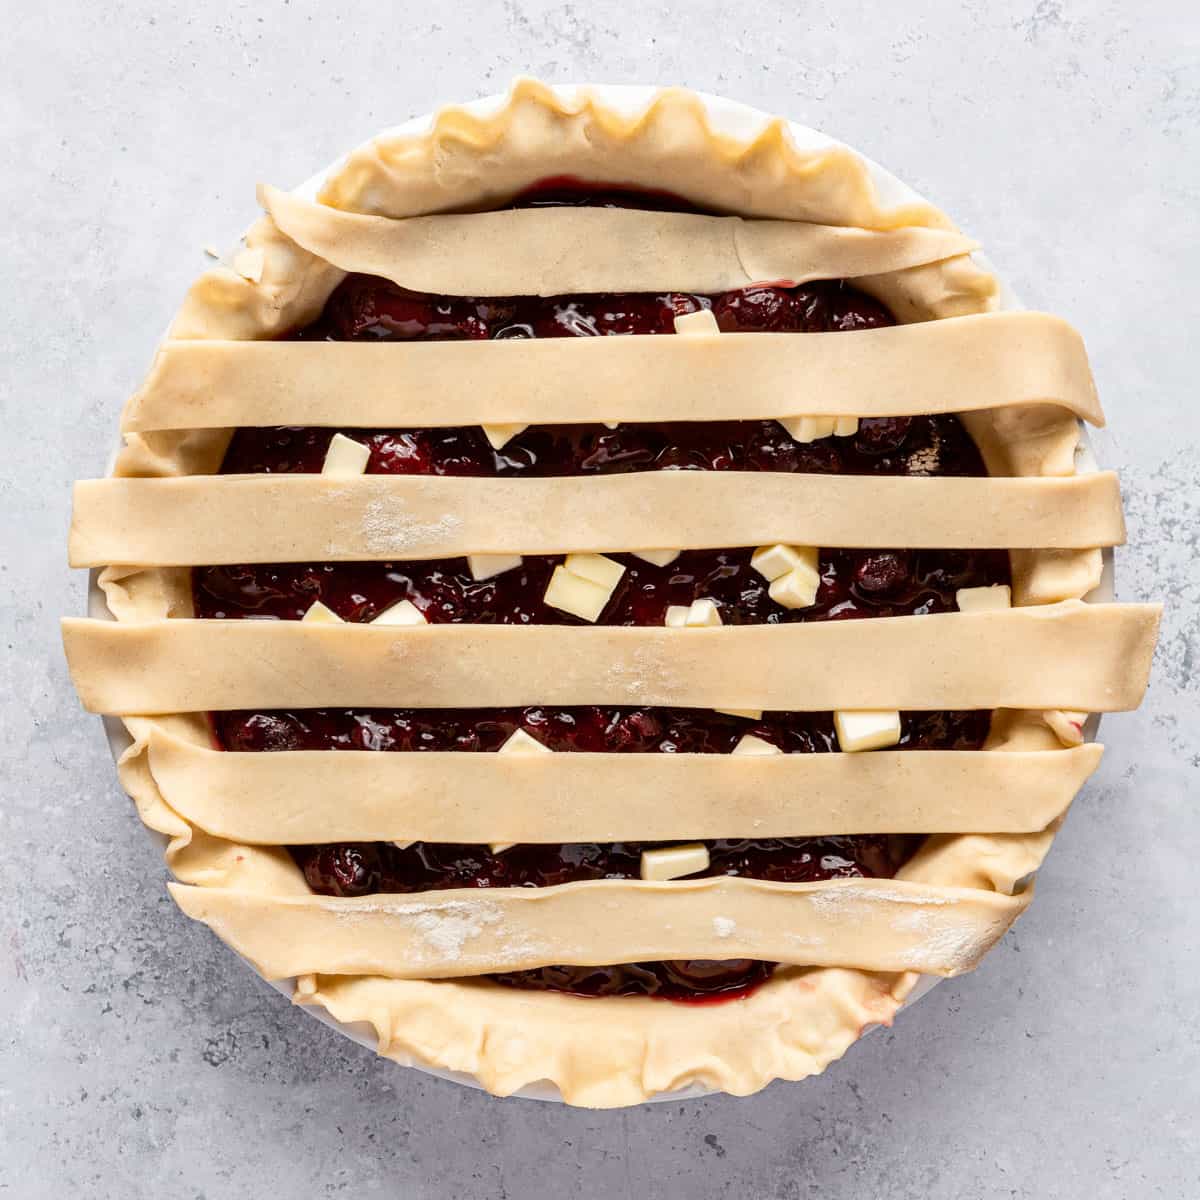
- Prepare the lattice top: Roll out one prepared pie crust on a lightly floured surface or silicone mat while keeping the other chilled until ready. Use a sharp knife or pastry wheel to cut the dough into 1 inch strips. You should get about 12 strips. Divide the strips into two piles, alternating between each.
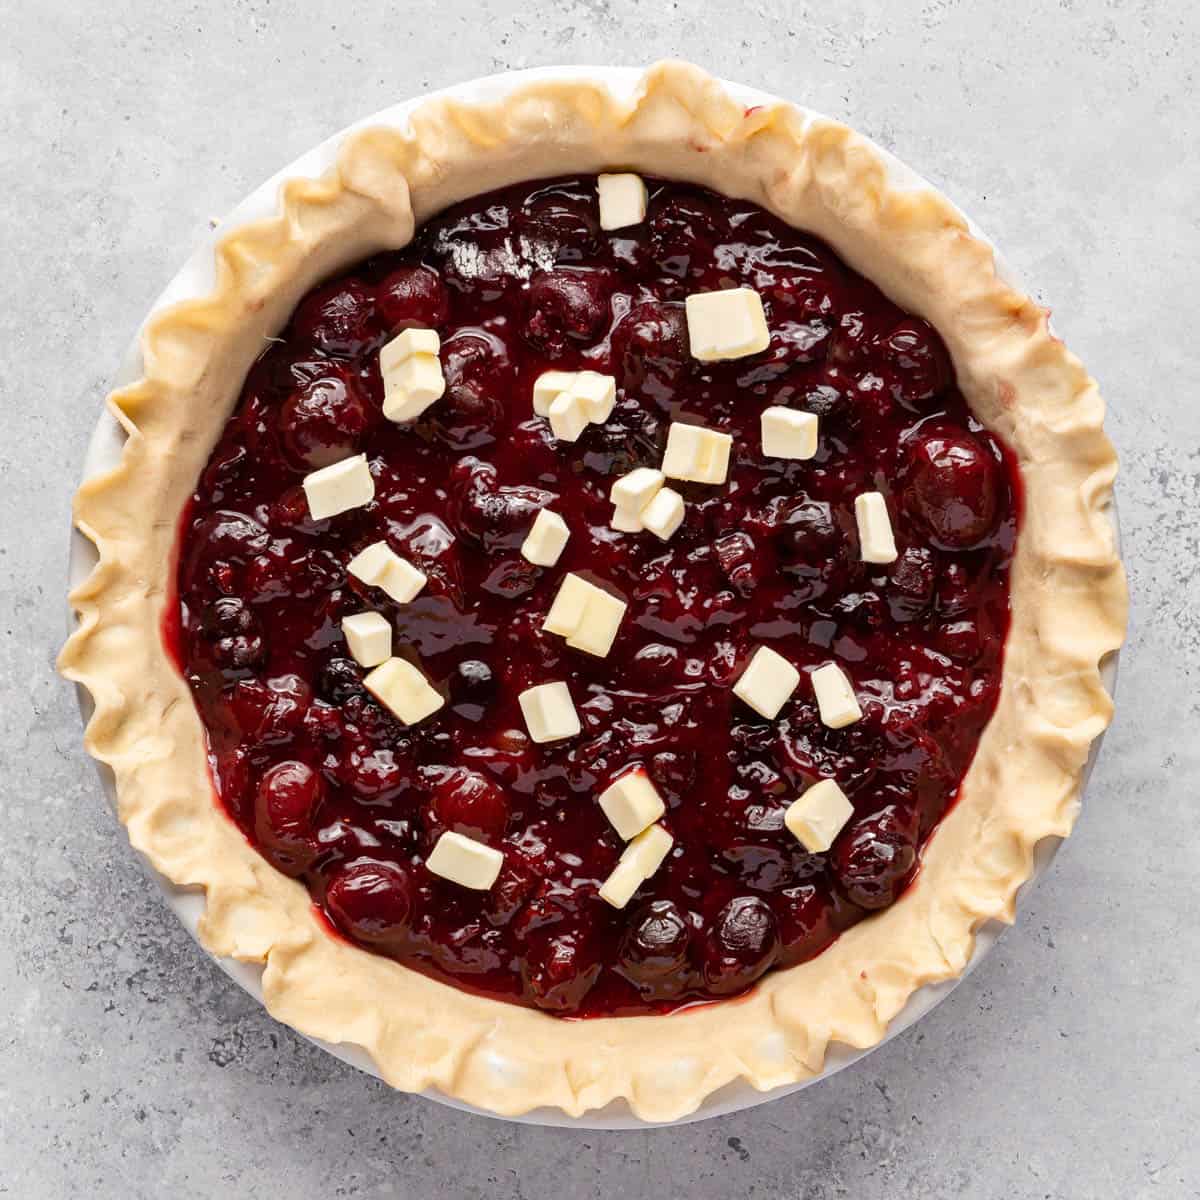
- Place the other chilled pie crust into a 9-inch pie plate so it conforms to the dish. Spoon in the cooled cherry filling and scatter the cold butter pieces over it.
- To create a lattice top, place the first set of strips evenly on top of the pie. Weave the remaining strips over and under the first set. To do this, lift every other strip backward and place a horizontal strip across, then return the lifted strips to their original position. Next, lift the alternate strips and repeat the process until the lattice is complete. Trim any excess and crimp the pie crust edges to seal.
- For the egg wash, whisk an egg in a small bowl and use a pastry brush to coat the crust. Sprinkle with coarse sugar, if using, place on the heated baking sheet, and bake at 425°F for 20 minutes. Reduce the temperature to 375°F and continue baking for an additional 40-45 minutes, or until the cherry filling is bubbly and the crust is a dark golden brown. If the edges are darkening too quickly, cover them with foil.
- Remove the pie from the oven and cool for 3-4 hours or until the cherry pie filling sets. Serve with whipped cream or ice cream.
Equipment
Notes
Nutrition
Nutrition information provided is an estimate. It will vary based on cooking method and specific ingredients used.


Comments
Advice if the filling still seems “soupy?” I followed the directions. Would it hurt to add more cornstarch until I reach the desired consistency?
No, it doesn’t hurt to add more cornstarch, I’d recommend trying another tablespoon and it should help since the cherries may have extra moisture.
I followed this recipe exactly and it did NOT disappoint!! Beautiful and delicious!!
Amazing!! Thank you, Dina!
Look very vibrant and that crust 🥰
So good, right? Glad you like it, Tasneem!!