Cake Pops
Published Aug 14, 2023
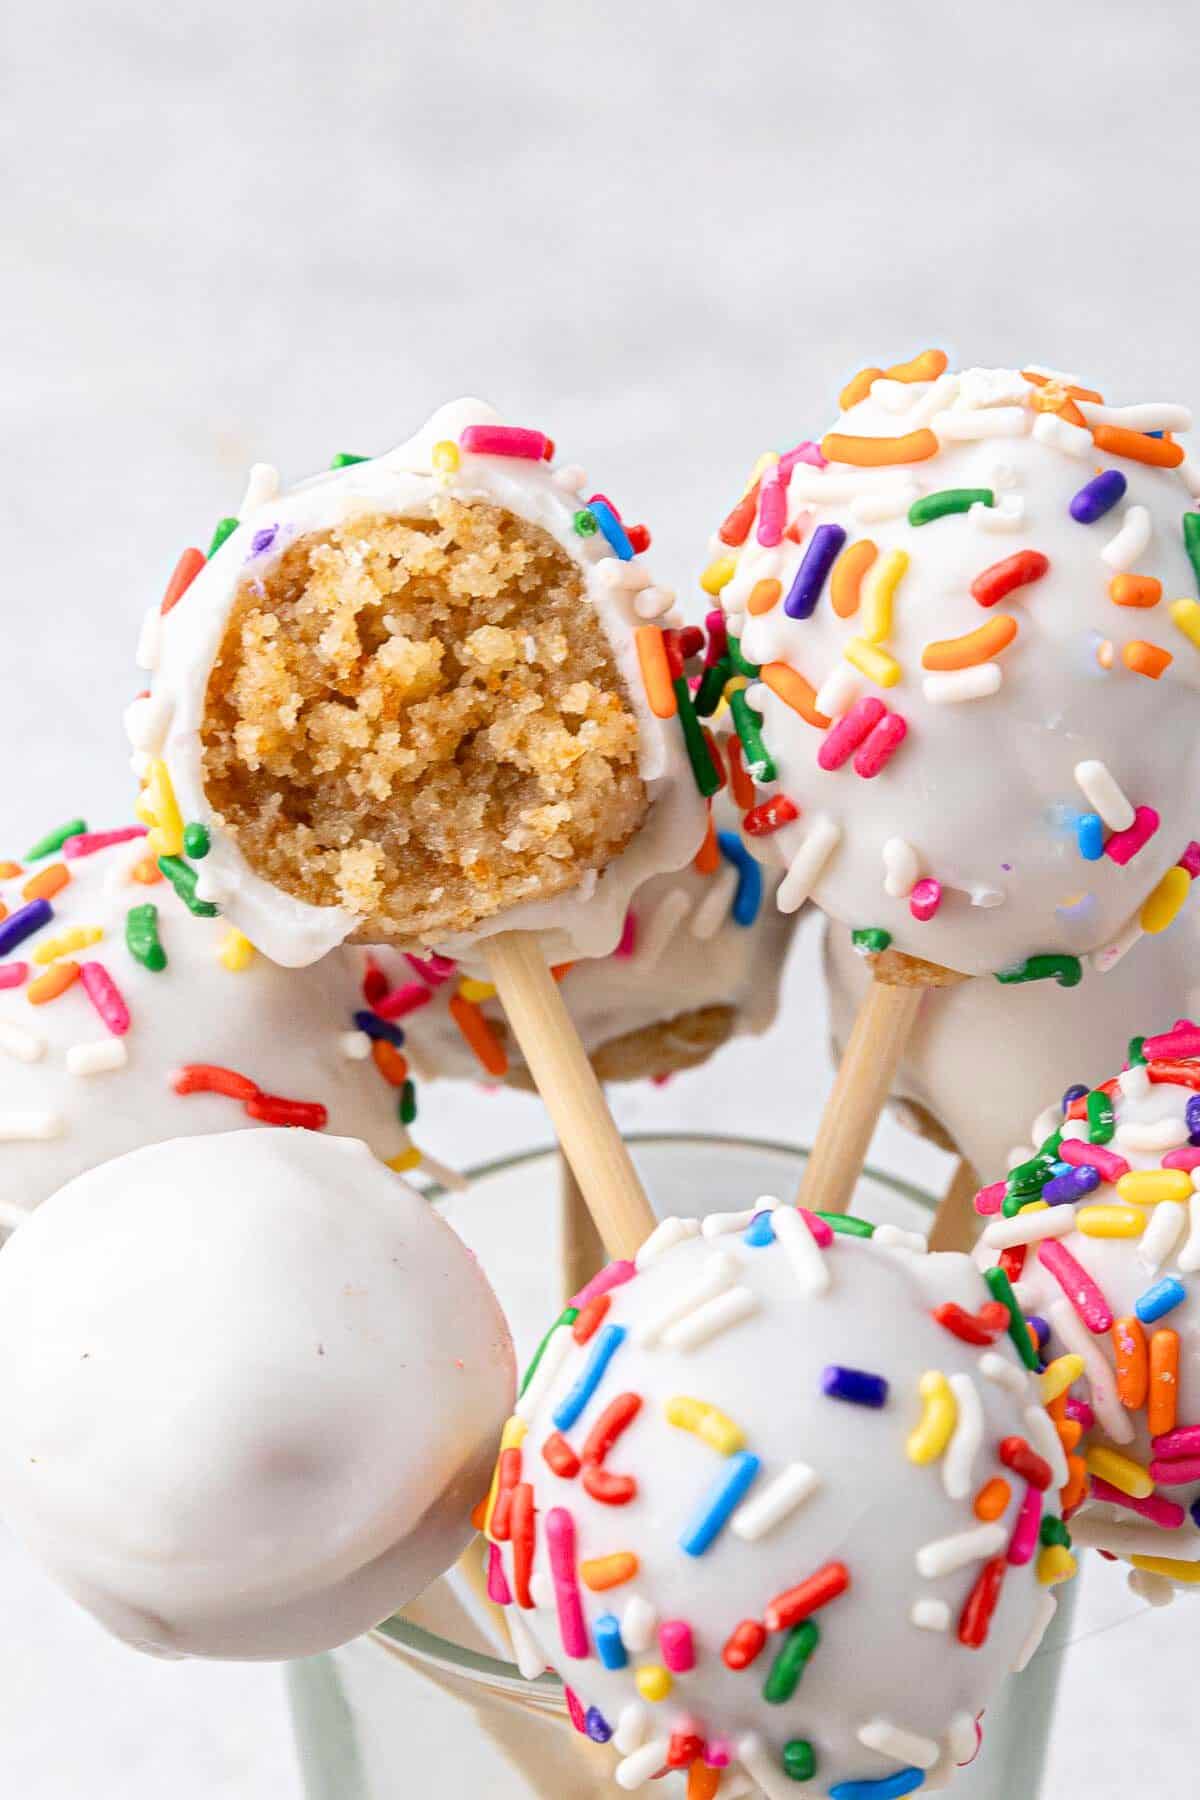
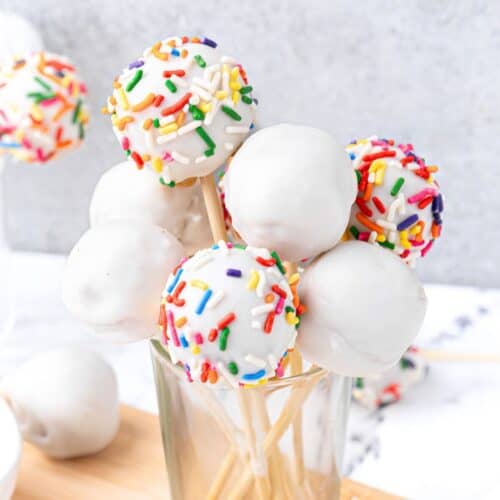
These Cake Pops are made with vanilla cake mix, homemade buttercream, white chocolate, and sprinkles. Easy to make and perfect as a treat or party favor!
This post may contain affiliate links. Please read our disclosure policy.
While cake pops might seem intimidating, especially when you see those perfect little orbs in a Starbucks display, my step-by-step guide makes it surprisingly simple. So, gather your ingredients, summon your inner pastry chef, and let’s create a batch of cake pops that both kids and adults will love.

Jump to Section
Ah, cake pops – little spheres of cakey goodness that combine the fun of lollipops with the richness of cake, frosting, and chocolatey outer coating. They’re not just a trendy Starbucks treat. You can easily create them right in your own kitchen. Whether you’re planning a party, a small gathering, or just looking to satisfy a sweet tooth, these cake pops are perfect. Sprinkled with love (and your choice of toppings), they’re a fun and interactive way to enjoy a dessert.
Why You’ll Love These Starbucks-Style Cake Pops
- Endless Creativity: With a neutral vanilla base, the sky’s the limit! Think themed parties, color-coordinated events, or even just to match your current mood.
- Centerpiece Worthy: Whether it’s a fancy soirée or a cozy gathering, these cake pops stand out in the crowd, making them the star of your dessert spread.
- Utensil-free Indulgence: No plates, no forks, just pure, uncomplicated enjoyment.
- Gift-ready: A bundle of these in a pretty package? You’ve just created a heartwarming, delicious gift for someone special.
- Bonding Over Baking: The process is as rewarding as the product. Making these with loved ones turns a simple recipe into a cherished memory.
Ingredients to Make Cake Pops
- Vanilla Cake Mix: Setting the stage with its airy and tender crumb.
- Homemade Buttercream: The small-batch buttercream enhances the texture while binding the cake with a hint of sweetness.
- White Chocolate Melting Wafers: Coat each pop in a silky sweet outside that hardens for a satisfying bite.
- Coconut Oil: Ensures that the chocolate melts just right.
- Sprinkles: More than mere decoration – they’re a sprinkle of joy and a delightful crunch.
- Lollipop or Cake Pop Sticks: The trusty stems holding the cake pops.

How to make cake pops with cake mix
While you can use any cake recipe to make the cake, I went with a simple box cake mix to keep things simple!
Make The cake pops
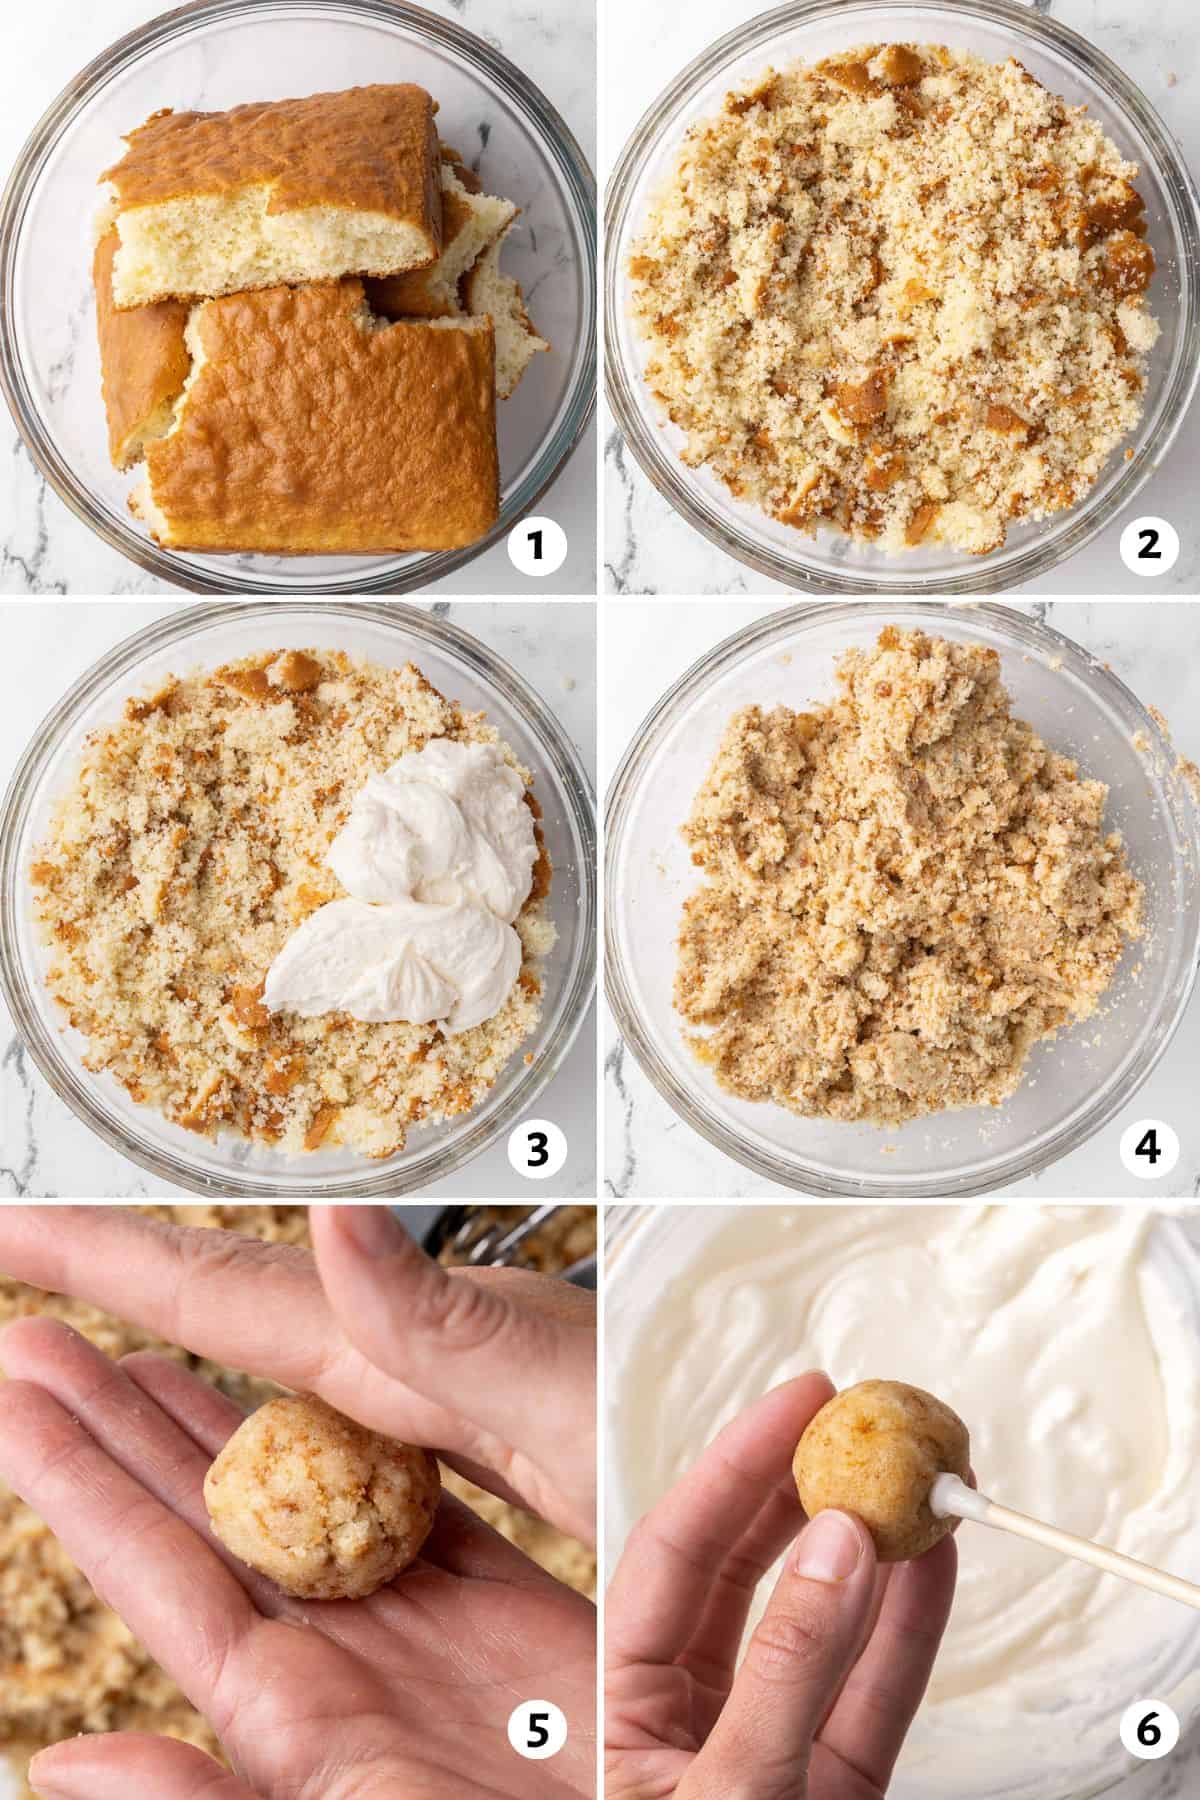
- Remove the cake from the fridge and add to a large bowl.
- Using your hands, break the cake up into very small crumbs. You want the texture to resemble coarse sand.
- Add the buttercream.
- Mix until it is evenly incorporated. The cake should resemble cookie dough.
- Use a cookie scoop, portion the cake mixture into even balls, and set it on the prepared baking sheet. Once you have made even portions, use your hands to roll each one into a smooth, even ball.
- Prepare the white chocolate coating. Dip the stick in the melted chocolate, then set it into the chilled cake balls to help it set securely in place. Chill again to allow the sticks to set.
how to decorate cake pops
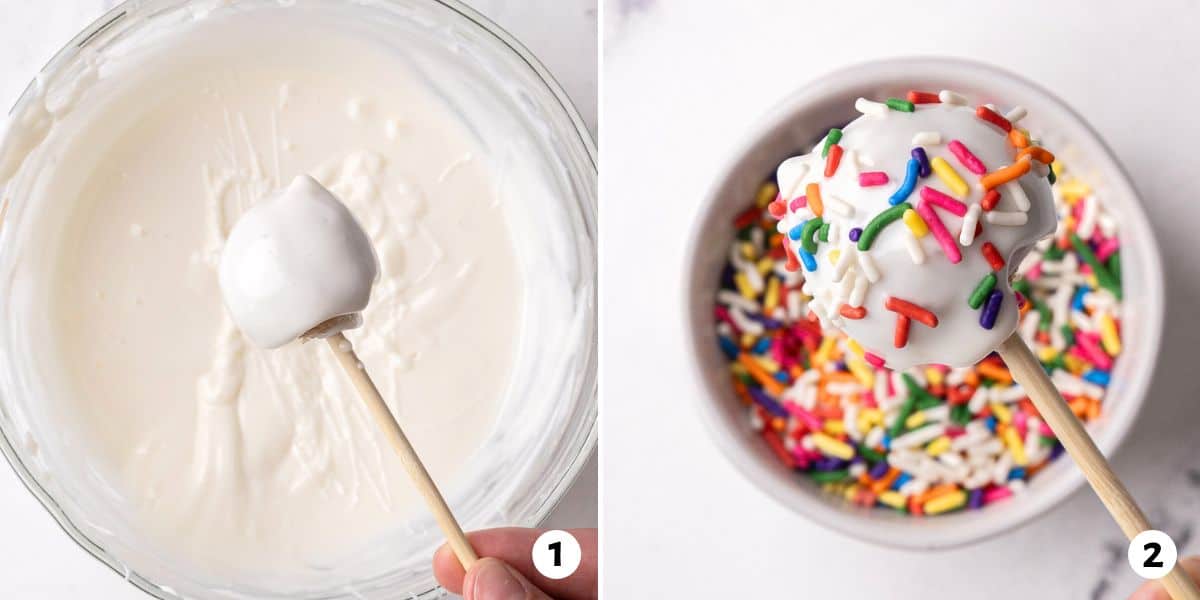
- Dip the cake into the melted chocolate, stirring to evenly coat. Take care to let all of the excess chocolate dip off of the cake pop, tapping it on the side of the measuring cup as needed.
- Once it is no longer dripping with chocolate, set it securely in the decorating rack. Working quickly, add desired sprinkles on top of the pop before the coating sets.
Tips for Making the Best Vanilla Cake Pops
- Chill First: Always ensure your cake is adequately chilled before forming balls. This makes the process smoother and the balls more uniform.
- Don’t Overdo the Buttercream: Too much buttercream can make the cake pops too moist, and they may not hold their shape well. Start with a small amount and add more only if necessary.
- Melt Gradually: When melting the white chocolate, use short intervals in the microwave, stirring between each one to prevent it from burning.
- Dipping Technique: When dipping the cake pop into the chocolate, immerse it fully in one go, then gently tap off the excess for a smooth finish.
- Firm but Not Frozen: The cake balls should be firm from the freezer, but not rock hard. If they’re too cold, the chocolate might crack as it sets.
Popular Substitutions & Additions
- Chocolate Cake Mix: For those who want a richer, chocolatey base.
- Cream Cheese Frosting: Swap out the buttercream for a tangier cream cheese frosting to mix into the cake crumbs.
- Milk or Dark Chocolate Coating: Instead of white chocolate, dip your cake pops in milk or dark chocolate for a different flavor profile.
- Nutty Surprise: Add chopped nuts like hazelnuts, walnuts, or pistachios to the cake mixture for added crunch and flavor.
- Change out the Sprinkles: You can use any style, any occasion sprinkles or decorations you want! As long as it will stick to the chocolate, then it’s good to go!
How to Store Cake Pops
Once your cake pops have set, it’s important to store them correctly to keep them fresh and delicious. Place them in an airtight container, making sure they’re not touching to prevent sticking or ruining the coating.
How Long Will Cake Pops Last in the Fridge?
Stored properly in an airtight container, cake pops can last up to a week in the fridge. However, they’re best enjoyed within the first 3-4 days for optimal freshness.
Can I Freeze Cake Pops?
Absolutely! To freeze cake pops, place them on a baking sheet so they aren’t touching and freeze for about an hour. Once they’re individually frozen, transfer them to a freezer-safe bag or container. They can be stored in the freezer for up to a month. When ready to enjoy, just let them thaw in the fridge or at room temperature.
Frequently asked questions
If your white chocolate becomes grainy or seizes, try adding a small amount of coconut oil or shortening and continue to heat in short bursts, stirring well between each.
If the cake balls are too cold or the chocolate too hot, it might cause the chocolate to crack. Ensure your cake balls are firm but not frozen solid.
Absolutely! Candy melts come in a variety of colors and flavors which can be used for coating.
If the cake mixture seems too dry to form balls, you can add a bit more buttercream frosting to reach the desired consistency.
Making these cake pops is both fun and rewarding. From mixing and rolling to dipping in chocolate, each step brings its own joy. And the best part? Enjoying the fruits of your labor with every bite.
More cake recipes:
- Vanilla Mug Cake
- Chocolate Mug Cake
- Nutella Mug Cake
- White Cake
- Lemon Ricotta Cake
- Almond Cake
- Cream Cheese Vanilla Cupcakes
- Cranberry Cake
If you try this feel good Cake Pops recipe or any other recipe on Feel Good Foodie, then don’t forget to rate the recipe and leave a comment below! It helps others who are thinking of making the recipe. We would love to hear about your experience making it. And if you snapped some shots, share it on Instagram so we can repost on Stories!
Cake Pops
Ingredients
- 1 15.25 ounce box vanilla cake mix (plus additional ingredients called for on the box)
- 1 cup homemade buttercream
- 1 10 ounce bag White Chocolate Melting Wafers (or 10 ounces of pure white chocolate)
- 1 teaspoon coconut oil
- Sprinkles of choice optional
- 36 lollipop or cake pop sticks
Instructions
- Bake cake in a 9 by 13-inch pan following the package directions. Let cool, then remove from pan and add to a very large bowl (it’s ok if you need to break the cake into pieces). Set the bowl in the fridge to chill for about 15 minutes while you prepare the buttercream.
- Line a large sheet pan with parchment paper. Remove the cake from the fridge and using your hands, break the cake up into very small crumbs. You want the texture to resemble coarse sand. Add the buttercream and mix until it is evenly incorporated. The cake should resemble cookie dough. Using a 1.5-tablespoon sized cookie scoop, portion the cake mixture into even balls and set on the prepared baking sheet.
- Once you have made even portions, use your hands to roll each one into a smooth, even ball. Set on prepared baking sheet and place in the freezer for 30 minutes.
- While the cake chills, set up a decorating rack where the cake pops can safely set after they are dipped in chocolate. A block of styrofoam, or an old box with holes the same size as the lollipop sticks punched into it works well.
- When the cake has about 5 minutes left of freezer time, prepare the white chocolate coating. Add white chocolate melts and coconut oil to a large microwave safe measuring cup. Melt in the microwave using 30 second increments until completely smooth. Mix well to incorporate the coconut oil into the chocolate.
- Remove the cake from the freezer. Dip about ½ inch of the stick in the melted chocolate, then set it into the chilled cake balls to help it set securely in place. Chill again for 10 minutes to allow the sticks to set.
- Working with one pop at a time, dip the cake into the melted chocolate, stirring to evenly coat. Take care to let all of the excess chocolate dip off of the cake pop, tapping it on the side of the measuring cup as needed. Once it is no longer dripping with chocolate, set it securely in the decorating rack. Working quickly, add desired sprinkles on the top of the pop before the coating sets.
- Repeat with remaining cake pops. The coating should set at room temperature within 5 minutes.
Nutrition
Nutrition information provided is an estimate. It will vary based on cooking method and specific ingredients used.


Comments
These cake pops were a fun idea but I used the wrong sticks. My cake pops had trouble staying up right. Also, the melted chocolate was too viscous and I could not get it to flow very well even with added coconut oil. Overall delicious but not as easy as I thought it would be.
Try using cream cheese instead of buttercream to form balls. Less sugar!
Love this idea!