This post may contain affiliate links. Please read our disclosure policy.
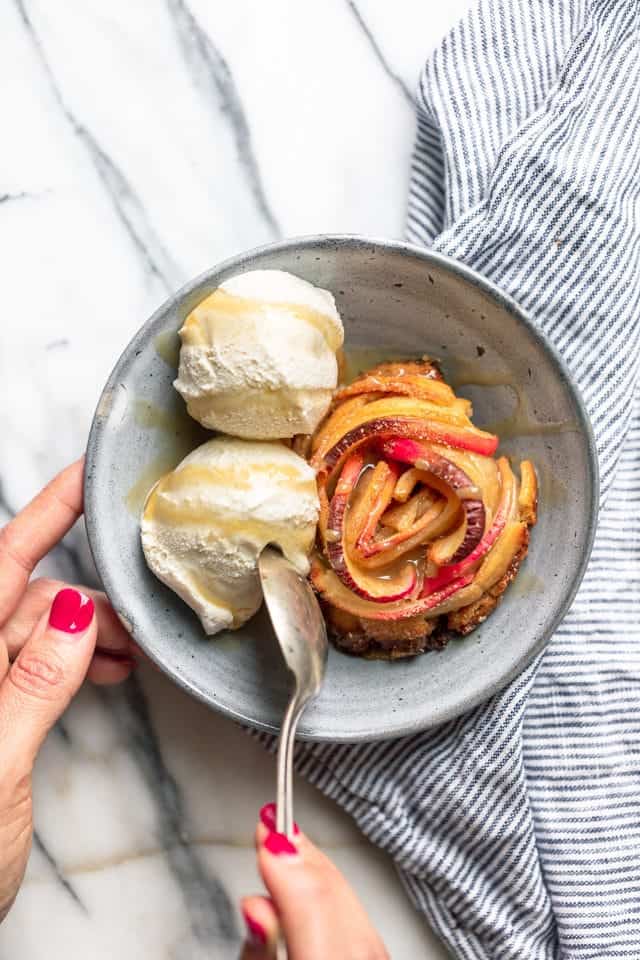
Ok guys, this was a total pinterest win moment for me! I made a Rose Apple Pie, and let me tell you it looks a lot of fancier than it actually is. If you can buy good quality pie crust, it just comes down to adding those apple slices, rolling it ever so delicately and coming out with the cutest most stunning Rose Apple Pie.
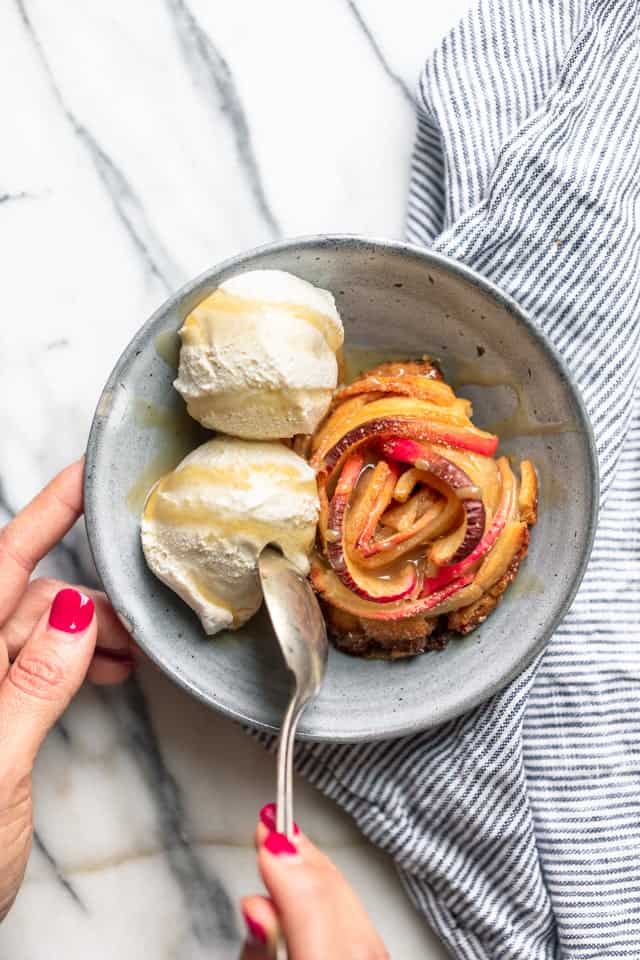
How to Make Rose Apple Pie
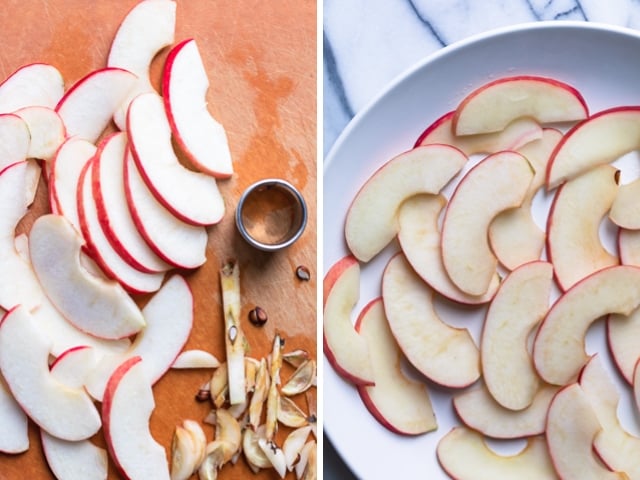
First, you’ll start out by thinly slicing some apples. And make sure to remove the core when doing so. To make the apples more flexible for rolling, I microwave them for a quick jiffy and then cover them up with a damp paper towel while I’m preparing the pie. If you want to try this with another fruit, it’s totally adaptable. You can do this with peaches, plums, pears or even strawberries. Those fruits are softer and won’t need the microwave time.
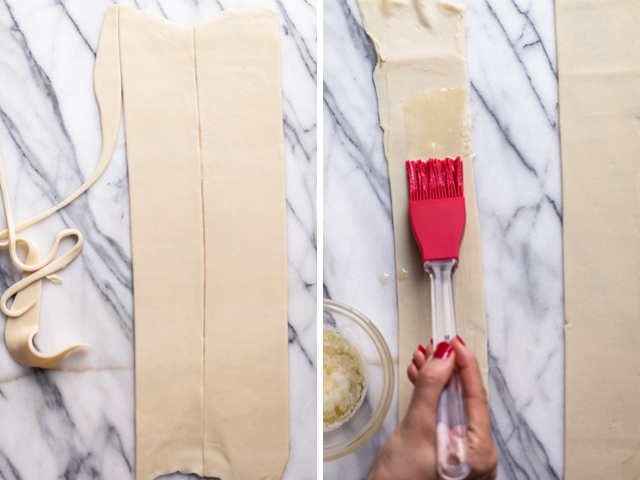
A standard pie crust is perfect to use for this recipe. If you roll it out, you can easily get 6 strips to make 6 individual roses. I make two for this recipe. Then I brush on the melted butter.
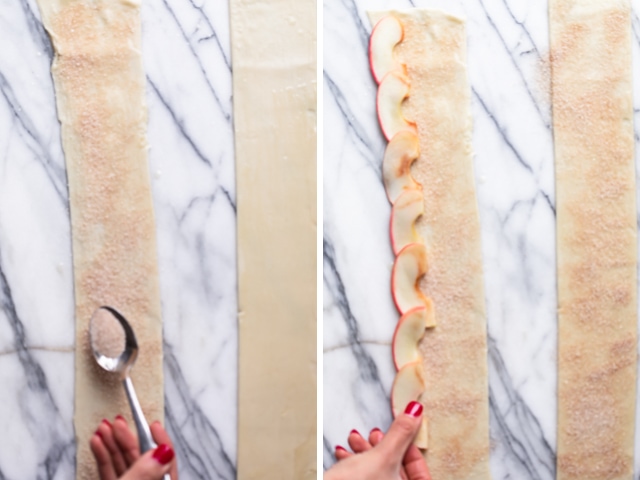
After adding the melted butter, I sprinkle a cinnamon sugar mixture, then carefully lay the apples with the skin side on the outside. We want to color to pop in the roses.
Next, I carefully fold the pie over to cover some of the apple slices, and brush it with egg wash.
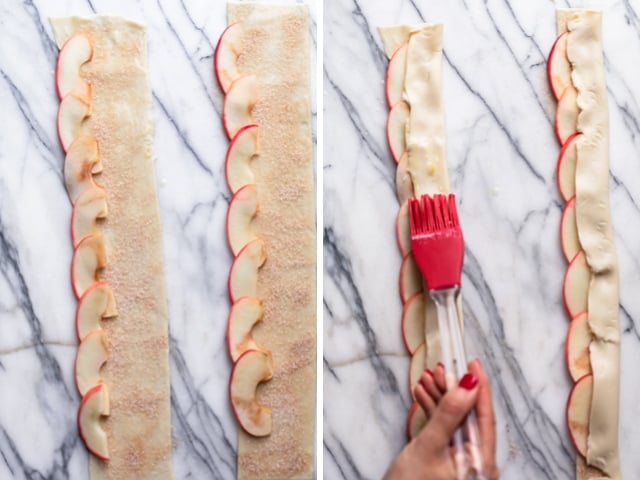
Now it’s time to get rolling. As I roll, I try to keep the apple slices from falling out by using my other finger on the apple end to keep the roll snug.
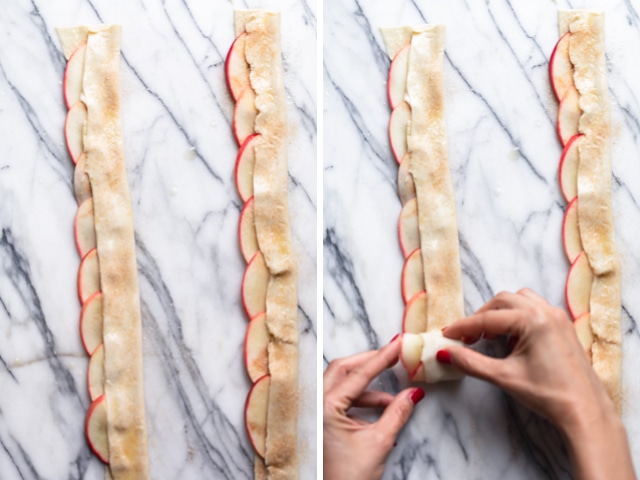
This is what they’ll look like when they’re rolled. The egg wash will keep them sealed so you don’t have to worry about it coming apart in the oven. The cool thing is you can also bake these in a muffin tin if you wanted to.
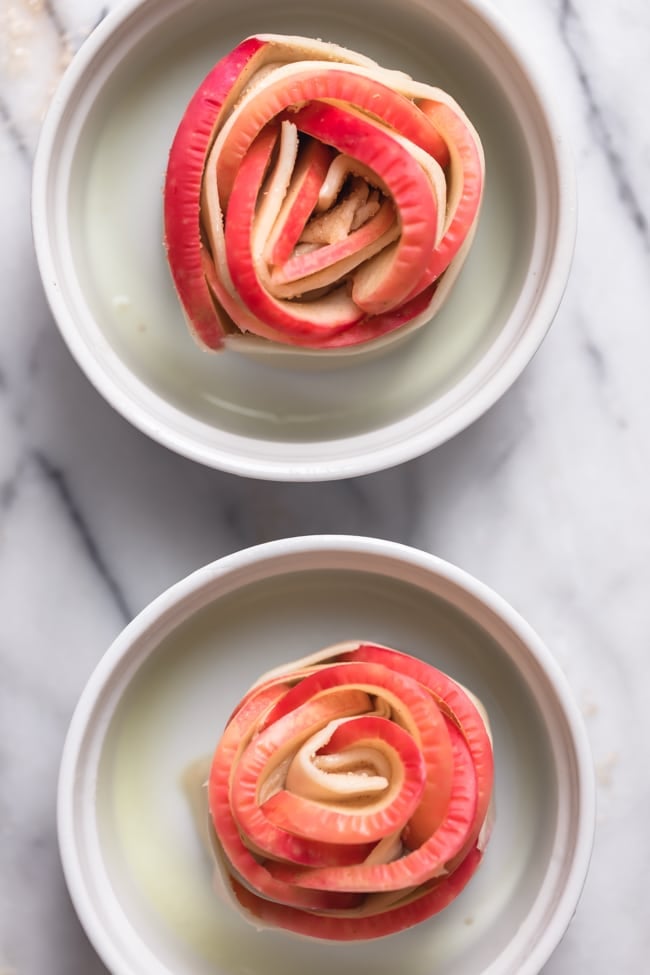
When it comes out of the oven, it smells like the perfect fall dessert. It’s buttery, rich and sweet with warm hints of cinnamon. To me, it’s my favorite way to use up any apples in season, especially from apple picking!
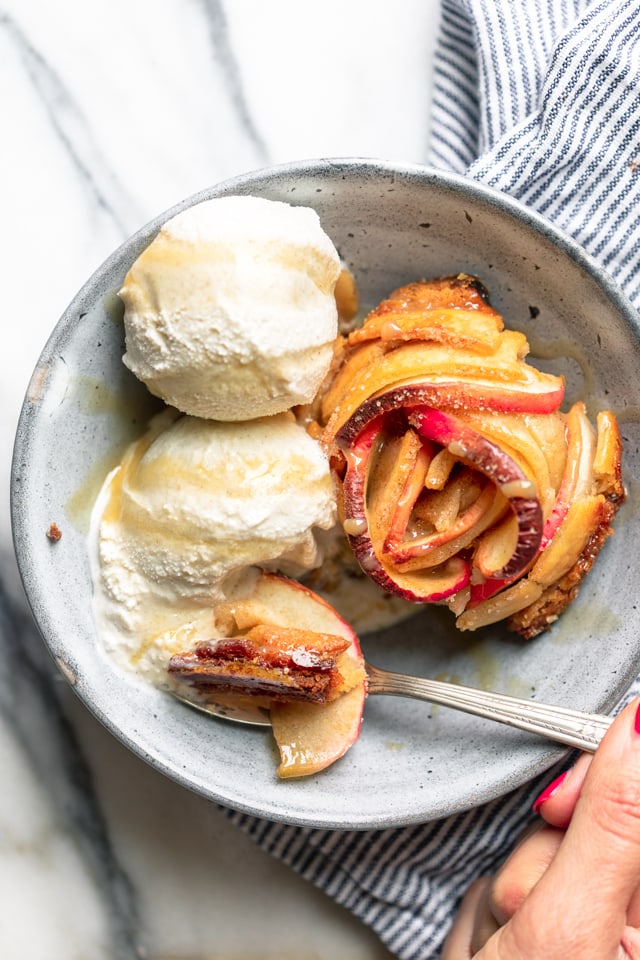
Want the kids to help? Try it with a smaller rose for them and have them follow the step-by-step pictures. They will have so much fun doing this! This Rose Apple Pie wouldn’t be the same without enjoying it a la mode. So I love serving it with vanilla ice cream and a touch of maple syrup or caramel sauce. It’s the best autumn dessert that I’m sure you’ll love making as much as you’ll love eating!
For more fall dessert recipes:
- Fall Pecan Pie
- Easy Apple Pie
- Mini Pumpkin Pies
- Cranberry Apple Mini Pies
- Cinnamon Baked Apples
- No-Bake Pumpkin Spice Balls
- Pumpkin Chocolate Chip Cookies
If you’ve tried this healthy-ish feel good Rose Apple Pie recipe or any other recipe on Feel Good Foodie, then don’t forget to rate the recipe and leave me a comment below! I would love to hear about your experience making it. And if you snapped some shots of it, share it with me on Instagram so I can repost on my stories!
Rose Apple Pie
Video
Ingredients
- 1 large red apple
- 2 pieces rectangular puff pastry or pie crust
- 2 tablespoon melted butter
- 3 tablespoons cane sugar
- 1 tablespoon cinnamon
- 1 large eggs
- Vanilla ice cream for serving
- Caramel sauce for serving
Instructions
- Preheat the oven to 400°F and grease two ramekins
- Cut the apples in half, remove the core, but keep the red peel. Slice them as thin as possible and place on a plate. Microwave for about 45 seconds until they slightly soften and become limp but not mushy. Cover the apples with a plastic wrap and towel while prepping the pastry to ensure they remain soft.
- Roll out the puff pastry and cut into 2 strips, each 1/8-inch thick, about 3” wide by 12 to 14” long. There will be extra pastry left
- Spread melted butter over the surface. Mix the sugar and cinnamon together in a small bowl, and sprinkle the cinnamon sugar over the pastry dough.
- Place the apple slices along the edge, starting about 1 inch in from the end, overlapping slightly, with the round part up, partly sticking out of the dough
- Fold the bottom half of the dough over the apples. Mix the egg with 1 tablespoon of water to make an egg wash, then brush the egg wash on top. Sprinkle more cinnamon sugar on top.
- Fold the puff pastry “closing” the apples as you roll.
- Place inside the greased ramekin, and repeat for the other strips
- Bake in the preheated oven for 40-45 minutes, or until the pastry is well browned.
- Allow to cool and serve with vanilla ice cream and caramel sauce, if desired.
Notes
Nutrition
Nutrition information provided is an estimate. It will vary based on cooking method and specific ingredients used.


Love it