Homemade Pie Crust Recipe
Updated Nov 21, 2025
Homemade pie crust made with cold butter and iced water for a flaky crust that works for sweet or savory pies, quick to mix and easy to handle.
This post may contain affiliate links. Please read our disclosure policy.

Jump to Section
HOMEMADE PIE CRUST IS SOO GOOD!

I started making homemade pie crust because I could never get the store-bought ones to taste the way I wanted. Once I figured out the cold-butter and iced-water trick, it finally clicked, and now this is the only pie crust I use. I make my pie crust in a stand mixer or a food processor, and this recipe makes two crusts, so I usually stash one in the fridge or freezer for later. It works for both sweet and savory pies.
Happy Cooking!
– Yumna
Homemade Pie Crust Ingredients
- Flour: All-purpose is the standard.
- Unsalted butter: I use unsalted butter for the best flavor.
- Sugar – Granulated is best for the texture of the finished crust. Feel free to leave it out if you are making a savory pie.
- Salt – Standard fine-grained sea salt or table salt works best for baking because the grains dissolve quickly.
- Water – Make sure it is ice-cold.
How to Make Homemade Pie Crust


Homemade Pie Crust Recipe
Video
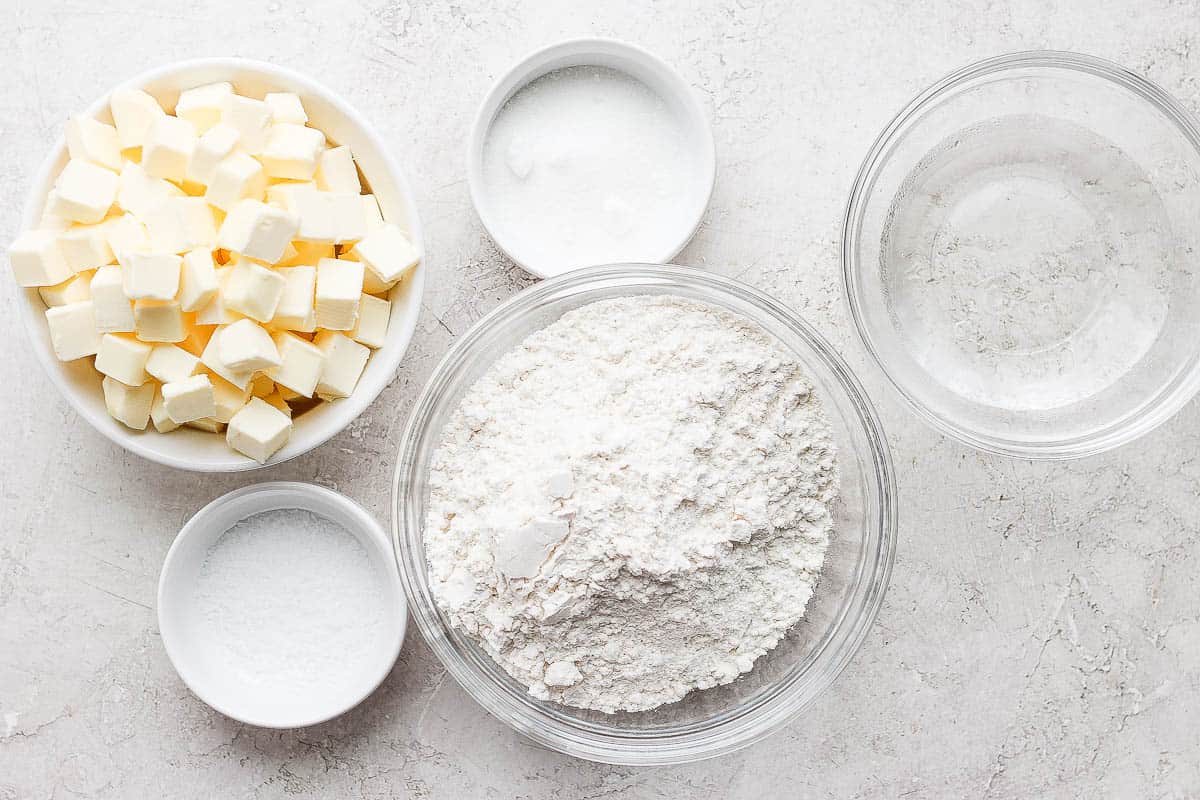
Ingredients
- 2 ½ cups all-purpose flour
- 2 tablespoons granulated sugar
- 2 teaspoons salt
- 1 ½ cups unsalted butter chilled and cubed
- ½ cup iced water
Instructions
- Using the dough blade or paddle attachment, combine the flour, sugar and salt in the bowl of a food processor or stand mixer. Pulse to ensure the mixture is evenly distributed.
- Add in the cubed butter and pulse a few times to break up the chunks, but there will still be some pieces of butter unblended. Add in the cold water and pulse until combined; it should form a rough dough.
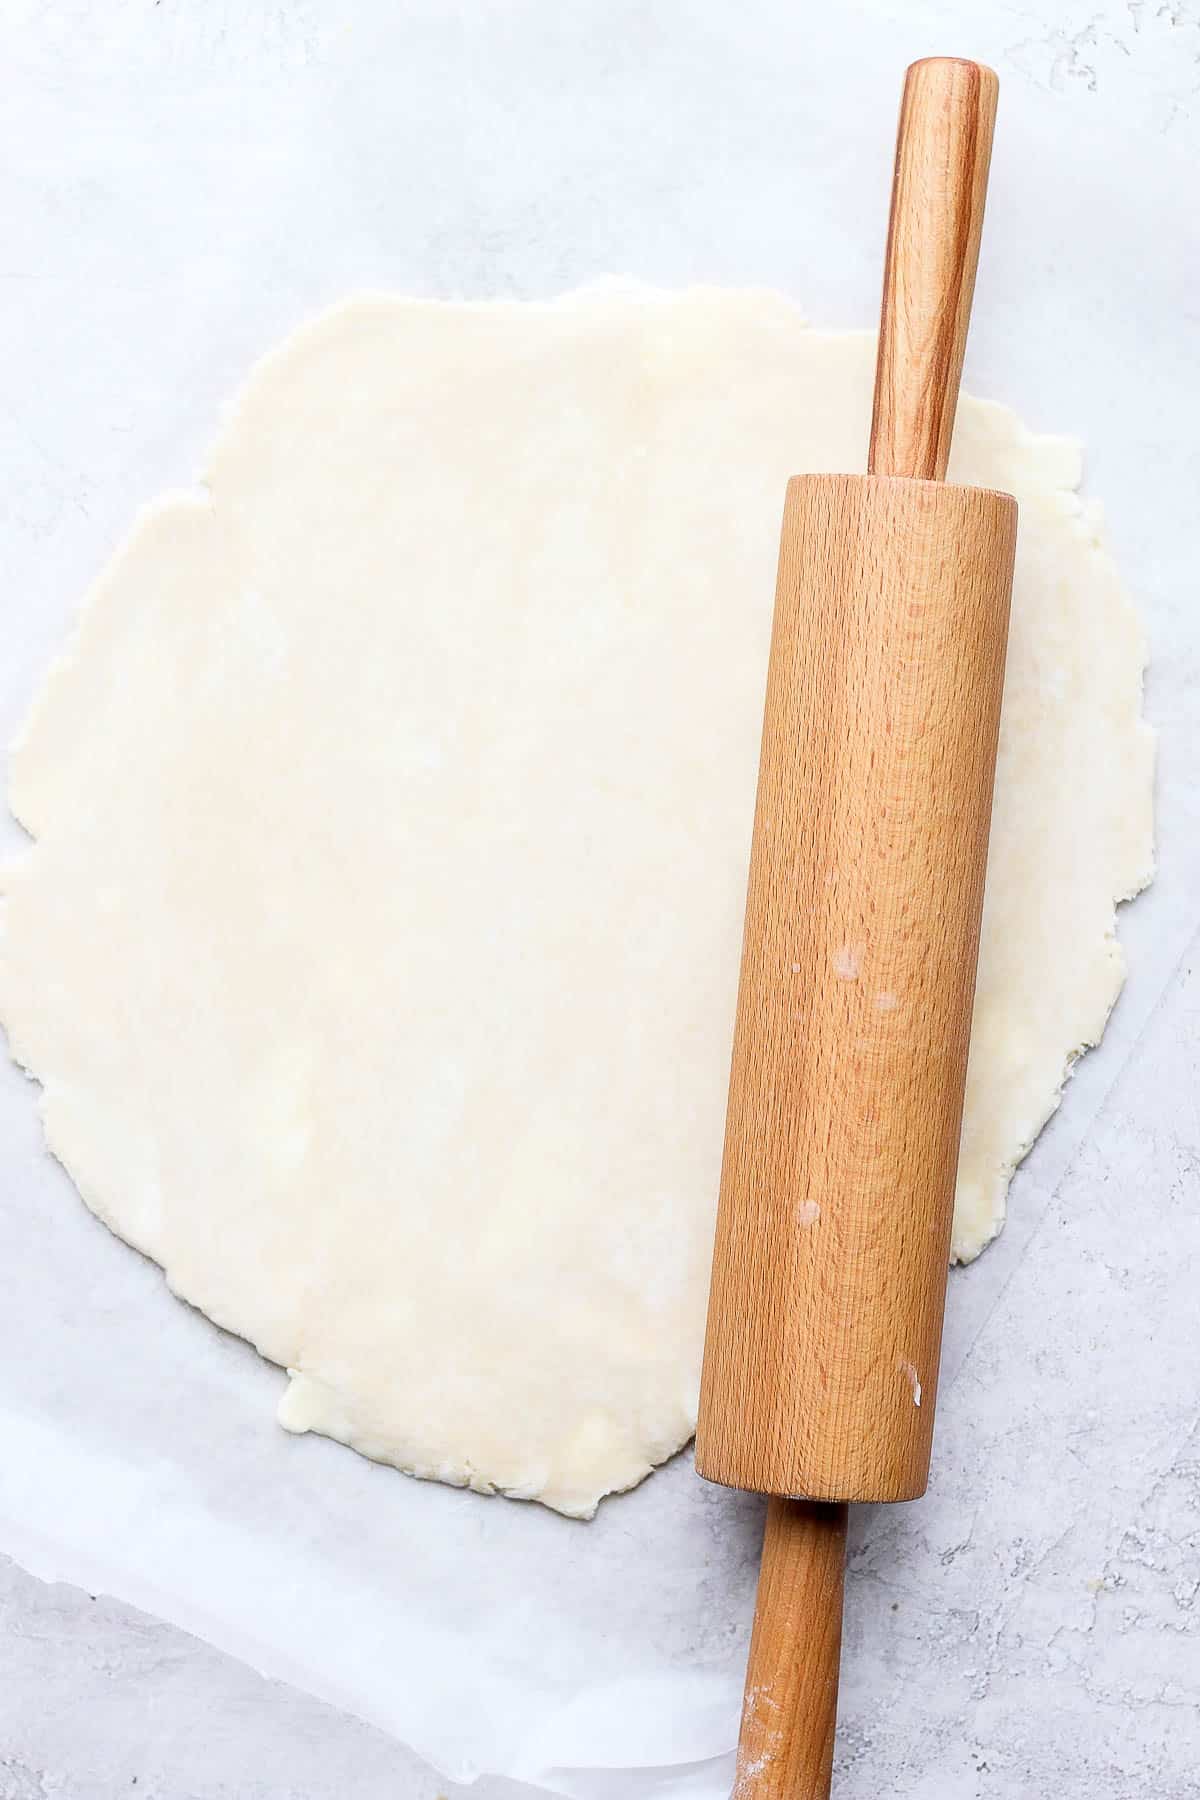
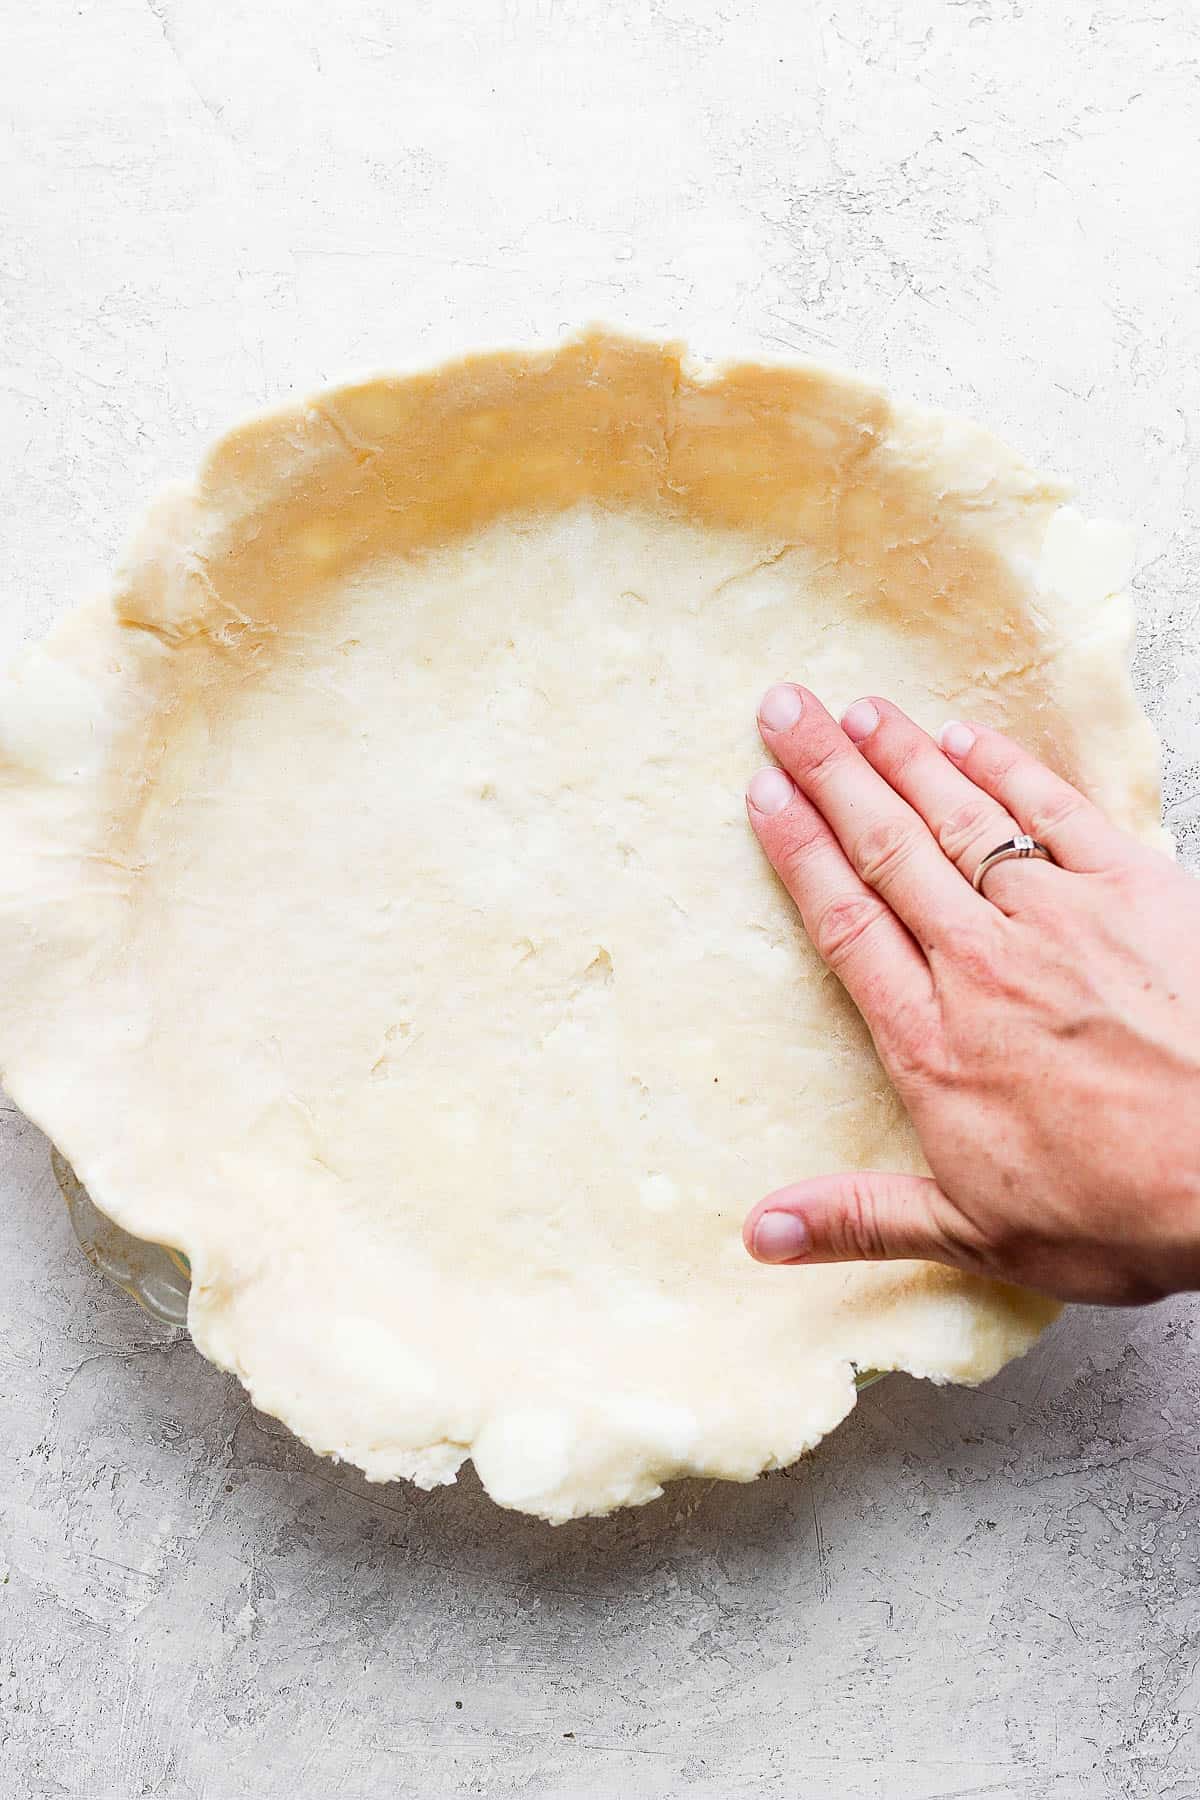
- Transfer the mixture onto a floured work surface and press all the dough together into a pile. Using two hands press down on the top of the mixture. Fold the dough into itself until most of the butter dissolves into the flour.
- Form two dough balls, and flatten each into 1-inch thick discs using your hands. Wrap each tightly in plastic, and store in the fridge for 4 hours before using in a pie recipe.
Notes
- My Top Tip: Cube your cold butter and keep it cold. Place the cubes on a small plate or tray in the freezer to stay as cold as possible while you prepare the other ingredients.
- Storage: The wrapped dough will keep well in the fridge for up to 3 days.
- Freezing: To freeze, wrap the dough in plastic wrap and foil, and then place it in a freezer bag to protect it from freezer burn. It will keep well for up to 6 months. Thaw in the fridge or at room temperature.
Nutrition
Nutrition information provided is an estimate. It will vary based on cooking method and specific ingredients used.
Video Tutorial
Recipe Tips
- Cube your cold butter and keep cold. Place the cubes on a small plate or tray in the freezer to stay as cold as possible while you ready the other ingredients.
- Don’t over mix. This will lead to a tough gummy dough instead of a flaky one. Visible bits of butter are ok, as long as the dough is properly hydrated.
- Add the water as you go. A lot of factors can impact how much water you’ll need for this recipe like where you live the weather the day you are baking. I always like to add about half of the water, then drizzle in a little more just until everything comes together. After all, you can always add more water but its impossible to take it out!
- Have your ingredients measured and ready to be mixed together. This one recipe where temperature – keeping the mixture cool – is important.
- Add a splash of vinegar. It may sound crazy, but adding 1 teaspoon of vinegar (I use apple cider vinegar) tenderizes the crust and makes it a bit easier to work with when you roll it out. But don’t worry, it doesn’t leave a vinegar taste!
- Let the plastic wrap do some of the work of forming the discs. The dough can still be a bit wonky when you wrap it in the plastic. Cover the dough and use the plastic as a guide to shape.
Recipes to Make with Homemade Pie Crust
- Go for a classic fall pie like one of these four great options: Pecan Pie, Easy Apple Pie, Vegan Pumpkin Pie or Mini Pumpkin Pies
- Or try something savory like these Broccoli & Cheese Hand Pies or a classic Quiche
FAQs
Chilling makes a better crust. It lets the gluten relax, the flour absorbs more of the water, the fat firms up and the dough becomes easier to handle when rolled out. However, sometimes, dough straight from the fridge needs five minutes to warm slightly.
If the dough is very dry and won’t come together on the work surface sprinkle some of the ice water over it and fold. Start with 1 teaspoon. If it is too wet, try the same with a small amount of flour.


Comments
Its really good 👌
Thank you so much!
Wondering why the butter oozed out of my pie crust? Followed instructions as written. Please advise.
Hi, this could have happened for a few reasons: Your dough wasn’t cold enough, your butter chunks were too big or weren’t incorporated into the dough well enough, or the butter you used had a higher fat content and less water. Pastries are tough, a lot of slight changes can affect the bake. I encourage you to keep experimenting!