Date Bars
Updated Jan 19, 2026
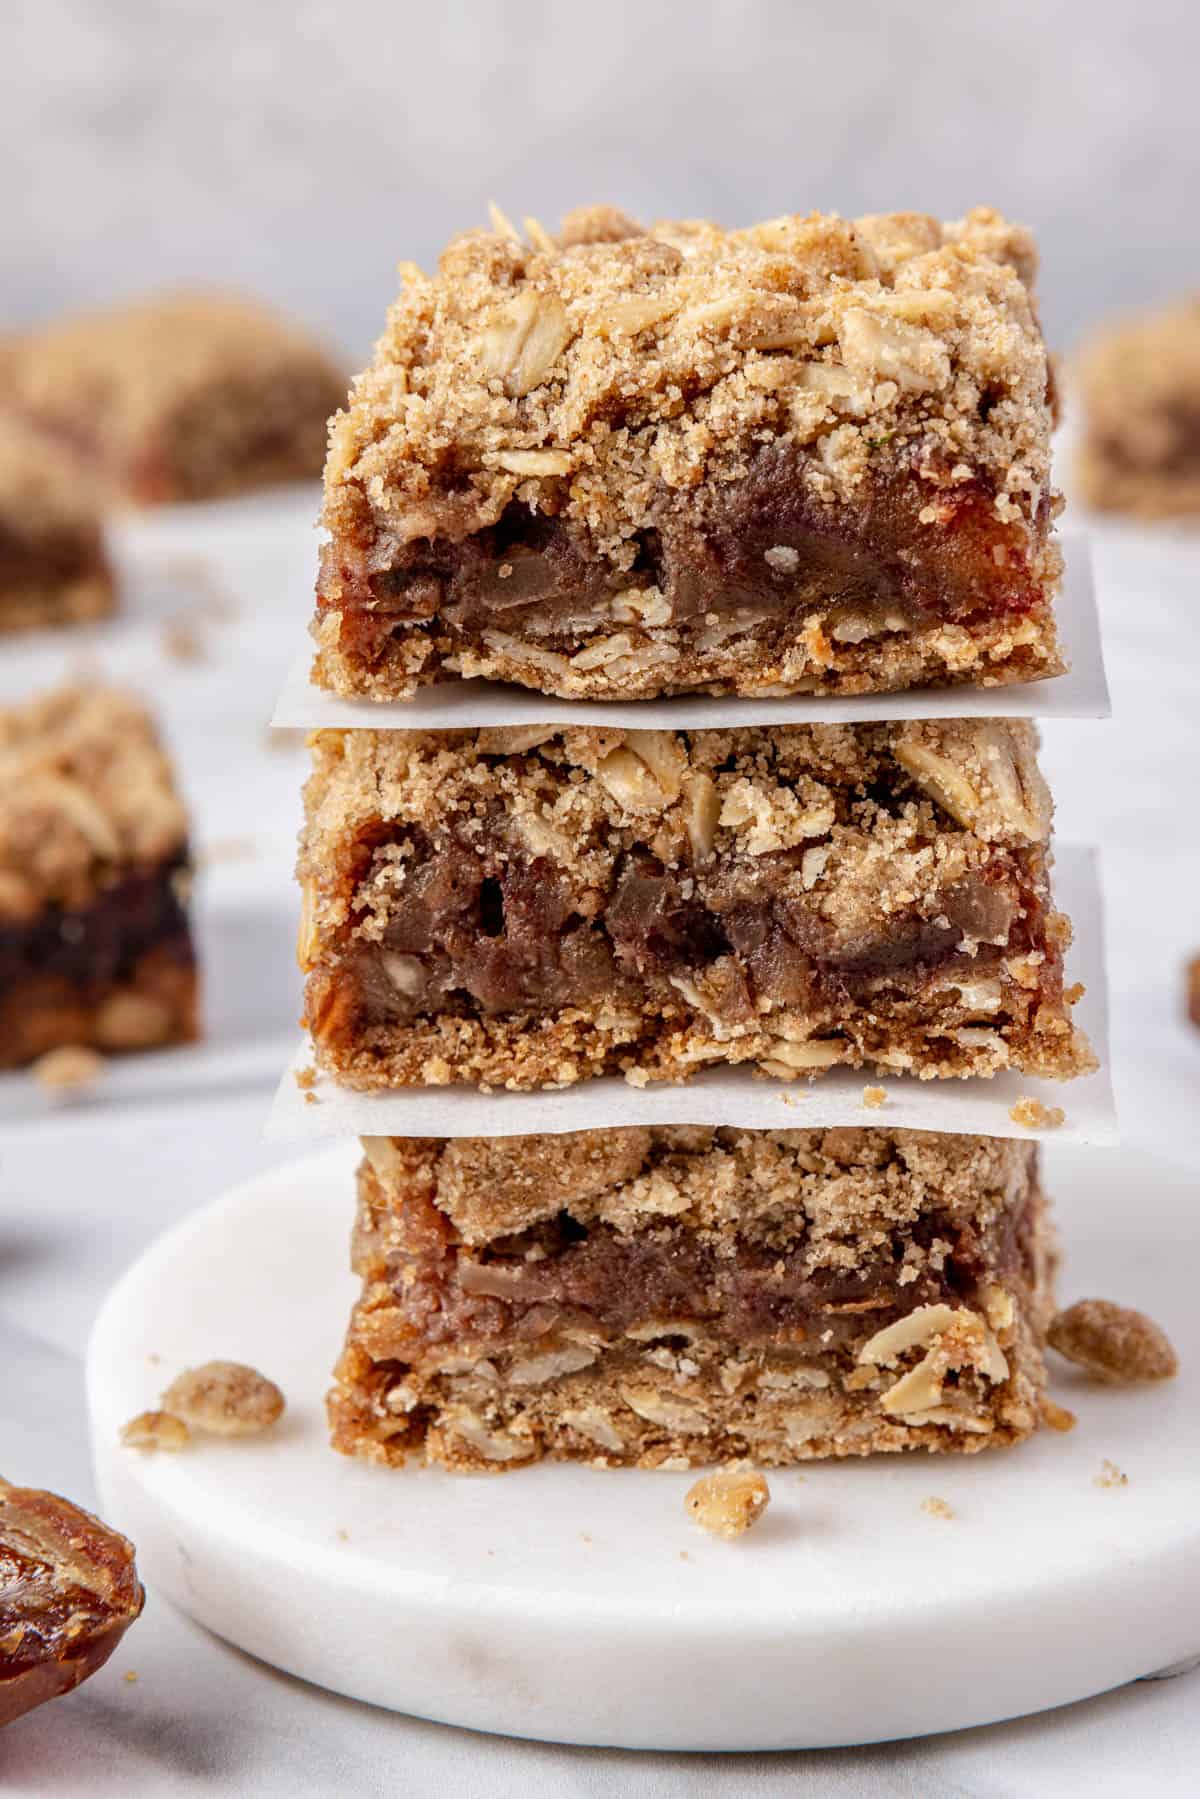
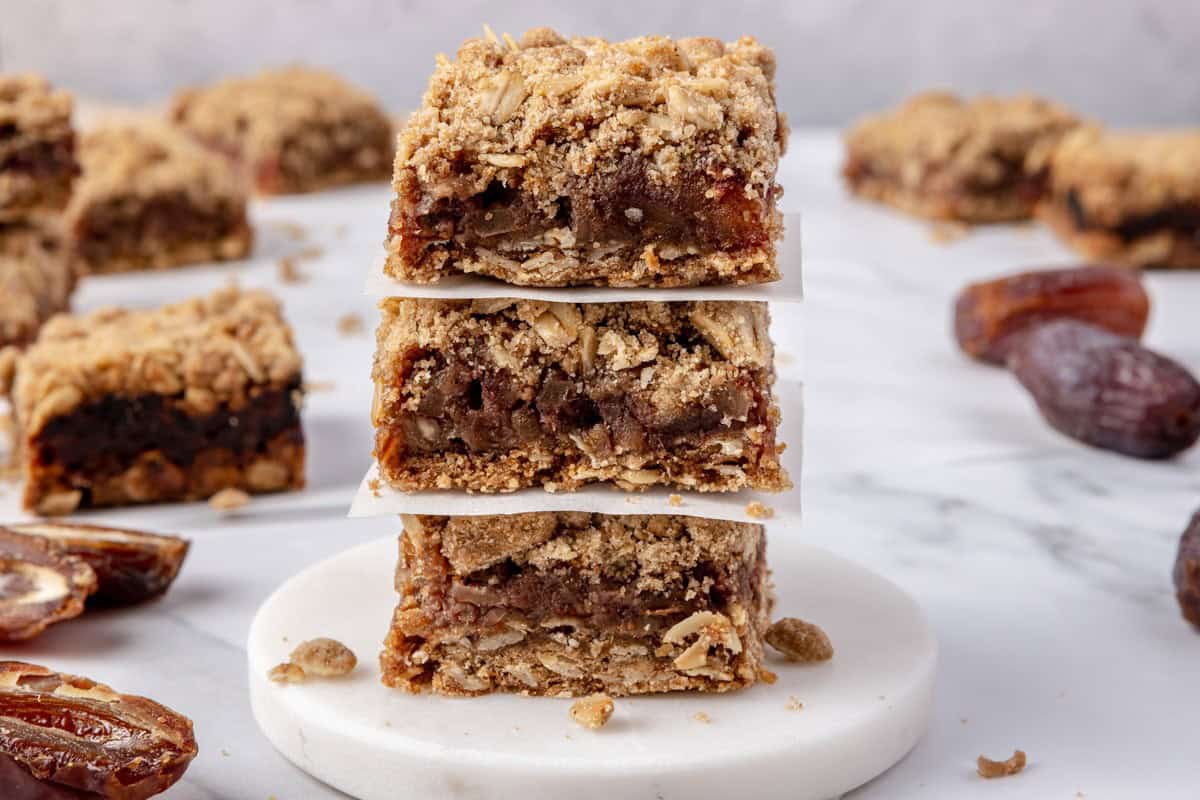
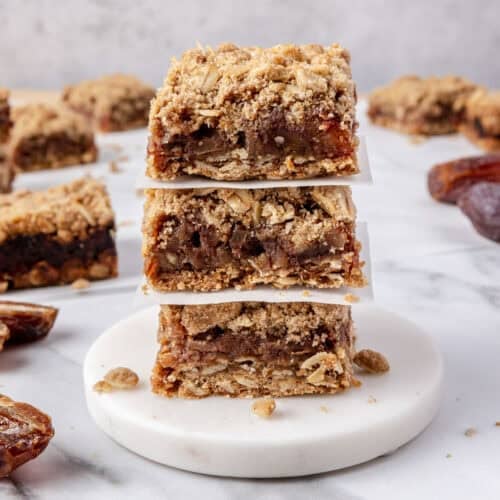
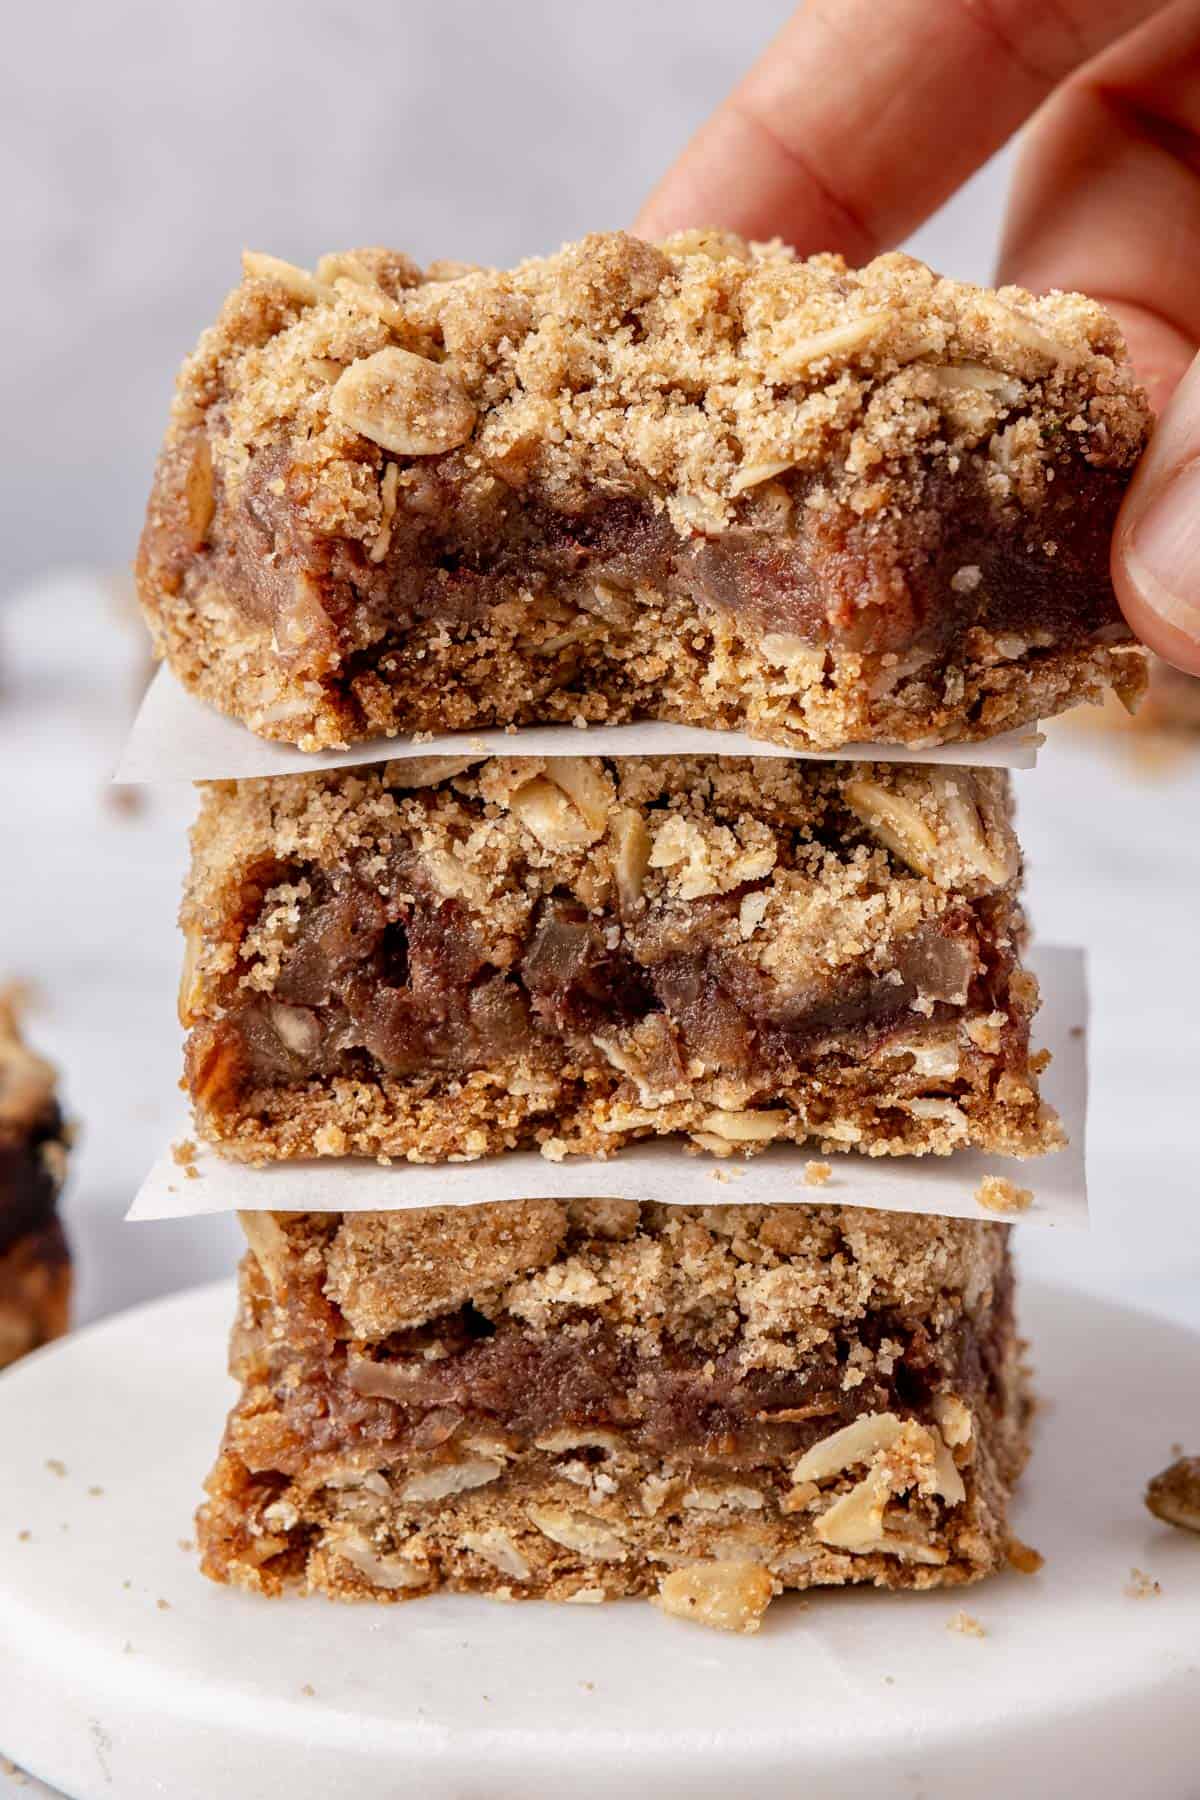
Easy date bars with Medjool dates, pecans, oats, and brown sugar, layered with a crumbly base and baked until golden.
This post may contain affiliate links. Please read our disclosure policy.
Jump to Section
MAKE HOMEMADE DATE BARS WITH OATMEAL!

I’ve been on a bit of a date kick lately (okay, always – I love using dates in recipes!), and these date bars are the latest in my kitchen experiments. You know how sometimes you just want a snack that feels nostalgic, like something your mom or grandma would make when you were a kid? That’s exactly what these date bars are for me. They remind me of the treats I grew up with.
These date bars are not too sweet and hold together well, so you can toss them in a bag and take them with you without them falling apart. I love this date bar recipe so much that it was one of the three desserts I decided to include in my cookbook, as is, with no changes.

Date Bars Ingredients
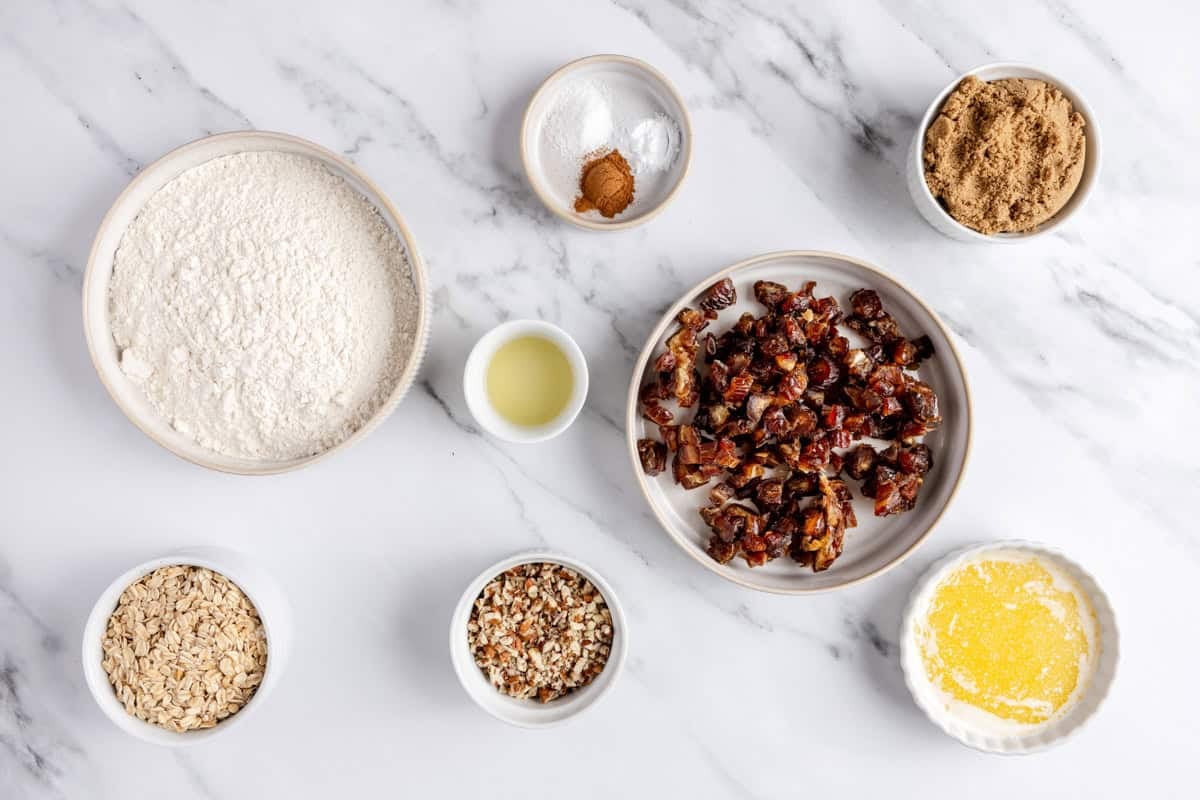
- Dates: I recommend Medjool dates or Deglet Noor dates, pitted and chopped. You can use any kind of dates here, or even date paste.
- Pecans: I like to roast pecans to bring out their flavor; it is optional, but so good! I can use any other type of nut you want, or even leave them out.
- Rolled oats: You can substitute with quick oats, but it changes the texture.
- Dry ingredients: You’ll need all-purpose flour, dark brown sugar, baking soda, cinnamon, and salt.
- Wet ingredients: You’ll also need lemon juice and unsalted butter. If you don’t have unsalted butter, reduce the salt in the recipe by ¼ teaspoon.
How to Make Date Bars
These date bars come together in two main parts: the cooked date filling and the crumbly oat base. Start with the filling so it has time to cool slightly while you mix the crust and topping.
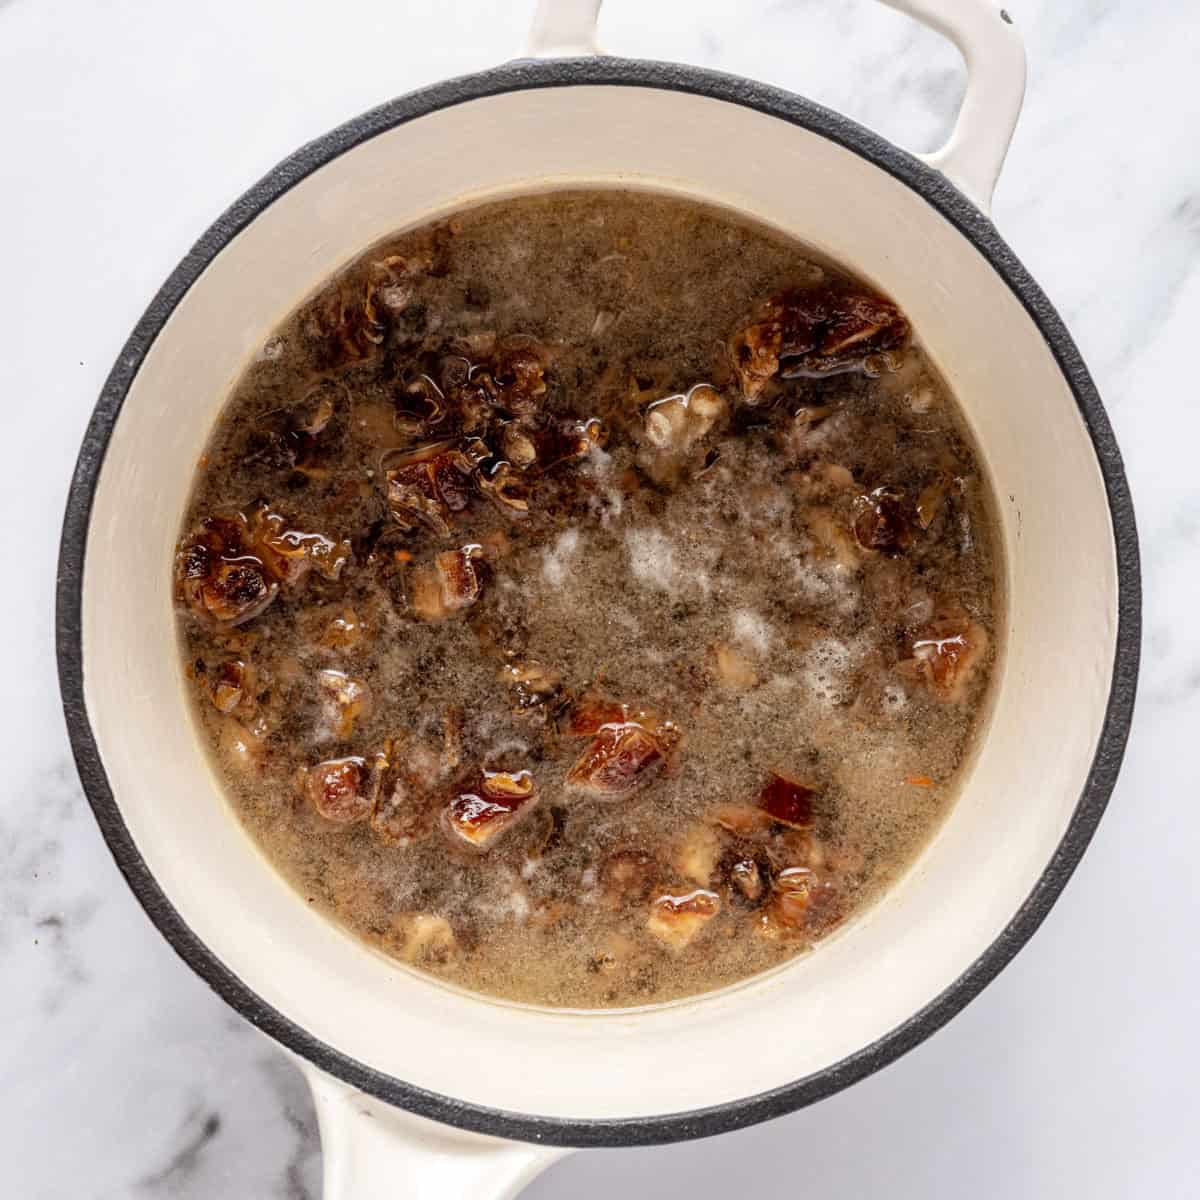
Make the Date Filling
Make the Crust
Assemble and Bake
Date Bars Recipe
Video
Ingredients
Filling
- 1½ cups chopped pitted Medjool dates
- 1 tablespoon lemon juice
- ½ cup pecans finely chopped
Base
- 1½ cups all-purpose flour
- 1 cup rolled oats
- ⅔ cup packed dark brown sugar
- ½ teaspoon ground cinnamon
- ½ teaspoon baking soda
- ½ teaspoon salt
- ½ cup (1 stick) unsalted butter melted
Instructions
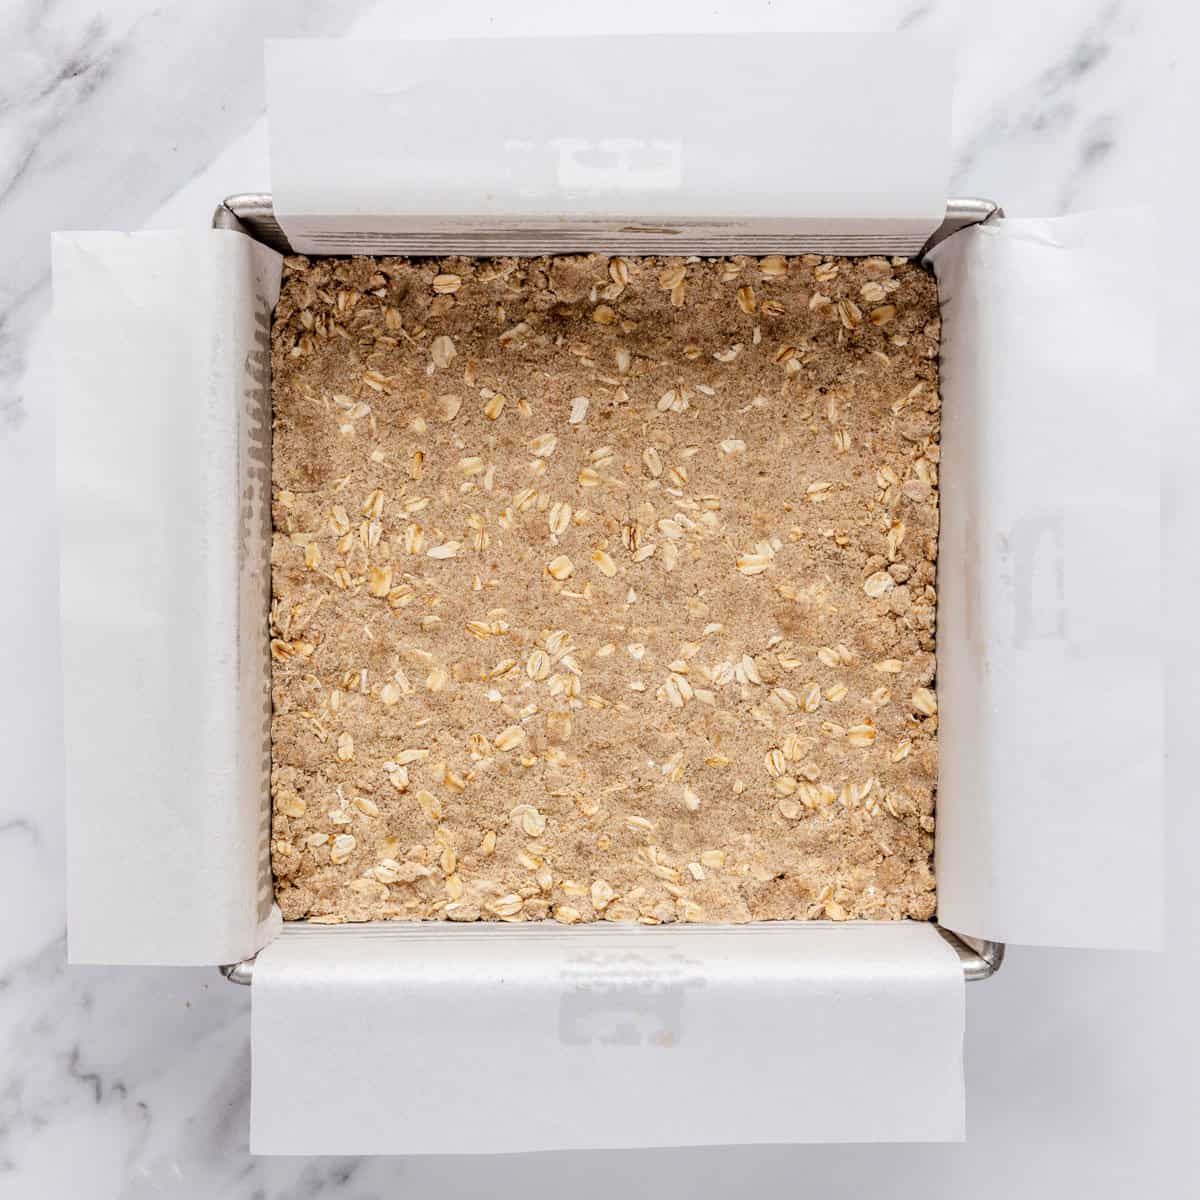
- Preheat the oven to 350°F. Line an 8×8-inch baking dish with parchment paper, leaving about 2 inches of extra parchment over both sides.
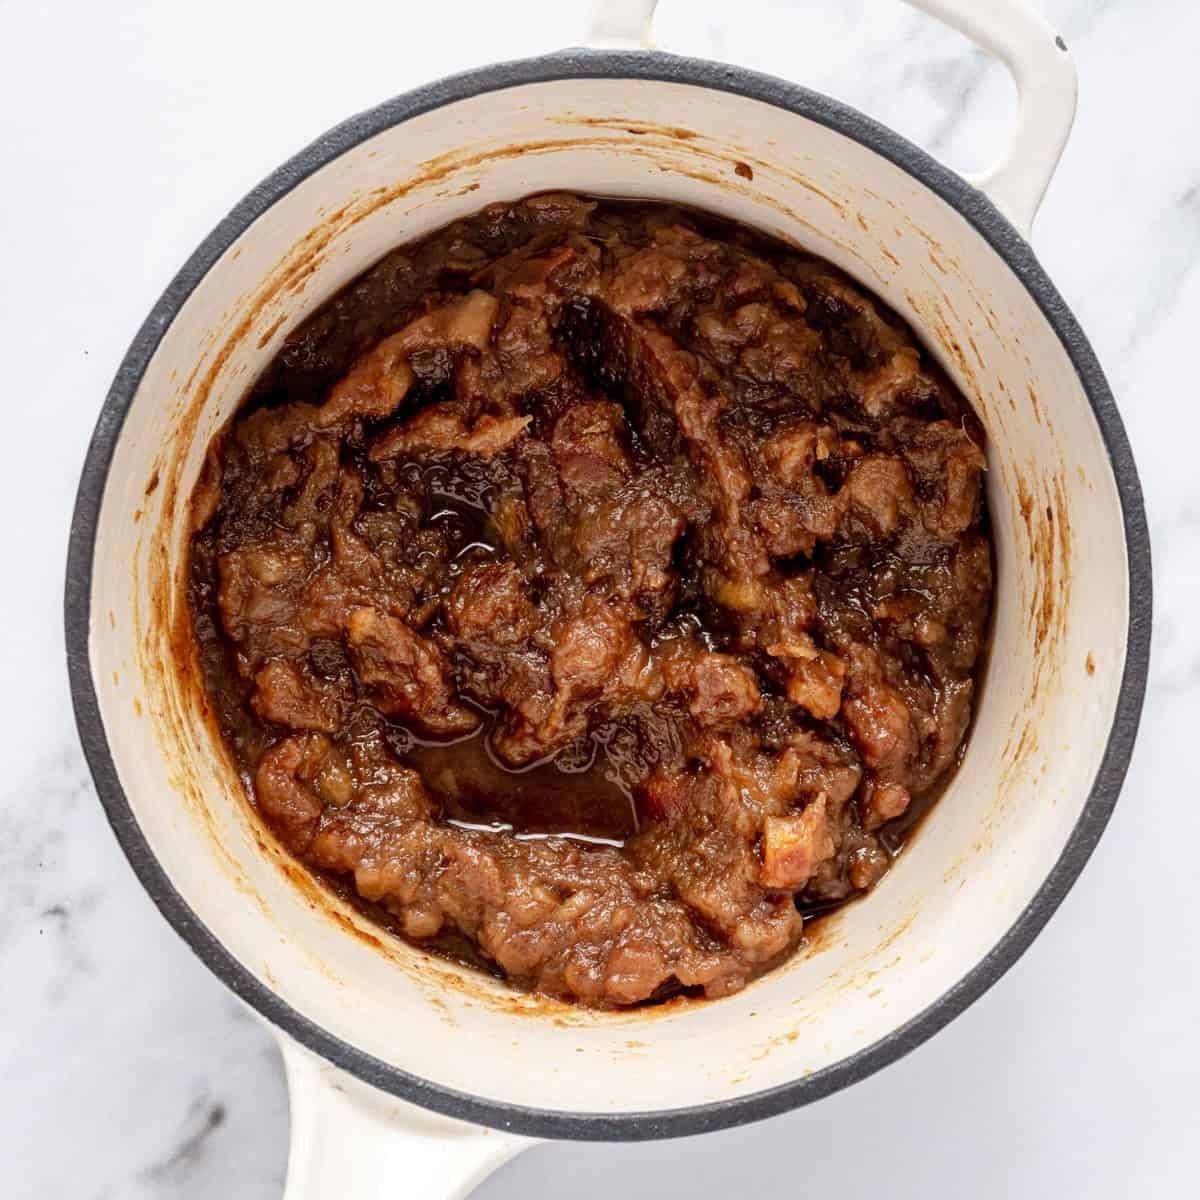
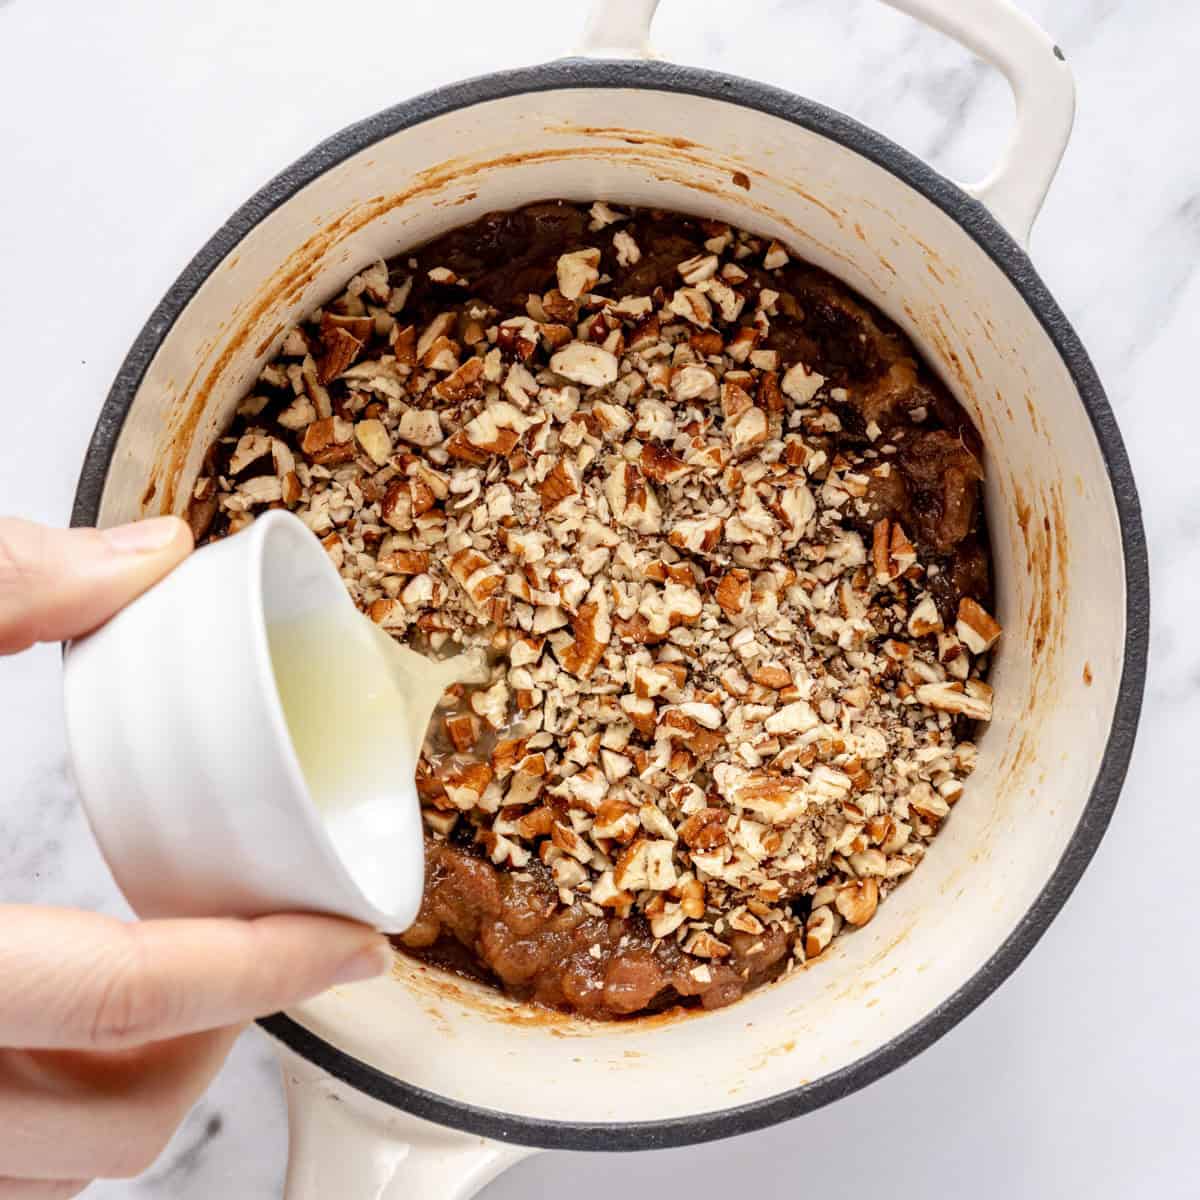
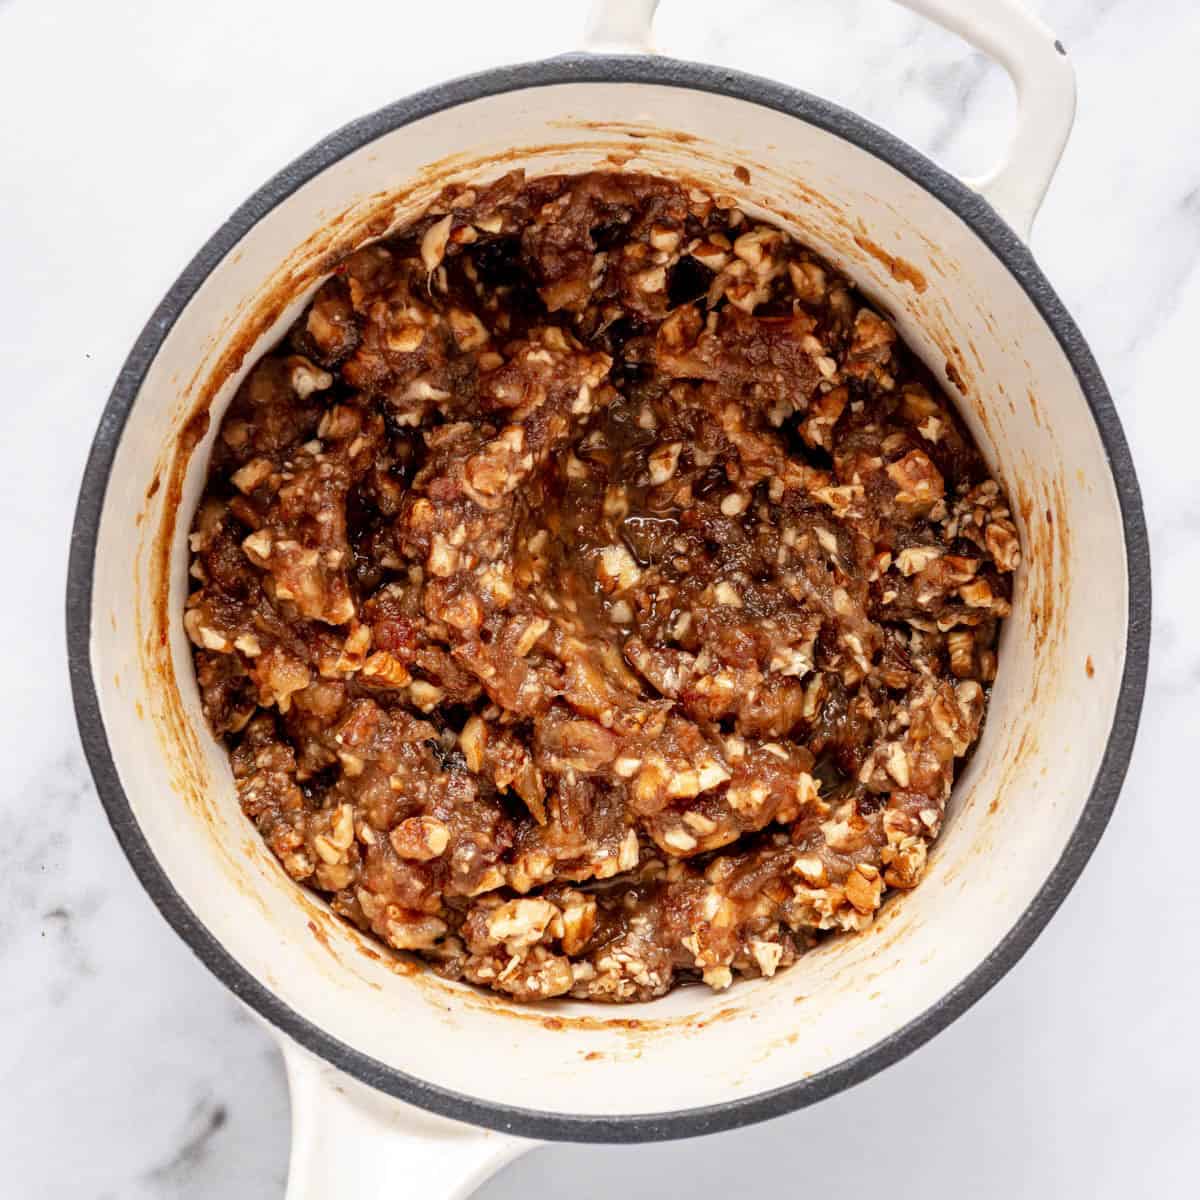
- In a small saucepan, bring 1 ¼ cups of water to a boil over high heat. Add the dates and boil, stirring occasionally, until the liquid has evaporated and the dates have melted and thickened, about 5 minutes. Remove the pan from the heat; stir in the lemon juice and pecans. Set aside to cool for 10 minutes.
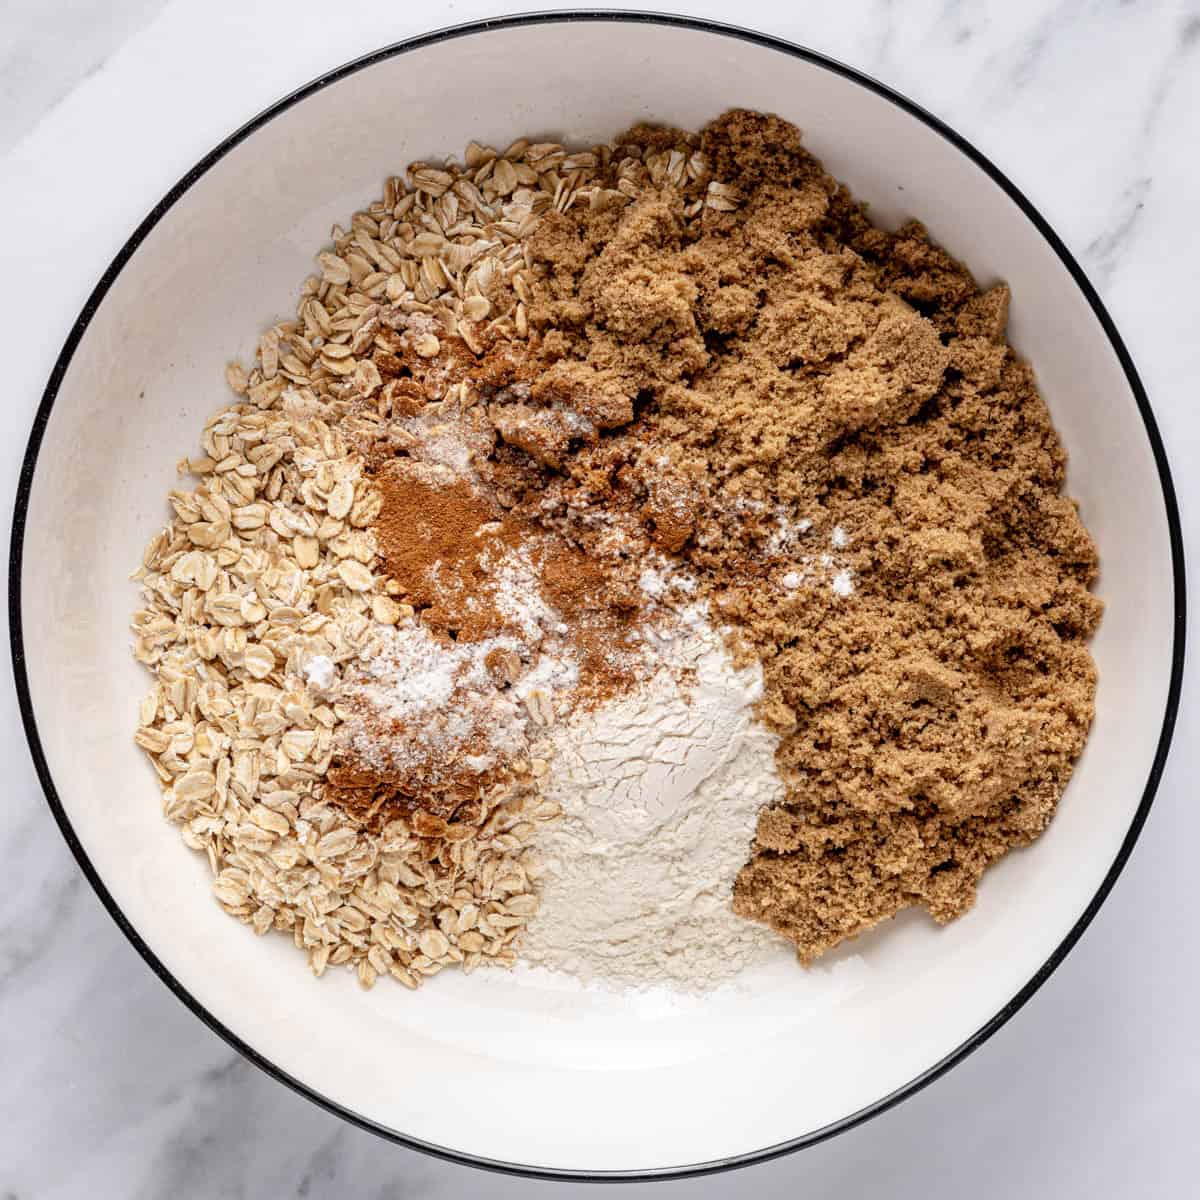
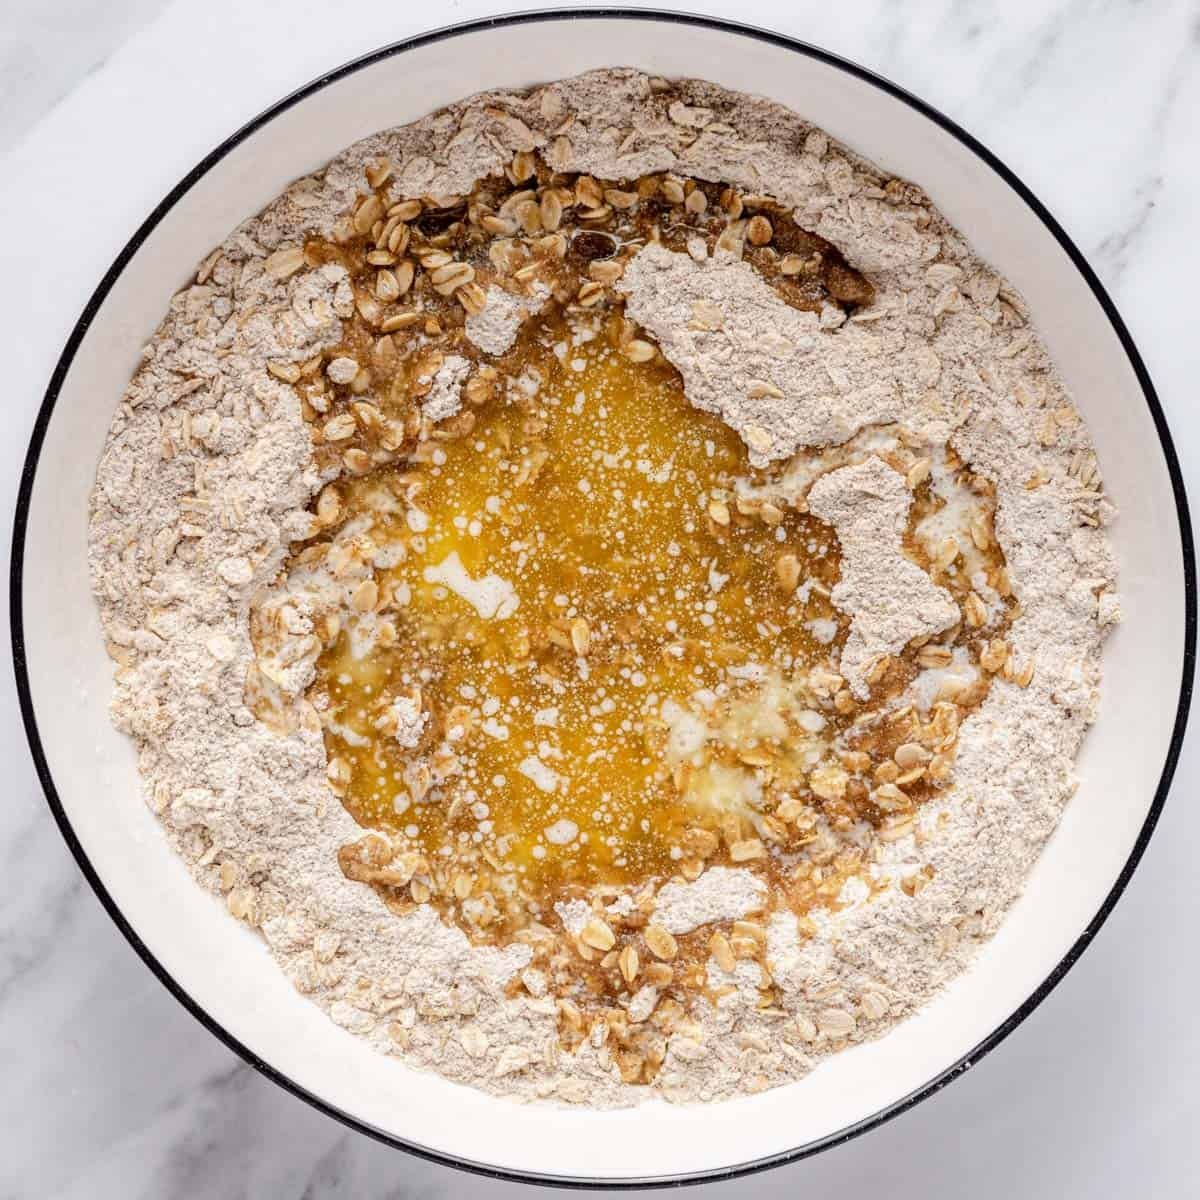
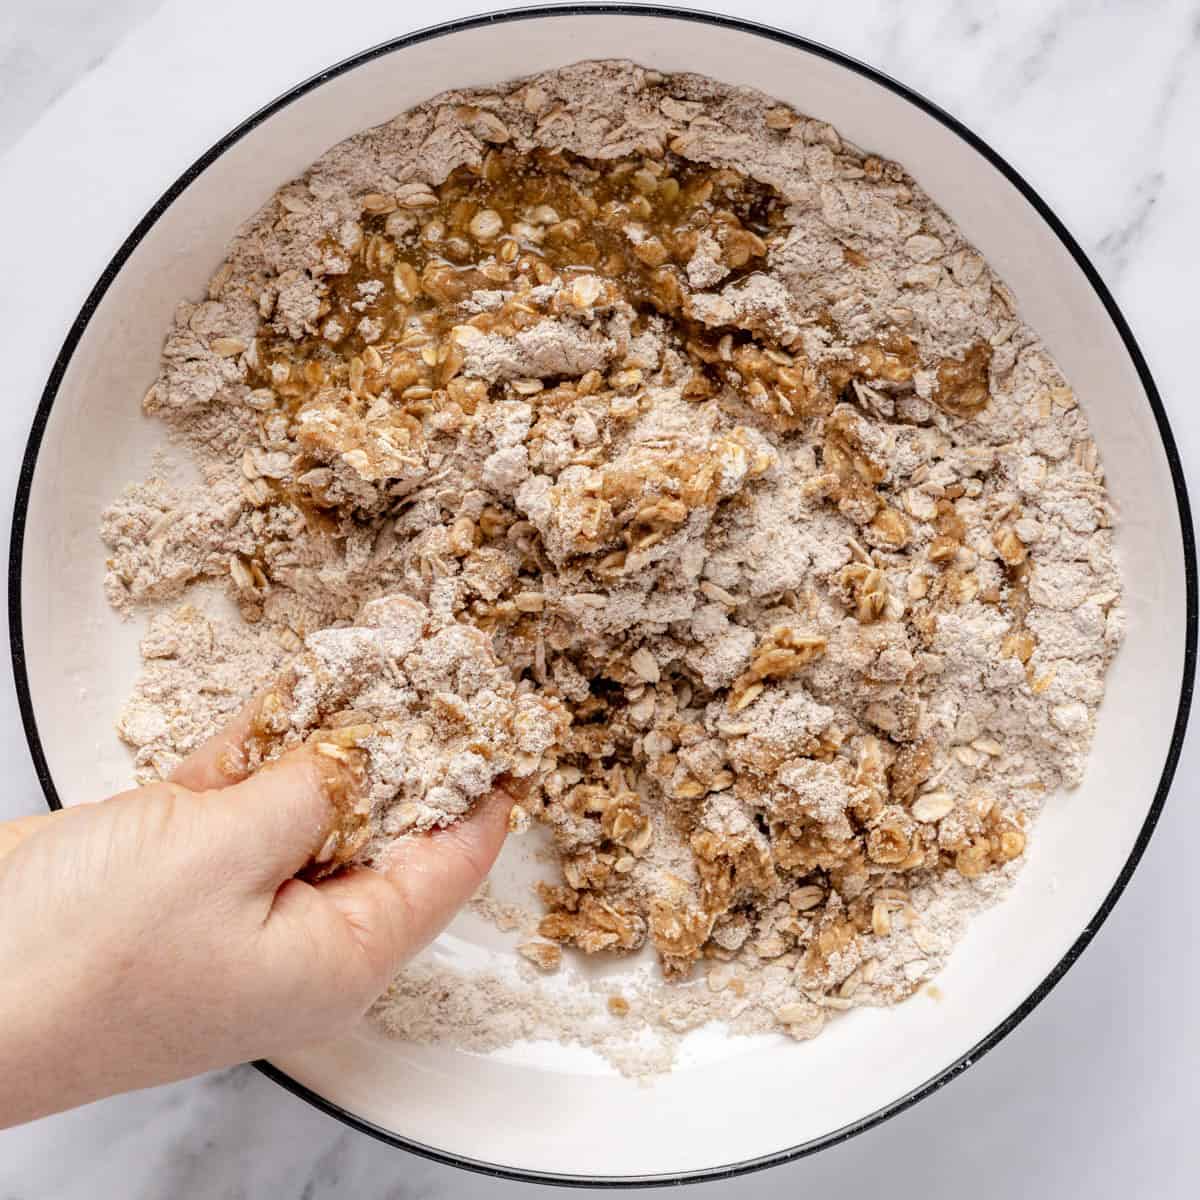
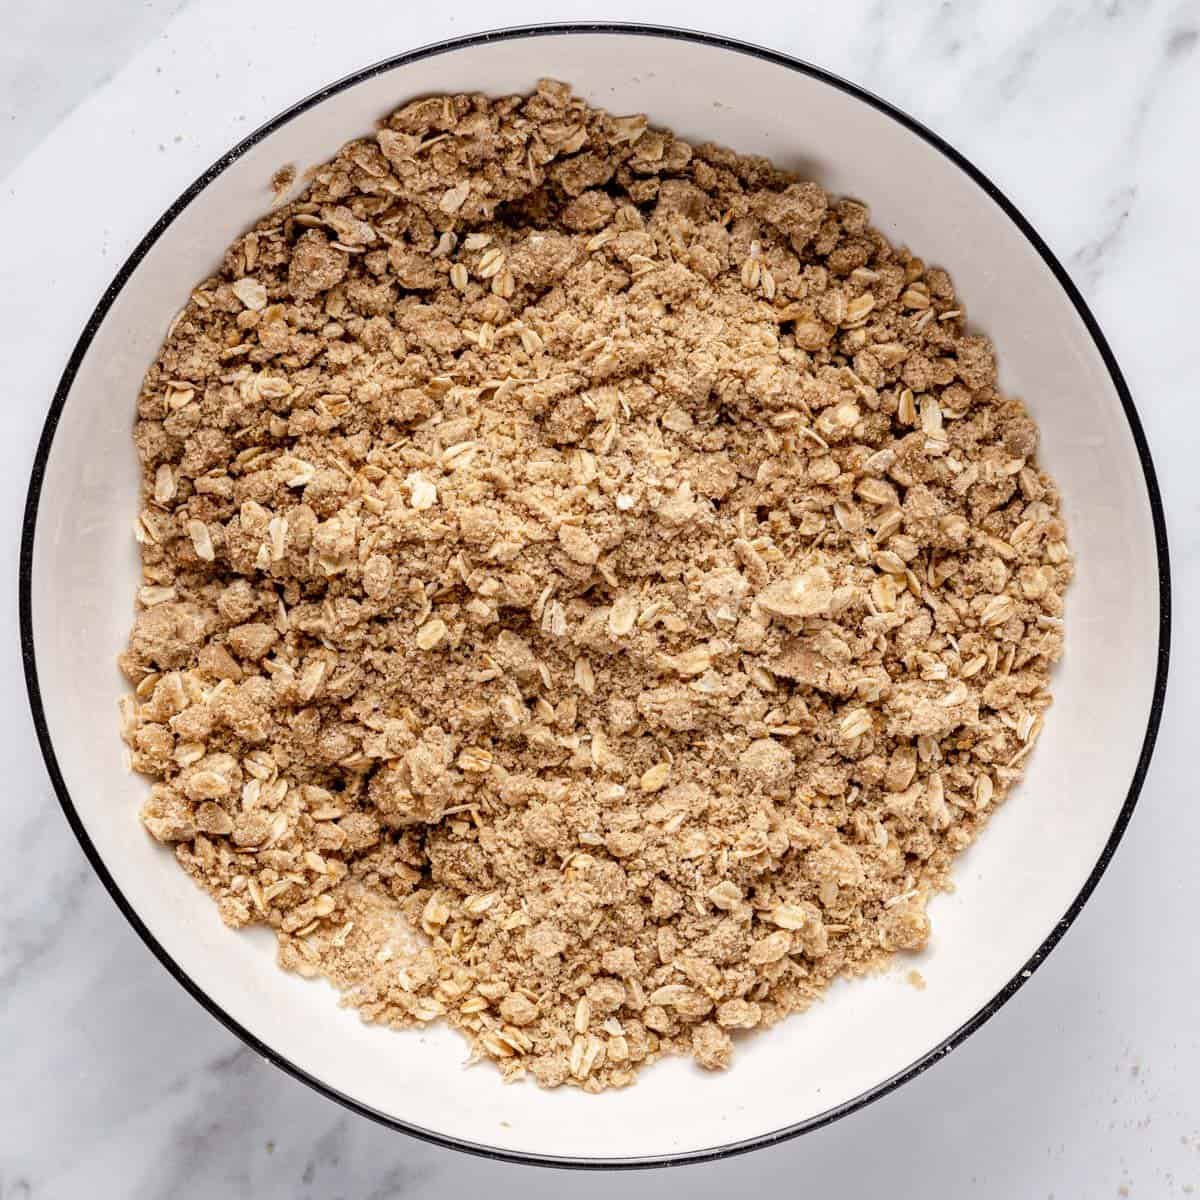
- In a large bowl, whisk the flour, oats, sugar, cinnamon, baking soda, and salt. Pour the melted butter on top. Using your fingertips, rub the butter into the flour mixture until you have a pebbly texture with moist pea-size clumps.
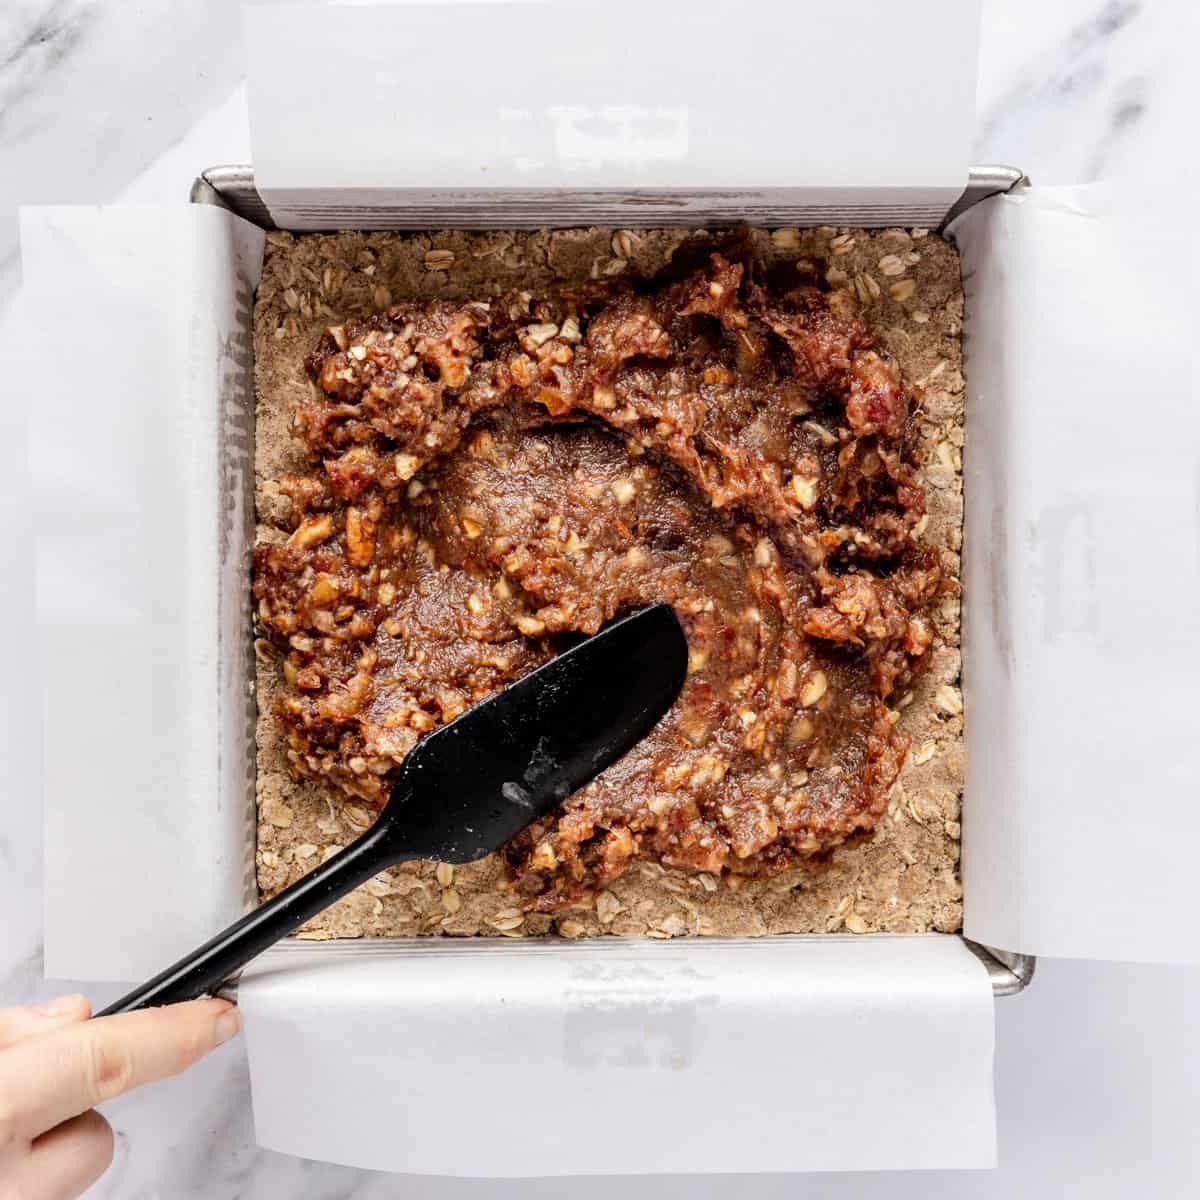
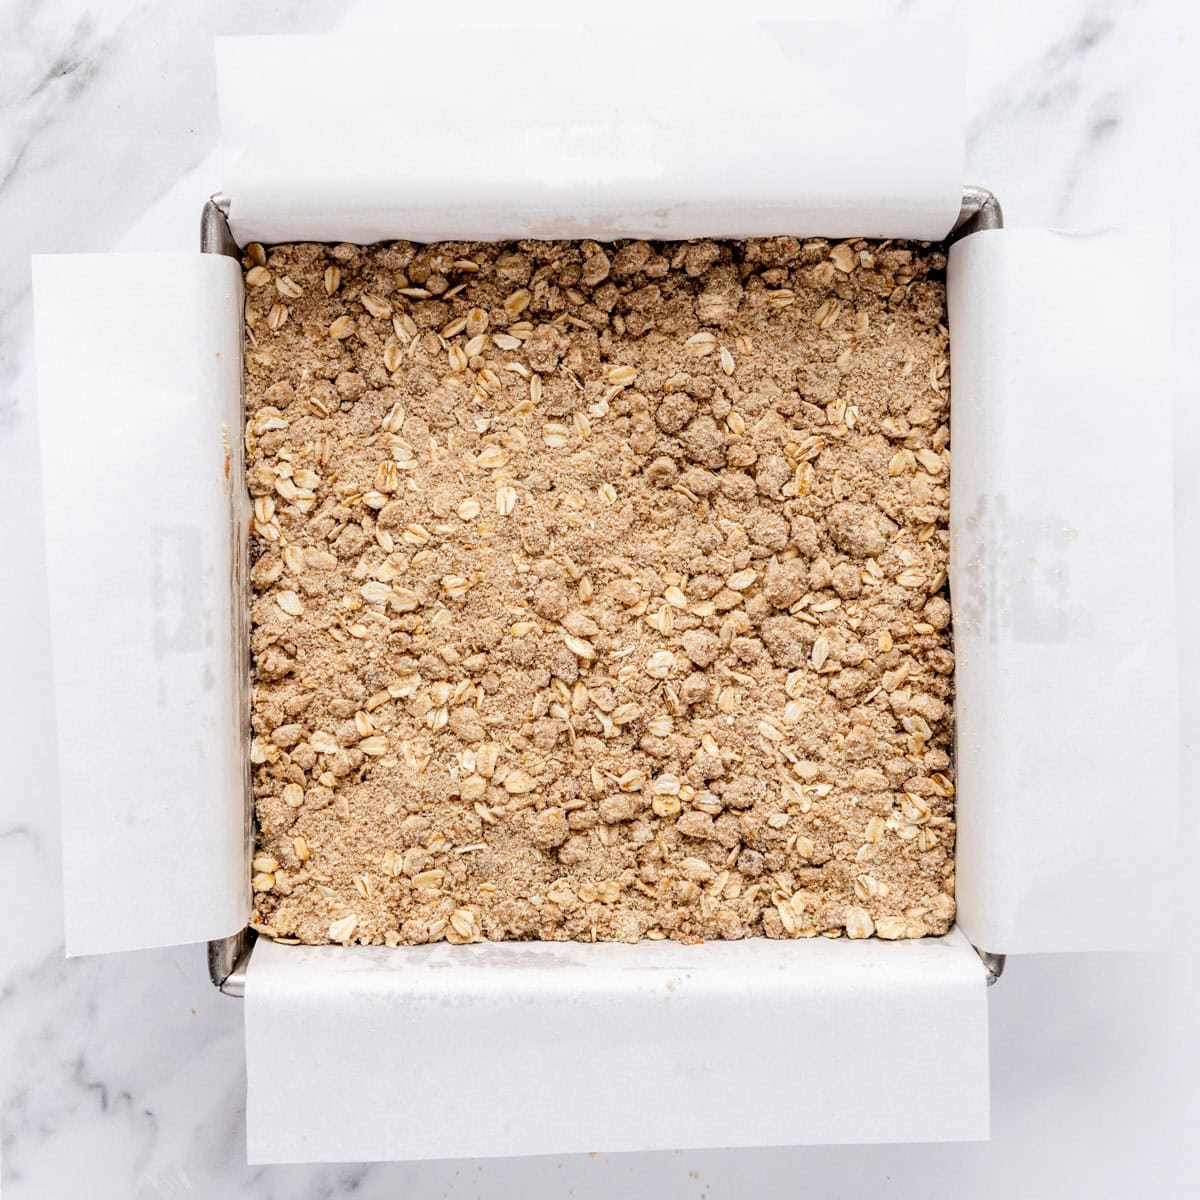
- Press half of the flour mixture evenly and firmly into the bottom of the prepared baking dish. Spread the date mixture evenly over the top. Sprinkle the remaining flour mixture over the date mixture; press gently to help the crumbs adhere.
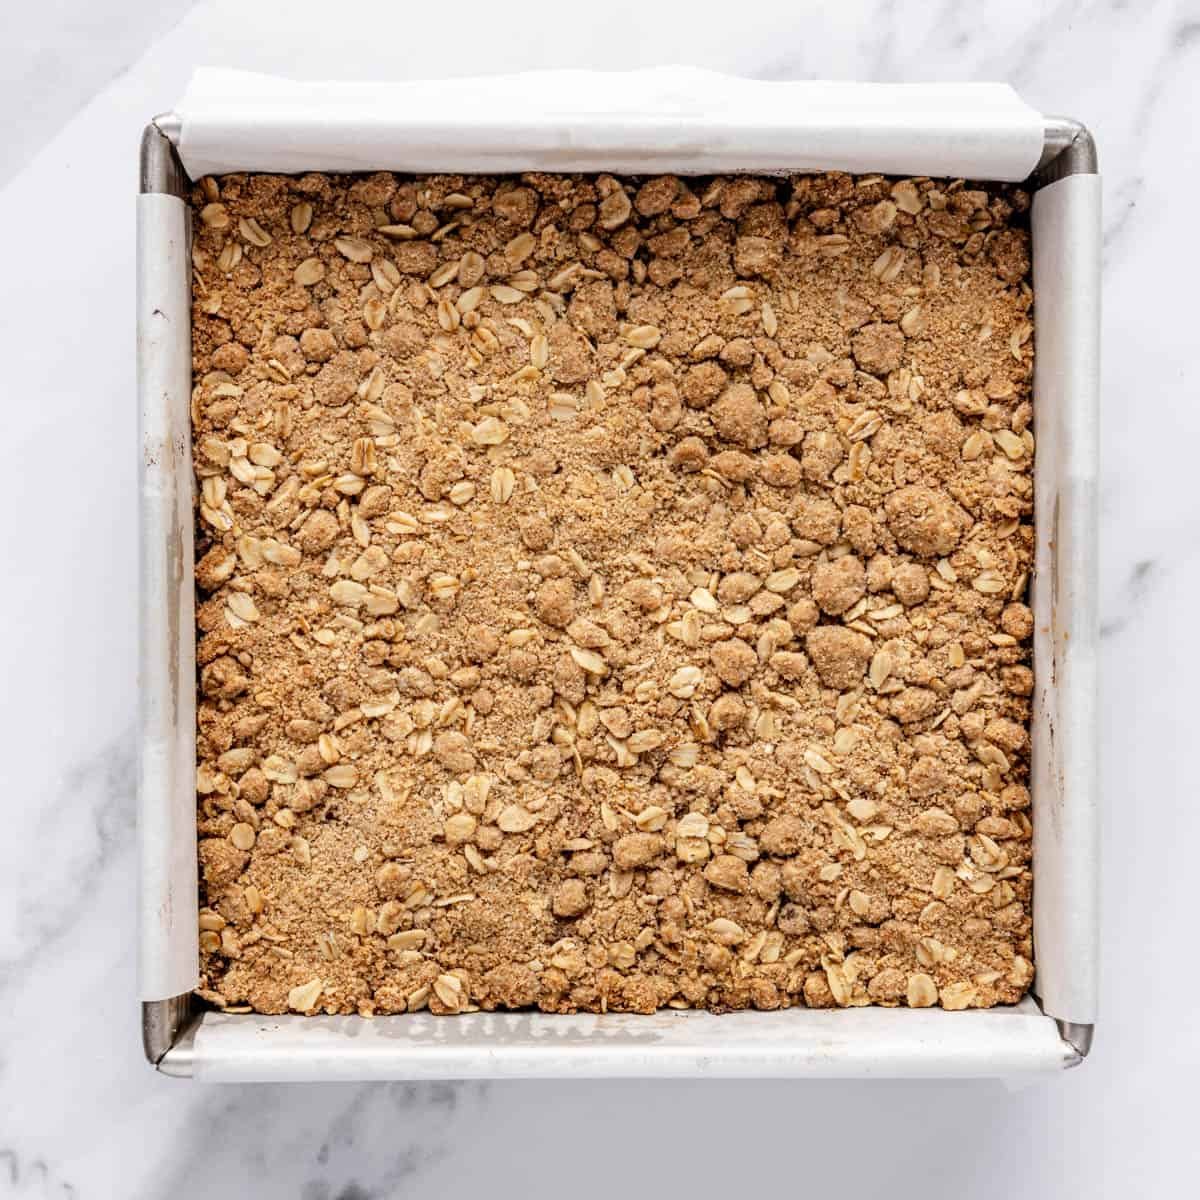
- Bake until the top and edges are golden brown, 35–40 minutes. Transfer the baking dish to a wire rack and cool completely. Cut into 16 bars and serve.
Equipment
Notes
- My Top Tip: Stir the date filling constantly. It gets pretty sticky, and stirring helps prevent it from sticking to the pot and burning at the bottom.
- Storage: Store the remaining date bars in an airtight container. They’ll last up to 7 days in the fridge.
- Freezing: Store the date bars in an airtight container or freezer bag. They’ll last up to 3 months in the freezer. Thaw in the fridge overnight before serving.
Nutrition
Nutrition information provided is an estimate. It will vary based on cooking method and specific ingredients used.
Recipe Variations
- Customize the date mixture with add-ins: Try shredded coconut, chocolate chips, or seeds. Just make sure you finely chop everything first so your add-ins don’t overpower the bar.
- Add cranberry flavor: Replace some of the chopped dates with chopped dried cranberries. This is a nice variation during the holidays!
- Top them with syrup: If you want extra sweetness, serve the date bars with my homemade date syrup.
Recipe Tips
- Press the crumb mixture firmly into the bottom of the pan. This helps the date bars stick together and not fall apart when you cut into them. When you add the second layer on top, you can use less pressure.
- Don’t skip the cooling part! I recommend cooling the date bars for at least one hour, but they set even more beautifully if you wait until the next day to slice them.

FAQs
There could be a few reasons. Be sure to let the date bars rest for at least an hour before you cut into them, but preferably let them rest overnight. And make sure you press the bottom crumb layer really firmly into the baking dish, then pack the other two layers in tightly. Both of these things help keep the date bars intact and from crumbling.


Comments
Mine fell apart, yes I let them sit for 1 hour plus. They were tasteless.
Oh no! I’m so sorry to hear that. Did you make sure to also press the bottom crumb layer really firmly into the baking dish, then pack the other two layers in tightly? It sounds like your bars also would’ve benefitted from sitting overnight to help them set fully.
Hello Yumna, these sounds lovely. I have a pecan allergy can I opt out of having pecans in recipe? Do you think it’ll just work with dates as the main mixture and filling: would appreciate your thoughts so I can try it
Great question! Yes, you can swap the pecans walnuts or cashews instead. You could also omit nuts entirely if needed but I love the crunch. Hope that helps!!
Can a different kind of flour be used; one that is gluten free and low/no carbs?
Hi there! Almond flour and coconut flour will change the texture and results, so I don’t recommend you use those. However, a gluten-free flour mix that is made for 1:1 substitute baking may work!
These bars have become a staple in my house. They are so delicious! I make them once a week, but I do a little different version of yours. I used oat flour first but yesterday I made them with semolina instead. I use very little coconut sugar (dates are sweet enough) and instead of butter I put coconut oil. Sometimes before I layer the top crust I sprinkle some unsweetened coconut flakes. Such a healthy guilt free snack or breakfast!
Yay, I’m so happy you enjoy them!! And I love the tweaks you’ve made. Thank you so much for sharing, Joyce!
Do you think dried figs would work instead of dates?
I think dried figs would not hold the bars together as well as sticky dates.
I can’t tell you how long I’ve been looking for a good date bet recipe. These are delicious! These will be making a regular appearance in our house.
Yay! So happy to hear you liked them Jim!
I’m thinking of adding some mini, dark chocolate chips. How do you recommend I incorporate them? And do I need to adjust the recipe ingredients? Thank you! I can’t wait to try these and your other recipes. I just signed up on your site.
Best,
Heidi
Love that idea! You could add it to the filling mixture, and you shouldn’t need to adjust the other recipe ingredients.
See All Comments