This post may contain affiliate links. Please read our disclosure policy.
Learn how to dye Easter eggs naturally using everyday produce and spices from your pantry! Dyeing Easter eggs with natural ingredients can be a fun and eco-friendly way to celebrate the holiday. You’ll learn the age-old technique of creating dyes using vegetables and fruits as they did thousands of years ago! It’s like a history and art lesson in one!
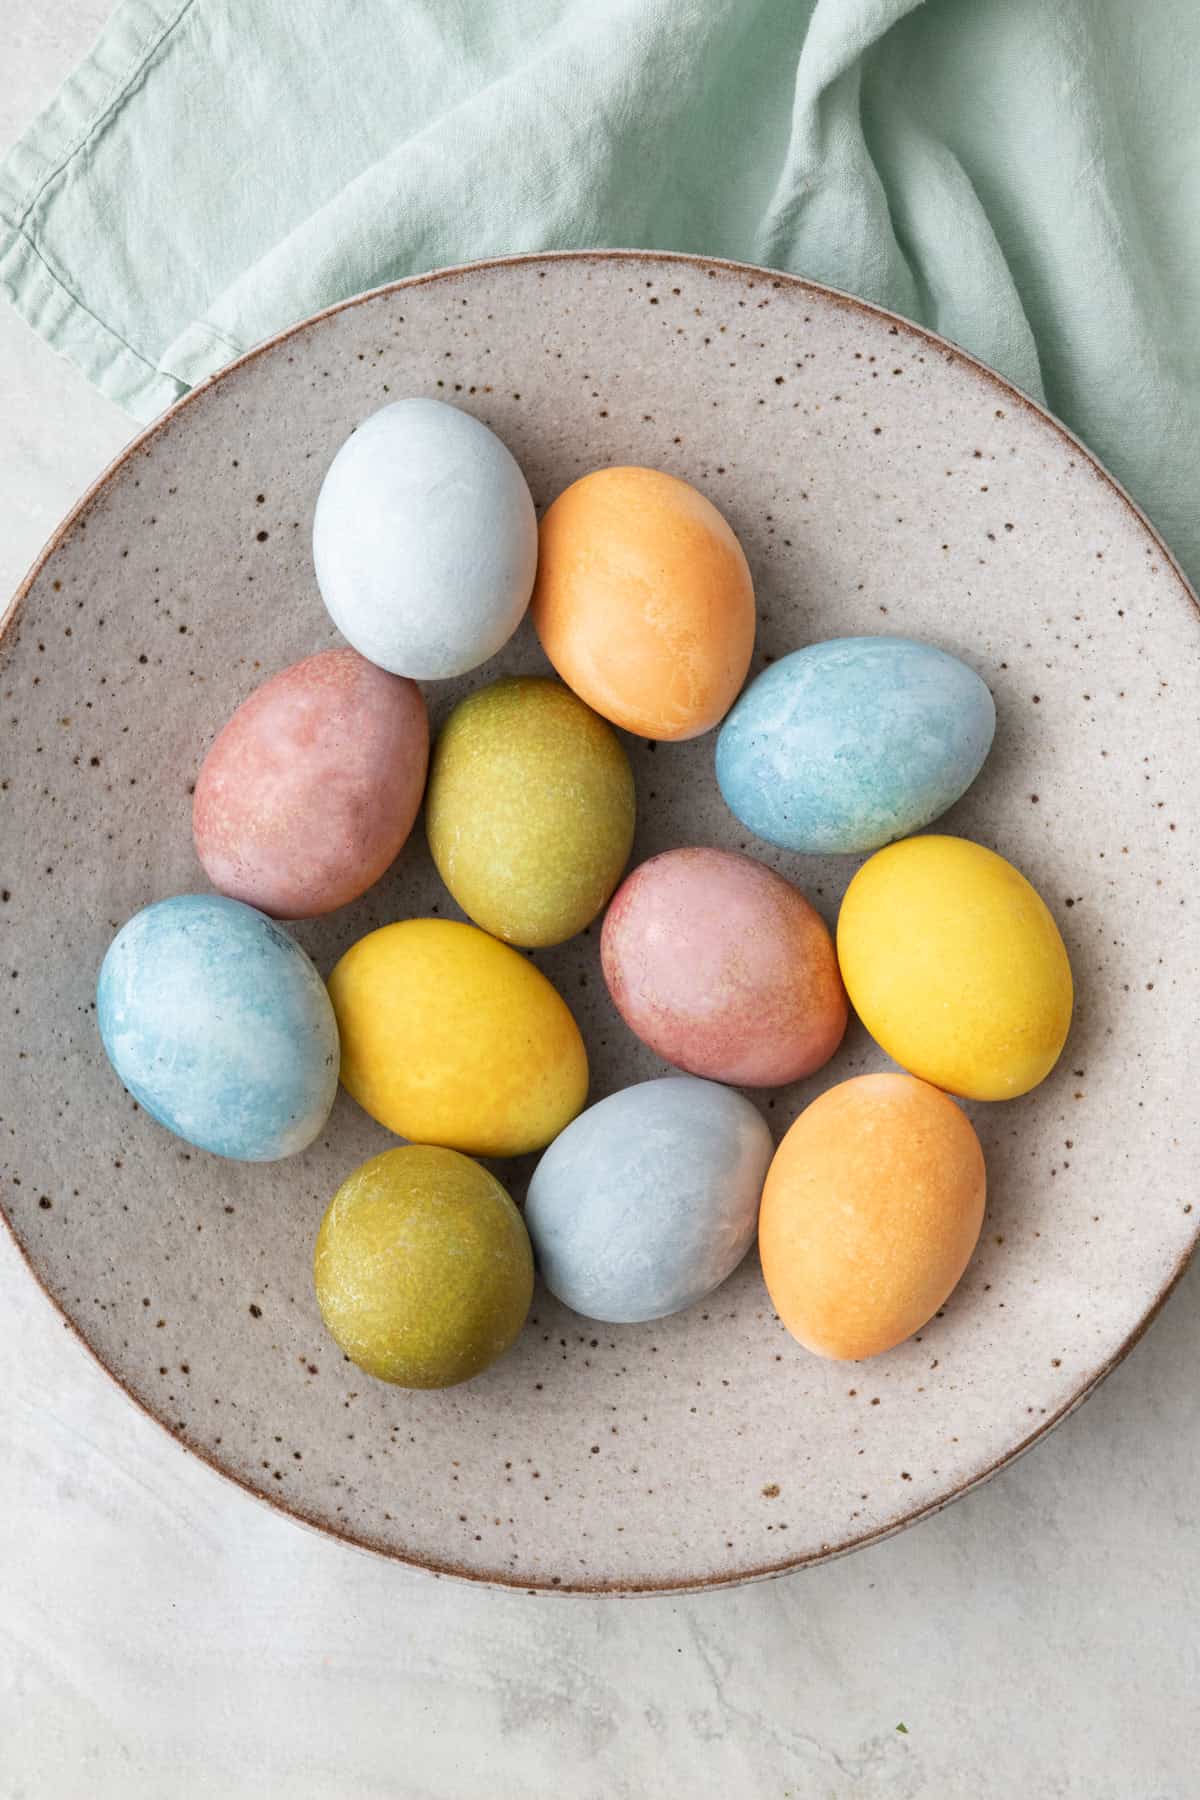
Table of Contents
- Why do we dye Easter eggs?
- WHY learn how to make natural dyes for Easter eggs
- Ingredients to make natural easter egg dyes
- HOW TO MAKE natural dye for easter eggs
- TIPS on coloring easter eggs naturally
- HOW TO STORE naturally dyed easter eggs
- FREQUENTLY ASKED QUESTIONS
- MORE kitchen tutorials:
- How to Dye Easter Eggs Recipe
Using homemade Easter egg dye may take a little extra time, but you’ll create beautifully unique and rustic hues to show off! Here’s a simple guide to dyeing Easter eggs with natural ingredients!
Why do we dye Easter eggs?
The tradition of dyeing Easter eggs is a popular custom in many cultures around the world, and it has been practiced for centuries. The exact origins of this tradition are not clear, but there are a few theories as to why we dye Easter eggs, including religious symbolism of transformation and renewal, celebrating the arrival of Spring, and as purely decorative pieces during the Easter season.
Regardless of the specific reason why we dye Easter eggs, it has become a cherished tradition for many people around the world. It is a fun activity that can be enjoyed by people of all ages, and it adds to the joy and excitement of the holiday.
WHY learn how to make natural dyes for Easter eggs
- Eco-friendly and safe dye! Dyeing eggs with natural ingredients is a more environmentally friendly option than using artificial dyes. It is also safer, especially if you have young children who may be handling the eggs.
- Fun and creative. Natural dyes allow you to experiment with different colors by combining ingredients with vinegar, water, and sometimes baking soda. You can mix and match to create a variety of hues and shades.
- Utilize what you already have. Have some vegetables and fruits lying around? Perfect! You’ll love how easy it is to create natural dyes with items in your produce bin.
- So fun for kids to learn about colors. Move over art class; we’re teaching our kids the basics with do-it-yourself dyes. Using natural ingredients to create dyes help kids learn about different fruits, vegetables, and spices and how they can be used to create colors naturally.
- Feel good about eating them. You can dye your Easter eggs and eat them too! For me, knowing they haven’t absorbed any unfavorable chemicals makes me feel good about feeding them to my family!
Ingredients to make natural easter egg dyes
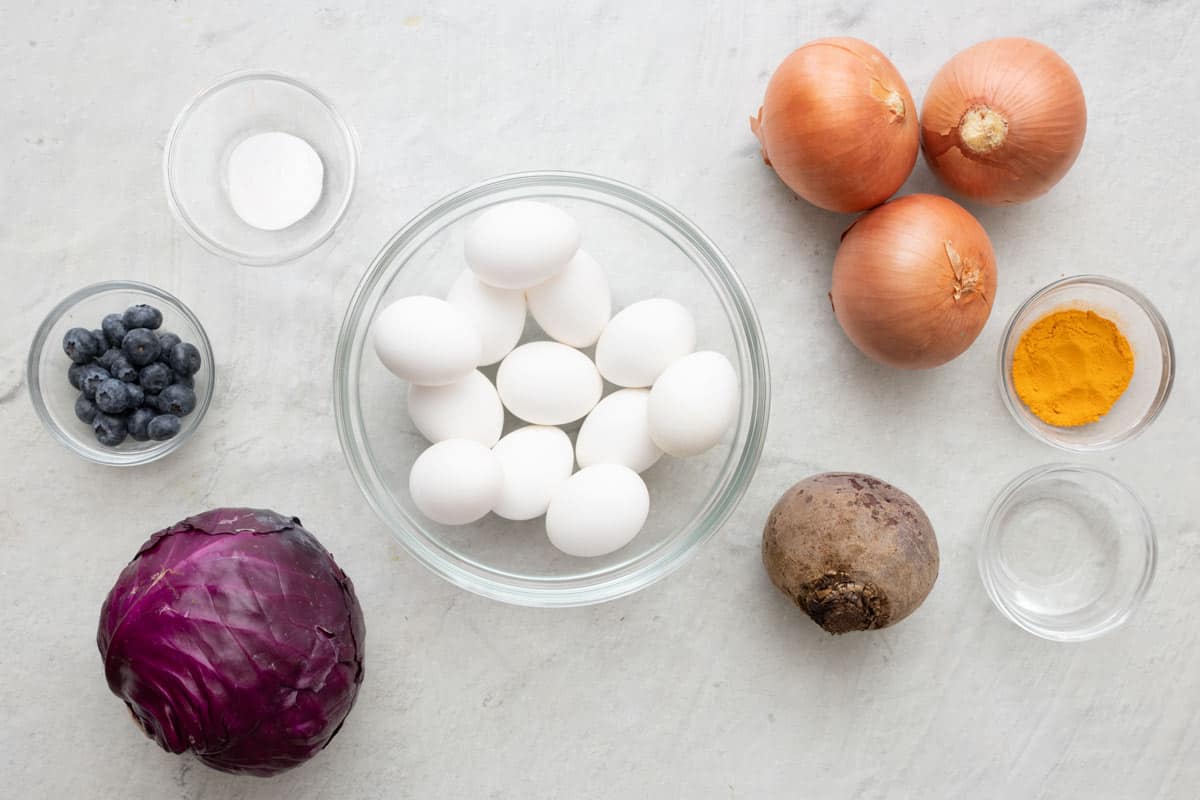
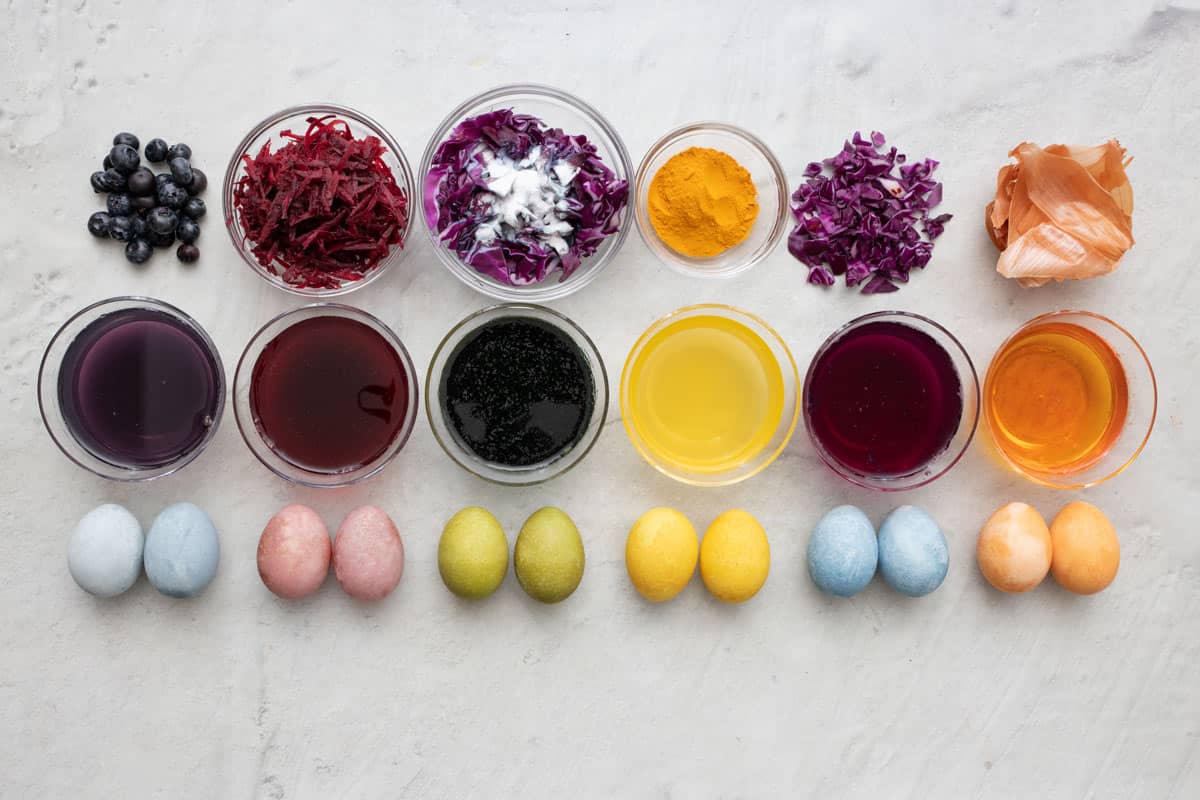
Each color requires hot water with white vinegar or baking soda added to help the colors stick to the shells. Below represents the additional natural ingredients to make dye for easter eggs and whether to add vinegar or baking soda.
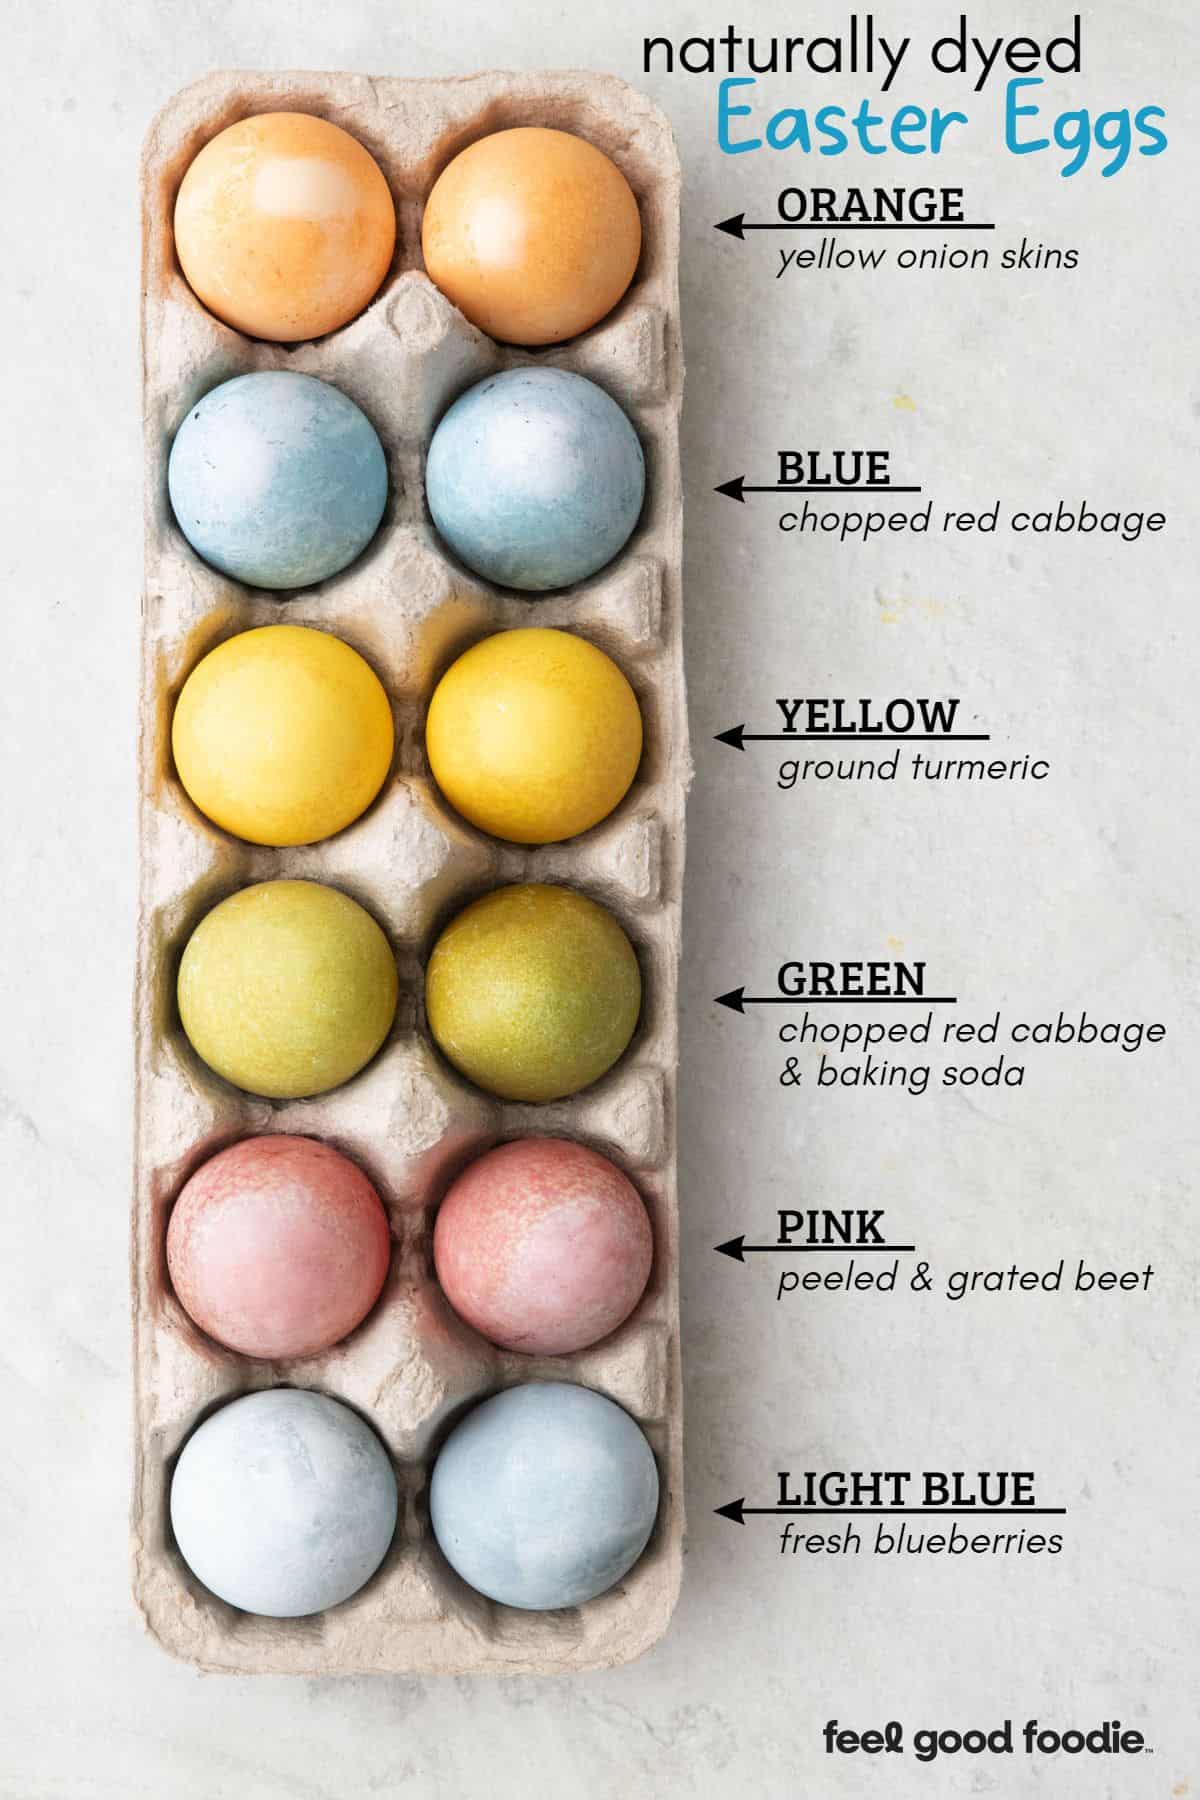
- Light blue: fresh blueberries + vinegar
- Pink: peeled and grated beet + vinegar
- Yellow: ground turmeric + vinegar
- Orange: yellow onion skins + vinegar
- Blue: chopped red cabbage + vinegar
- Green: chopped red cabbage + baking soda
HOW TO MAKE natural dye for easter eggs
It’s so easy to make natural food dyes in just a few steps. Grab a large-rimmed sheet pan to place the bowls of dyes on and clear a space in the fridge for them to sit in the dye. You’ll also need 2 small pots for boiling ingredients for certain colors. Read on to learn how to naturally dye eggs for Easter!
For Pink
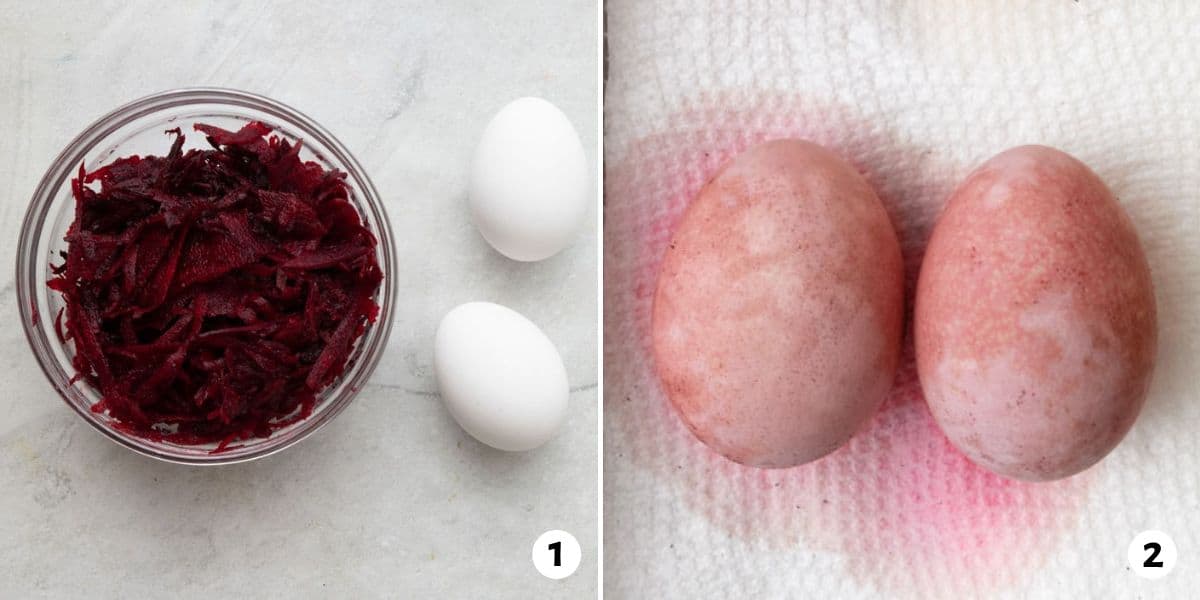
- Combine beets, vinegar, and hot water in a bowl. Add 2-3 eggs to the bowl, making sure they are fully submerged.
- Allow the eggs to soak for at least 4 hours or overnight in the fridge, and then remove them from the dye and let dry on a paper towel-lined sheet pan.
For orange
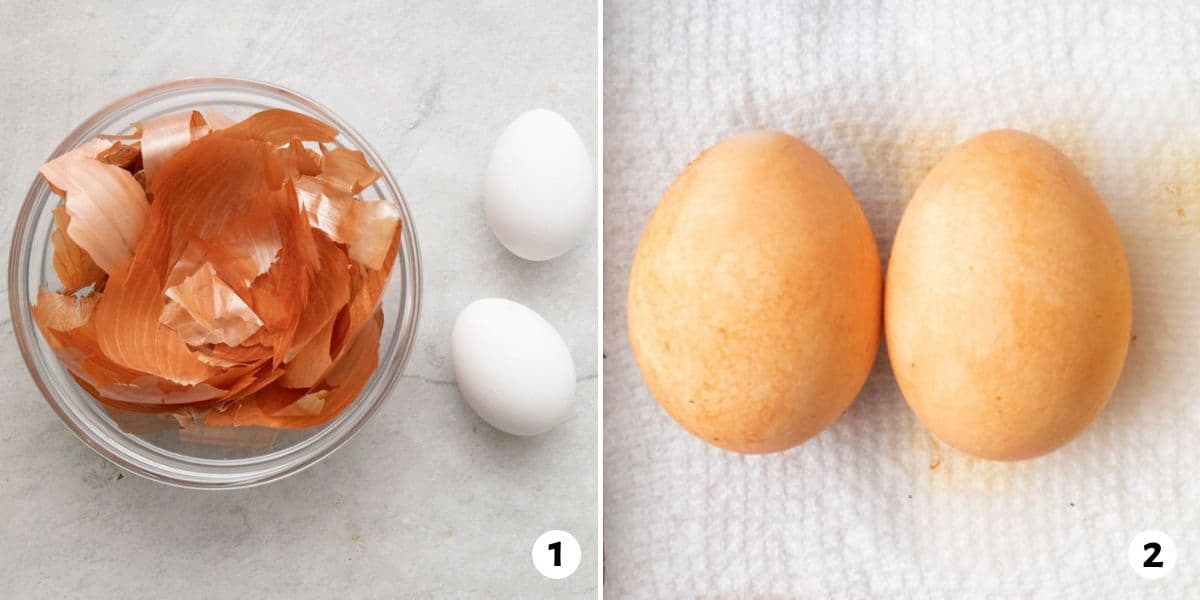
- Place yellow onion skins, vinegar, and hot water in a bowl and mix the ingredients to combine. Submerge the eggs in the dye liquid.
- Allow the eggs to soak in the fridge, and then remove them from the dye and let dry on a paper towel-lined sheet pan.
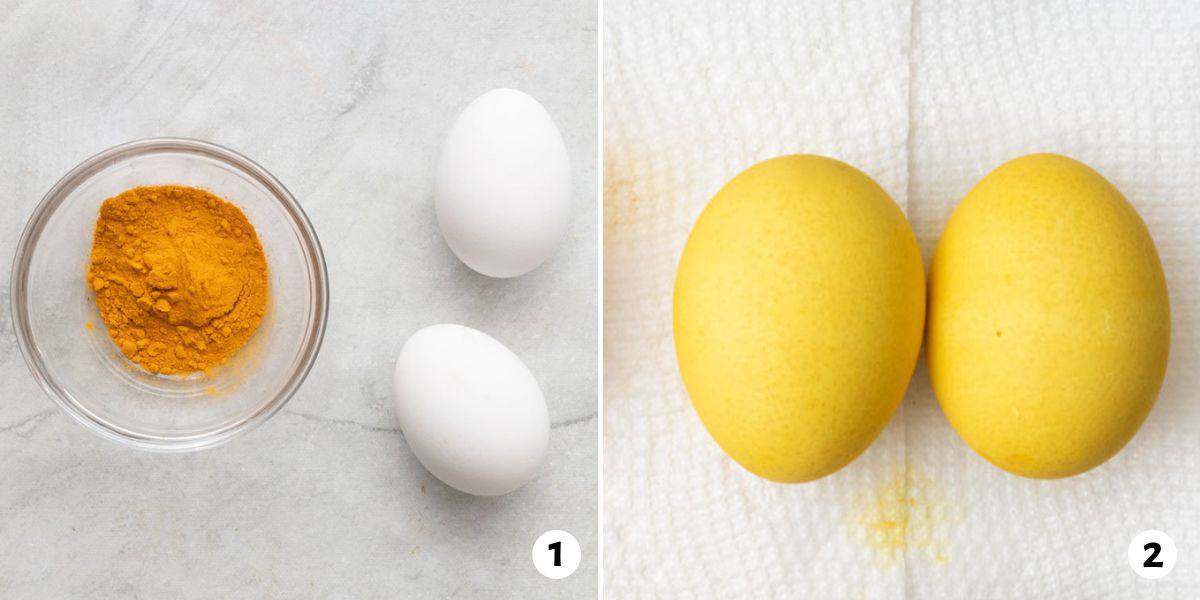
For yellow
- Place ground turmeric, vinegar, and hot water in a bowl and mix the ingredients to combine. Submerge the eggs in the dye liquid.
- Allow the eggs to soak in the fridge, and then remove them from the dye and let dry on a paper towel-lined sheet pan.
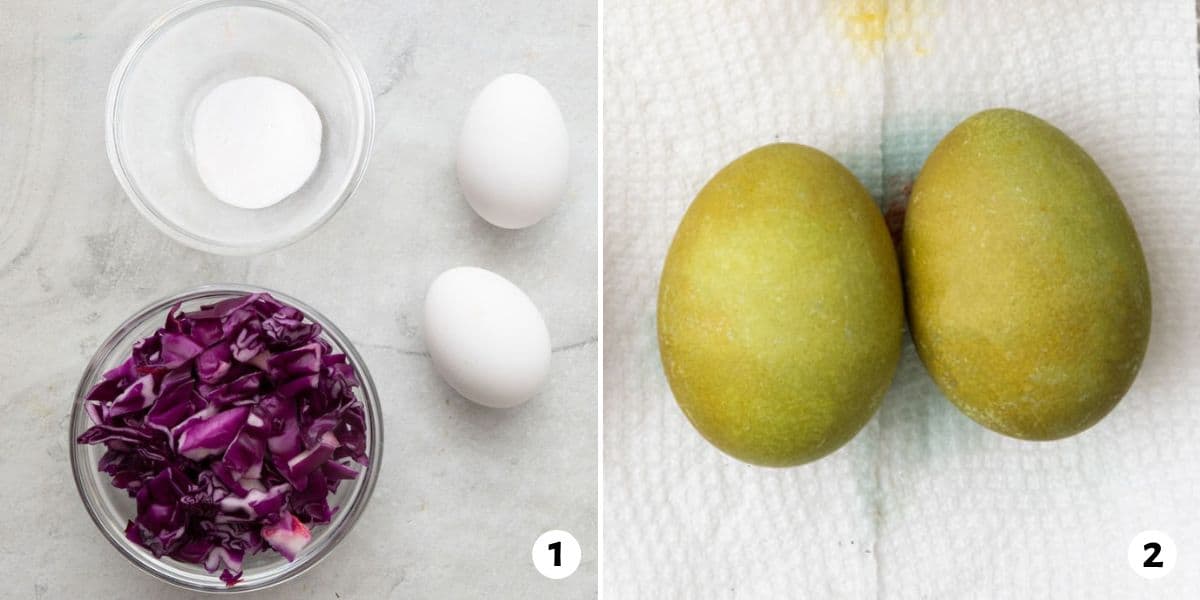
For green
- Add the chopped red cabbage and water to a pot. Bring to a boil and reduce to a simmer to extract the pigment. Transfer the water and cabbage to a bowl and add baking soda before fully submerging the eggs.
- Allow the eggs to soak in the fridge, and then remove them from the dye and let dry on a paper towel-lined sheet pan.
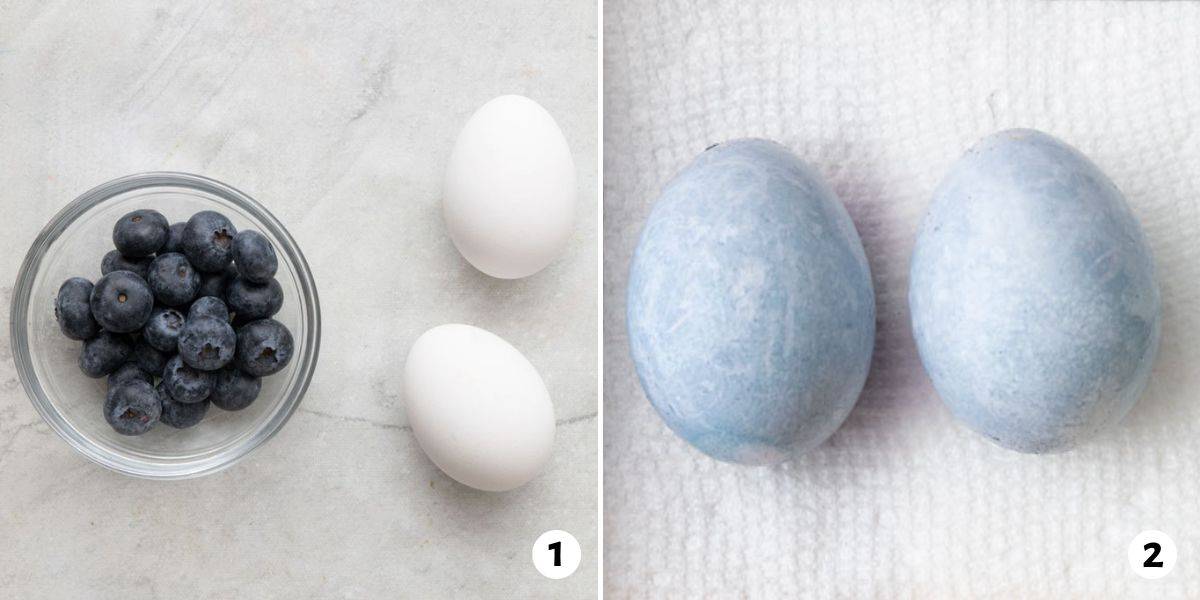
For light blue
- Add the fresh smashed blueberries and water to a pot. Bring to a boil and reduce to a simmer to extract the pigment. Transfer the blueberries and water to a bowl and add the baking soda and eggs until fully submerged.
- Allow the eggs to soak in the fridge, and then remove them from the dye and let dry on a paper towel-lined sheet pan.
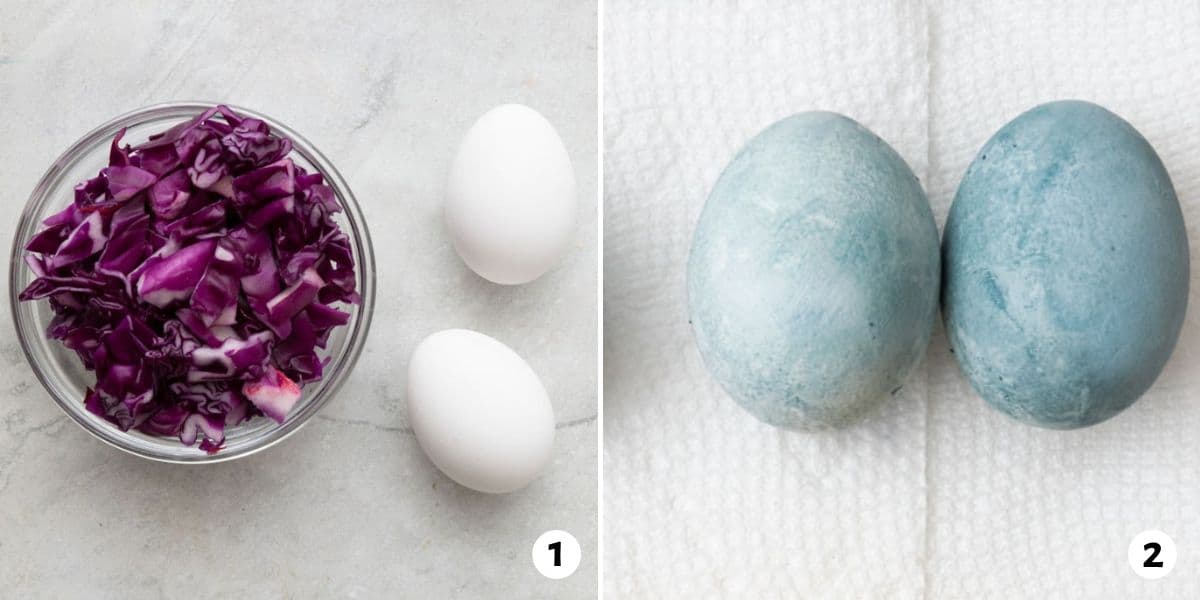
For blue
- Add the chopped red cabbage and water to a pot. Bring to a boil and reduce to a simmer to extract the pigment. Transfer the water and cabbage to a bowl and add vinegar and eggs until fully submerged.
- Allow the eggs to soak in the fridge, and then remove them from the dye and let dry on a paper towel-lined sheet pan.
And that’s it! With these simple steps, you can begin experimenting with different ingredients or stick to this tutorial and create a variety of dyes for Easter eggs with natural ingredients.
TIPS on coloring easter eggs naturally
- Let the eggs soak. Natural ingredients can take a lot longer to dye than store-bought dyes. The longer you soak them, the more vibrant color they will produce.
- Use vinegar or baking soda. This helps your dye solution color stick to the eggshells.
- Boil some ingredients if needed. A few of the natural dye ingredients may require a quick 10-minute boil to concentrate the dye solution before soaking the eggs, such as blueberries and red cabbage.
- Use tongs to remove the eggs from the dye. To prevent staining your hands, lift the eggs out of the bowl with something like tongs or a slotted spoon.
- Have fun and experiment! Try different ingredients and combinations to create varying color shades and hues.
HOW TO STORE naturally dyed easter eggs
Store easter eggs in the fridge with the shell on. It’s important to remember that the eggs should be refrigerated during the dyeing process. Otherwise, they will go bad quickly.
HOW LONG WILL easter eggs LAST IN THE FRIDGE?
With the shell on, the hard-boiled eggs will keep for up to 7 days in the refrigerator.
FREQUENTLY ASKED QUESTIONS
Use fruits, vegetables, spices, and other items to dye eggs naturally with vinegar and sometimes baking soda.
– Pink: grated beets
– Orange: yellow onion skins
– Yellow: turmeric
– Blue: blueberries (lighter) or red cabbage (deeper)
– Green: red cabbage + turmeric
The trick is to use boiling hot water, white vinegar, and whichever natural ingredient will create the color hue you’re looking for and then let it soak in this mixture for at least 4 hours or up to overnight for deeper colors.
It depends on the natural ingredient you are using to dye the eggs, but generally, it is recommended to use hot water to make the dye solution.
I hope this guide on how to make Easter egg dye naturally is something you can use year after year and celebrate a hands-on activity with the kids. Overall, learning to dye eggs with natural ingredients can be a fun and rewarding activity that is both safe and eco-friendly. It allows you to express your creativity and experiment with different colors, while also teaching you and your family about the natural world.
MORE kitchen tutorials:
- How to Make Ganache
- How to Fry an Egg
- How to Boil Eggs
- How to Make Lemon Pepper Seasoning
- How to Freeze Bananas
- How to Make Frosting
- How to Make Candied Walnuts
- How to Make Apple Butter
If you found this tutorial for How to Dye Easter Eggs helpful or if you try any recipe on Feel Good Foodie, then don’t forget to rate the recipe and leave a comment below! It helps others who are thinking of trying out this tutorial and we would love to hear about your experience. And if you snapped some shots, share it on Instagram so we can repost on Stories!

How to Dye Easter Eggs
Ingredients
- 1 dozen eggs hard-boiled
For Pink:
- 1 small beet peeled and grated
- 2 tablespoons white vinegar
For Orange:
- 3 yellow onions skins only
- 2 tablespoons white vinegar
For Yellow:
- 2 teaspoons turmeric
- 2 tablespoons white vinegar
For Light Blue:
- ¼ cup blueberries smashed
- 2 tablespoons white vinegar
For Green:
- 1 cup red cabbage chopped
- 1 tablespoon baking soda
For Blue:
- 1 cup red cabbage chopped
- 2 tablespoons white vinegar
Instructions
For pink, orange, yellow and light blue:
- Bring a large kettle of water to a boil. You may need to refill this and bring it to a boil again depending on the size of your kettle.
- Set out one high-rimmed, heatproof bowl for each color on a rimmed sheet pan. Place the ingredients for each color in separate bowls. Each color will be enough to color 2 to 3 eggs. Mix the ingredients in each bowl to combine the color agent with the vinegar.
- Transfer the cooked eggs to the bowls, adding as many eggs as you want of a specific color to the bowl.
- Cover the eggs with boiling water until they are fully submerged. Let sit for at least 4 hours, or up to overnight in the fridge for deeper hues. Remove eggs from the dye and let dry for a few minutes on a paper-towel lined sheet pan.
For blue and green:
- Add water to a pot with ingredient for each color. Set out a high-rimmed, heatproof bowl for each on a rimmed sheet pan. Bring to a boil and simmer for 10 minutes. Then transfer the water with the ingredient to a bowl before submerging the eggs.
- Remove eggs from the dye and let dry for a few minutes on a paper-towel lined sheet pan.
Equipment
Notes
Nutrition
Nutrition information provided is an estimate. It will vary based on cooking method and specific ingredients used.


