This post may contain affiliate links. Please read our disclosure policy.
I’ve been on a bit of a date kick lately (okay, always – I love dates!), and these date bars are the latest in my kitchen experiments. You know how sometimes you just want a snack that feels nostalgic, like something your mom or grandma would make when you were a kid? That’s exactly what these date bars are for me. They remind me of the treats I grew up with—simple, homemade, and full of rich, comforting flavors.
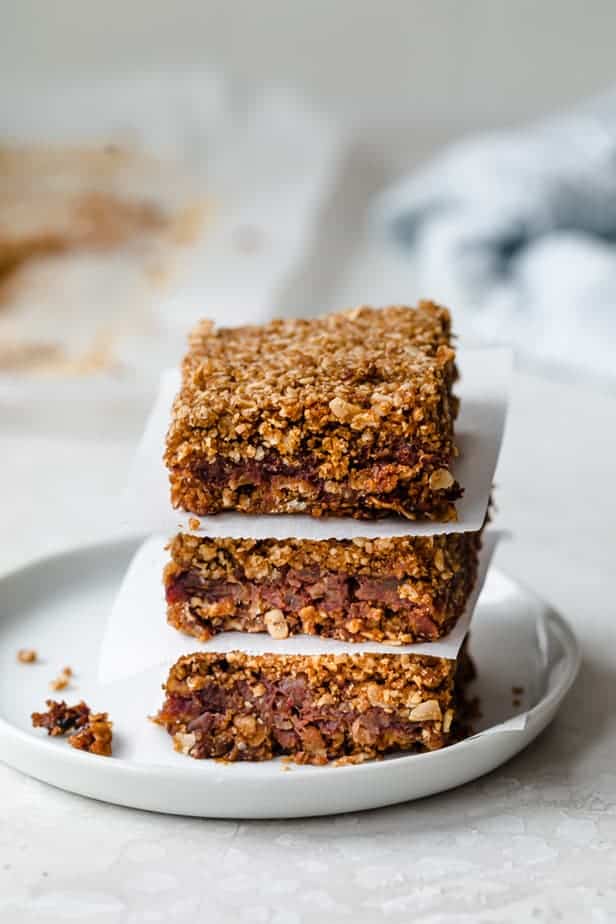
Table of contents
Why this date bar recipe is so good!
These date bars are not too sweet and hold together well, so you can toss them in a bag and take them with you without them falling apart. They are made with oat flour, so they are gluten-free. Plus, have a long shelf life, too, so you can make them ahead of time, and they are perfect for a grab-and-go breakfast. And hey, if you love the pecan-date combo, you should make my date cookies next!
How to make date bars
Make the date filling
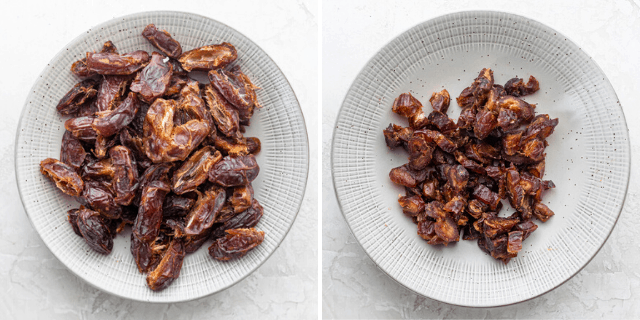
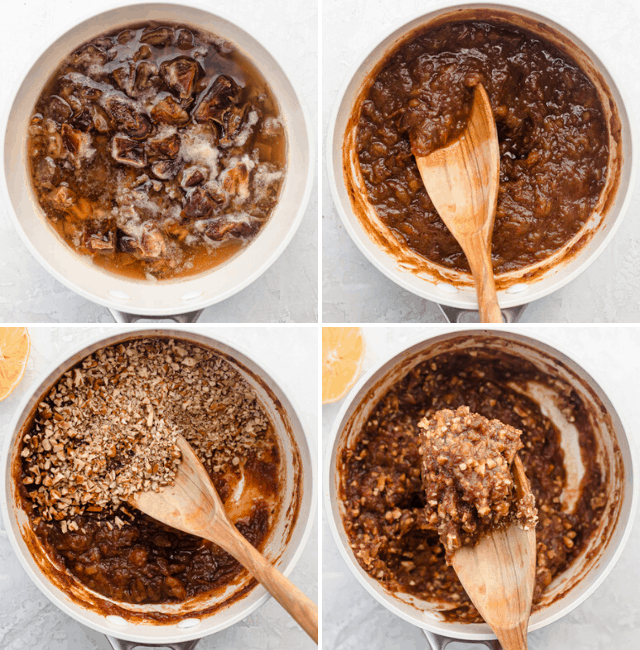
Chop the dates, then add them to boiling water and simmer on the stovetop for 10 minutes. Let it cool to room temperature and stir in the lemon juice and pecans. The mixture will become thick and paste-like, but spreadable. Feel free to leave out the nuts or switch with other nuts you prefer.
Make the crust
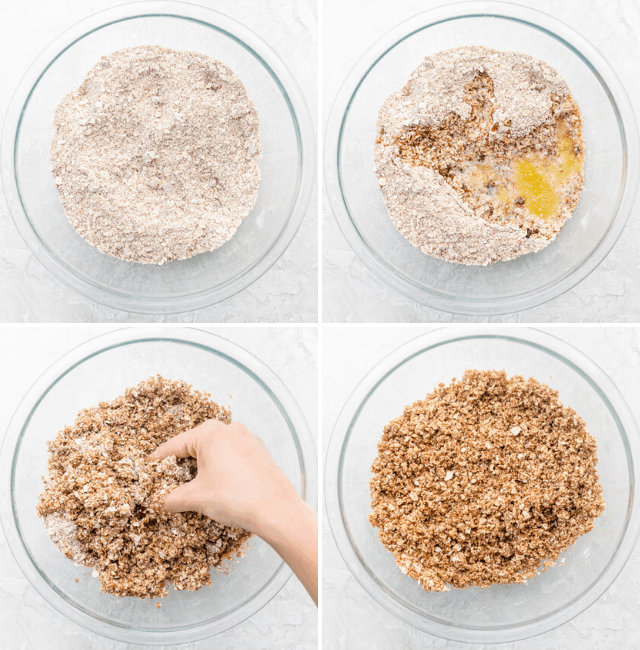
Now you’ll work with the dry ingredients to make the crust for the date bars. Just combine flour, oats, sugar, cinnamon, baking soda, and salt and whisk them together. Add some melted butter and use your fingertips to rub the butter with the dry ingredients. You want everything to become moist and clumps to form.
Assemble and bake
Next, use your hands to take half of that buttery crust mixture and press it into a square pan (either 8×8 or 9×9 will work). Make sure there are no gaps and that you spread the mixture evenly on the pan. Spread the cooled date mixture evenly on top of the base crust. It helps to use the back of a small spoon or a spatula to spread the mixture easily
Finally, sprinkle what’s left of the oat mixture over the date mixture. Press down so it all sticks together well. And then you’re ready to bake these date bars.
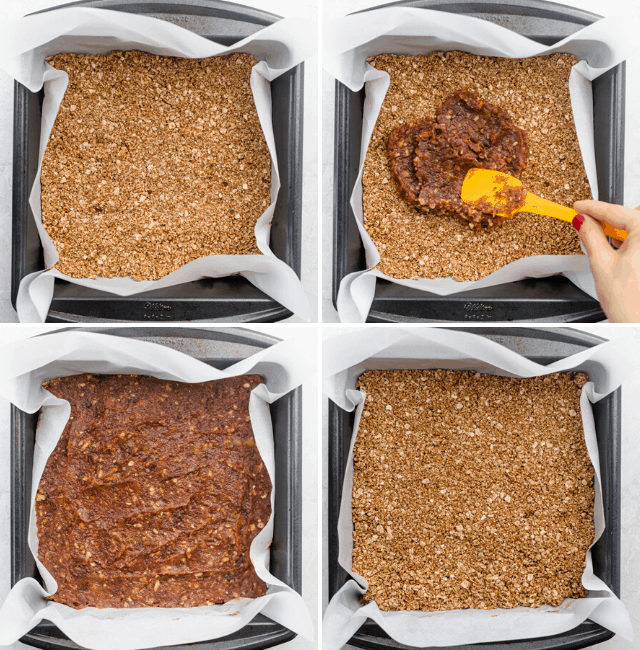
Although the color on top won’t change too much, the texture of the date bars will harden so you’ll know they’re done. The trick to getting these to remain in tact and not crumble is to let them rest. I usually leave them overnight, but I recommend at least an hour.
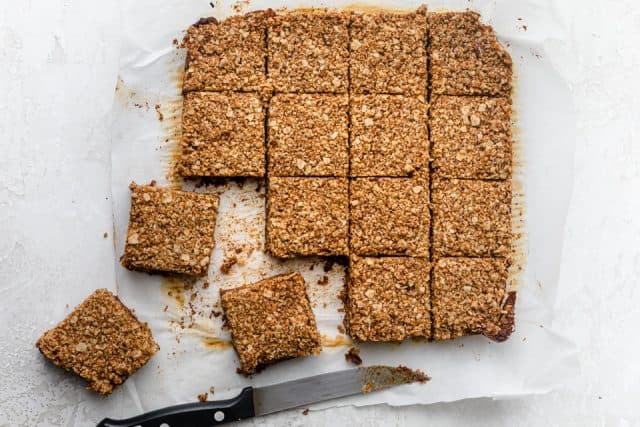
Tips for making the best date bars
- Make sure to use a larger piece of parchment paper than the baking pan. This will allow some of the paper to hang on the sides, making it easier to lift the date bars out of the pan and slice them neatly. And you won’t even get the pan dirty!
- Customize the date mixture with other add-ins you’d like. I love the combination of pecans with dates, but it works great with any other type of nuts, shredded coconuts, seeds or even chocolate chips. Just make sure to finely chop whatever you add in there.
- Be sure to press the crumb mixture into the bottom of the pan pretty firmly. This will help to make sure that the date bars stick together and don’t fall apart when you cut into them. When you add the second layer on top, you can use less pressure.
- Let them cool completely before cutting them. I would recommend at least one hour, but they set even more beautifully if you wait until the next day.
Frequently asked questions
You can use medjool or deglet noor dates for this recipe. I like to buy ones that are already pitted as this cuts down on the prep time quite considerably; it’s especially great when you have little kids who snack on dates! Dates add a natural sweetness to each bite and are a good source of fiber, antioxidants, and other nutrients.
Once the bars have cooled and you cut them, store them in a fridge in an airtight container for up to 7 days. You don’t need to add any parchment paper in between as they won’t stick together. The bars also freeze really well, for up to 3 months, and you can thaw them at room temperature before serving.
The only non-vegan ingredient in these date bars is the butter. I preferred it to using coconut oil for the best crumb texture and taste. However, you can easily make these vegan by trying it with coconut oil, although I think vegan butter would work better.
More bars recipes:
- Chocolate Peanut Butter Bars (No Bake)
- Breakfast Oatmeal Bars
- Healthy Rice Krispie Treats
- Vegan Lemon Bars
- No Bake Samoa Bars
- Easy Pumpkin Bars
- Vegan Protein Bars
- Chocolate Peanut Butter Granola Bars

This date bar recipe is a great one to have in your baking arsenal! I love that they have a long shelf life and don’t require any special equipment to make. They are gluten-free and packed full of healthy ingredients, so they are great to have on hand when you get a sugar craving.
If you’ve tried this feel good Date Bars recipe or any other recipe on FeelGoodFoodie, then don’t forget to rate the recipe and leave me a comment below! I would love to hear about your experience making it. And if you snapped some shots of it, share it with me on Instagram so I can repost on my stories!

Date Bars
Video
Ingredients
For the Filling
- 1 ½ cups water
- 1 ½ cups chopped pitted dates
- 1 teaspoon lemon juice
- ½ cup chopped pecans finely chopped
For the Base
- 1 ½ cups oat flour
- 1 cup rolled oats
- ⅔ cup dark brown sugar packed
- ½ teaspoon cinnamon
- ½ teaspoon baking soda
- ½ teaspoon salt
- ½ cup butter melted
Instructions
- Preheat oven to 350°F. Line an 8×8-inch baking pan with parchment paper hanging wider than the pan so it hangs from the sides. Grease the parchment paper with nonstick cooking spray.
- Bring 1 ½ cups water to boil in medium saucepan. Add dates; simmer until very soft and thick, stirring occasionally, about 10 minutes. Cool to room temperature. Stir in lemon juice and pecans.
- Combine flour, oats, sugar, cinnamon, baking soda, and salt in large bowl; stir to blend. Add butter. Using fingertips, rub in until moist clumps form. Press half of oat mixture evenly and firmly over bottom of prepared pan. Spread date mixture evenly on top of the base crust. Sprinkle with remaining oat mixture; press gently to adhere.
- Bake until the top it set and the bars are golden brown at edges, about 40 minutes. Cool completely in pan on rack (about one hour). Cut into 16 bars and serve.
Notes
- To make them vegan, you can use melted coconut oil or vegan butter (which is what I would recommend)
- To make them refined sugar free, substitute the 2/3 cup brown sugar for ¼ cup maple syrup.
- Instead of oat flour, you can use almond flour or even regular all-purpose flour.
- Instead of pecans, you can use any other finely chopped nuts or other add-ins of your choice.
Nutrition
Nutrition information provided is an estimate. It will vary based on cooking method and specific ingredients used.


These bars have become a staple in my house. They are so delicious! I make them once a week, but I do a little different version of yours. I used oat flour first but yesterday I made them with semolina instead. I use very little coconut sugar (dates are sweet enough) and instead of butter I put coconut oil. Sometimes before I layer the top crust I sprinkle some unsweetened coconut flakes. Such a healthy guilt free snack or breakfast!
Yay, I’m so happy you enjoy them!! And I love the tweaks you’ve made. Thank you so much for sharing, Joyce!
Do you think dried figs would work instead of dates?
I think dried figs would not hold the bars together as well as sticky dates.
I can’t tell you how long I’ve been looking for a good date bet recipe. These are delicious! These will be making a regular appearance in our house.
Yay! So happy to hear you liked them Jim!
I’m thinking of adding some mini, dark chocolate chips. How do you recommend I incorporate them? And do I need to adjust the recipe ingredients? Thank you! I can’t wait to try these and your other recipes. I just signed up on your site.
Best,
Heidi
Love that idea! You could add it to the filling mixture, and you shouldn’t need to adjust the other recipe ingredients.